This piece was just featured on Design Milk’s website and Instagram! I walked them through each step in the process of making Torus, this donut-shaped paper sculpture. Watch the preview video below, then read Design Milk’s article for more detail.


Redwood City Utility Box Mural
I painted my first mural! Thanks to Redwood City Parks, Recreation, and Community Service, I recently got the opportunity to beautify a set of utility boxes at the corner of Middlefield Rd. and Willow St. in Redwood City, California.
One of my goals for this year was to paint a mural. I'd been wanting to explore my favorite patterns but on a larger scale. I saw that Redwood City Parks, Recreation, and Community Service had put out a call for artists, and I applied. I put together a proposal based on the maze motif I'd developed in a previous steel project. My design was selected, and I dove in!
This project came with a number of challenges, all of which made me a better artist. First, I learned how to work with paint! I hadn't painted anything in years, and this project was a crash course in primer, mixing colors, and using painter's tape. Secondly, working away from a studio -- and away from tools, a sink, and supplies -- meant that I had to plan ahead, and keep a mobile studio in the back of my car. Lastly, it was 90 degrees. Some days, my shirt was drenched with sweat by 8:30am! I have a newfound respect for anyone whose job requires them to be out in the elements all day long.
The best part of this project was getting to know the community during those six days I spent on that street corner. I had lovely chats with curious folks stopped at the red light. I fielded questions and waves from little kids. I chatted with Mexican workers in broken Spanglish. I got a joyful pep talk from a homeless woman pushing a shopping cart. On an especially hot day, an employee from the grocery store nearby came by and brought me a coconut water. An hour later, a woman in a passing car literally offered me the hat off her head. I got more smiles and thumbs-ups from strangers than I could begin to count.
I feel like I've gotten to know this corner of Redwood City so well. It's been an honor and a privilege. This sounds cheesy, but it was humbling to see how a little splash of art on a street corner could bring smiles to so many people's faces. This project was my first foray into public art, and I think I might be hooked.
If you're in the area, go check out the boxes in person! Here's a map of where they're located. And if you'd like to check out all of the other public art in Redwood City, check out the Explore RWC app for Apple and Android phones. (Side note: How cool is it that Redwood City not only invests in public art, but even built an app to help people discover it!)


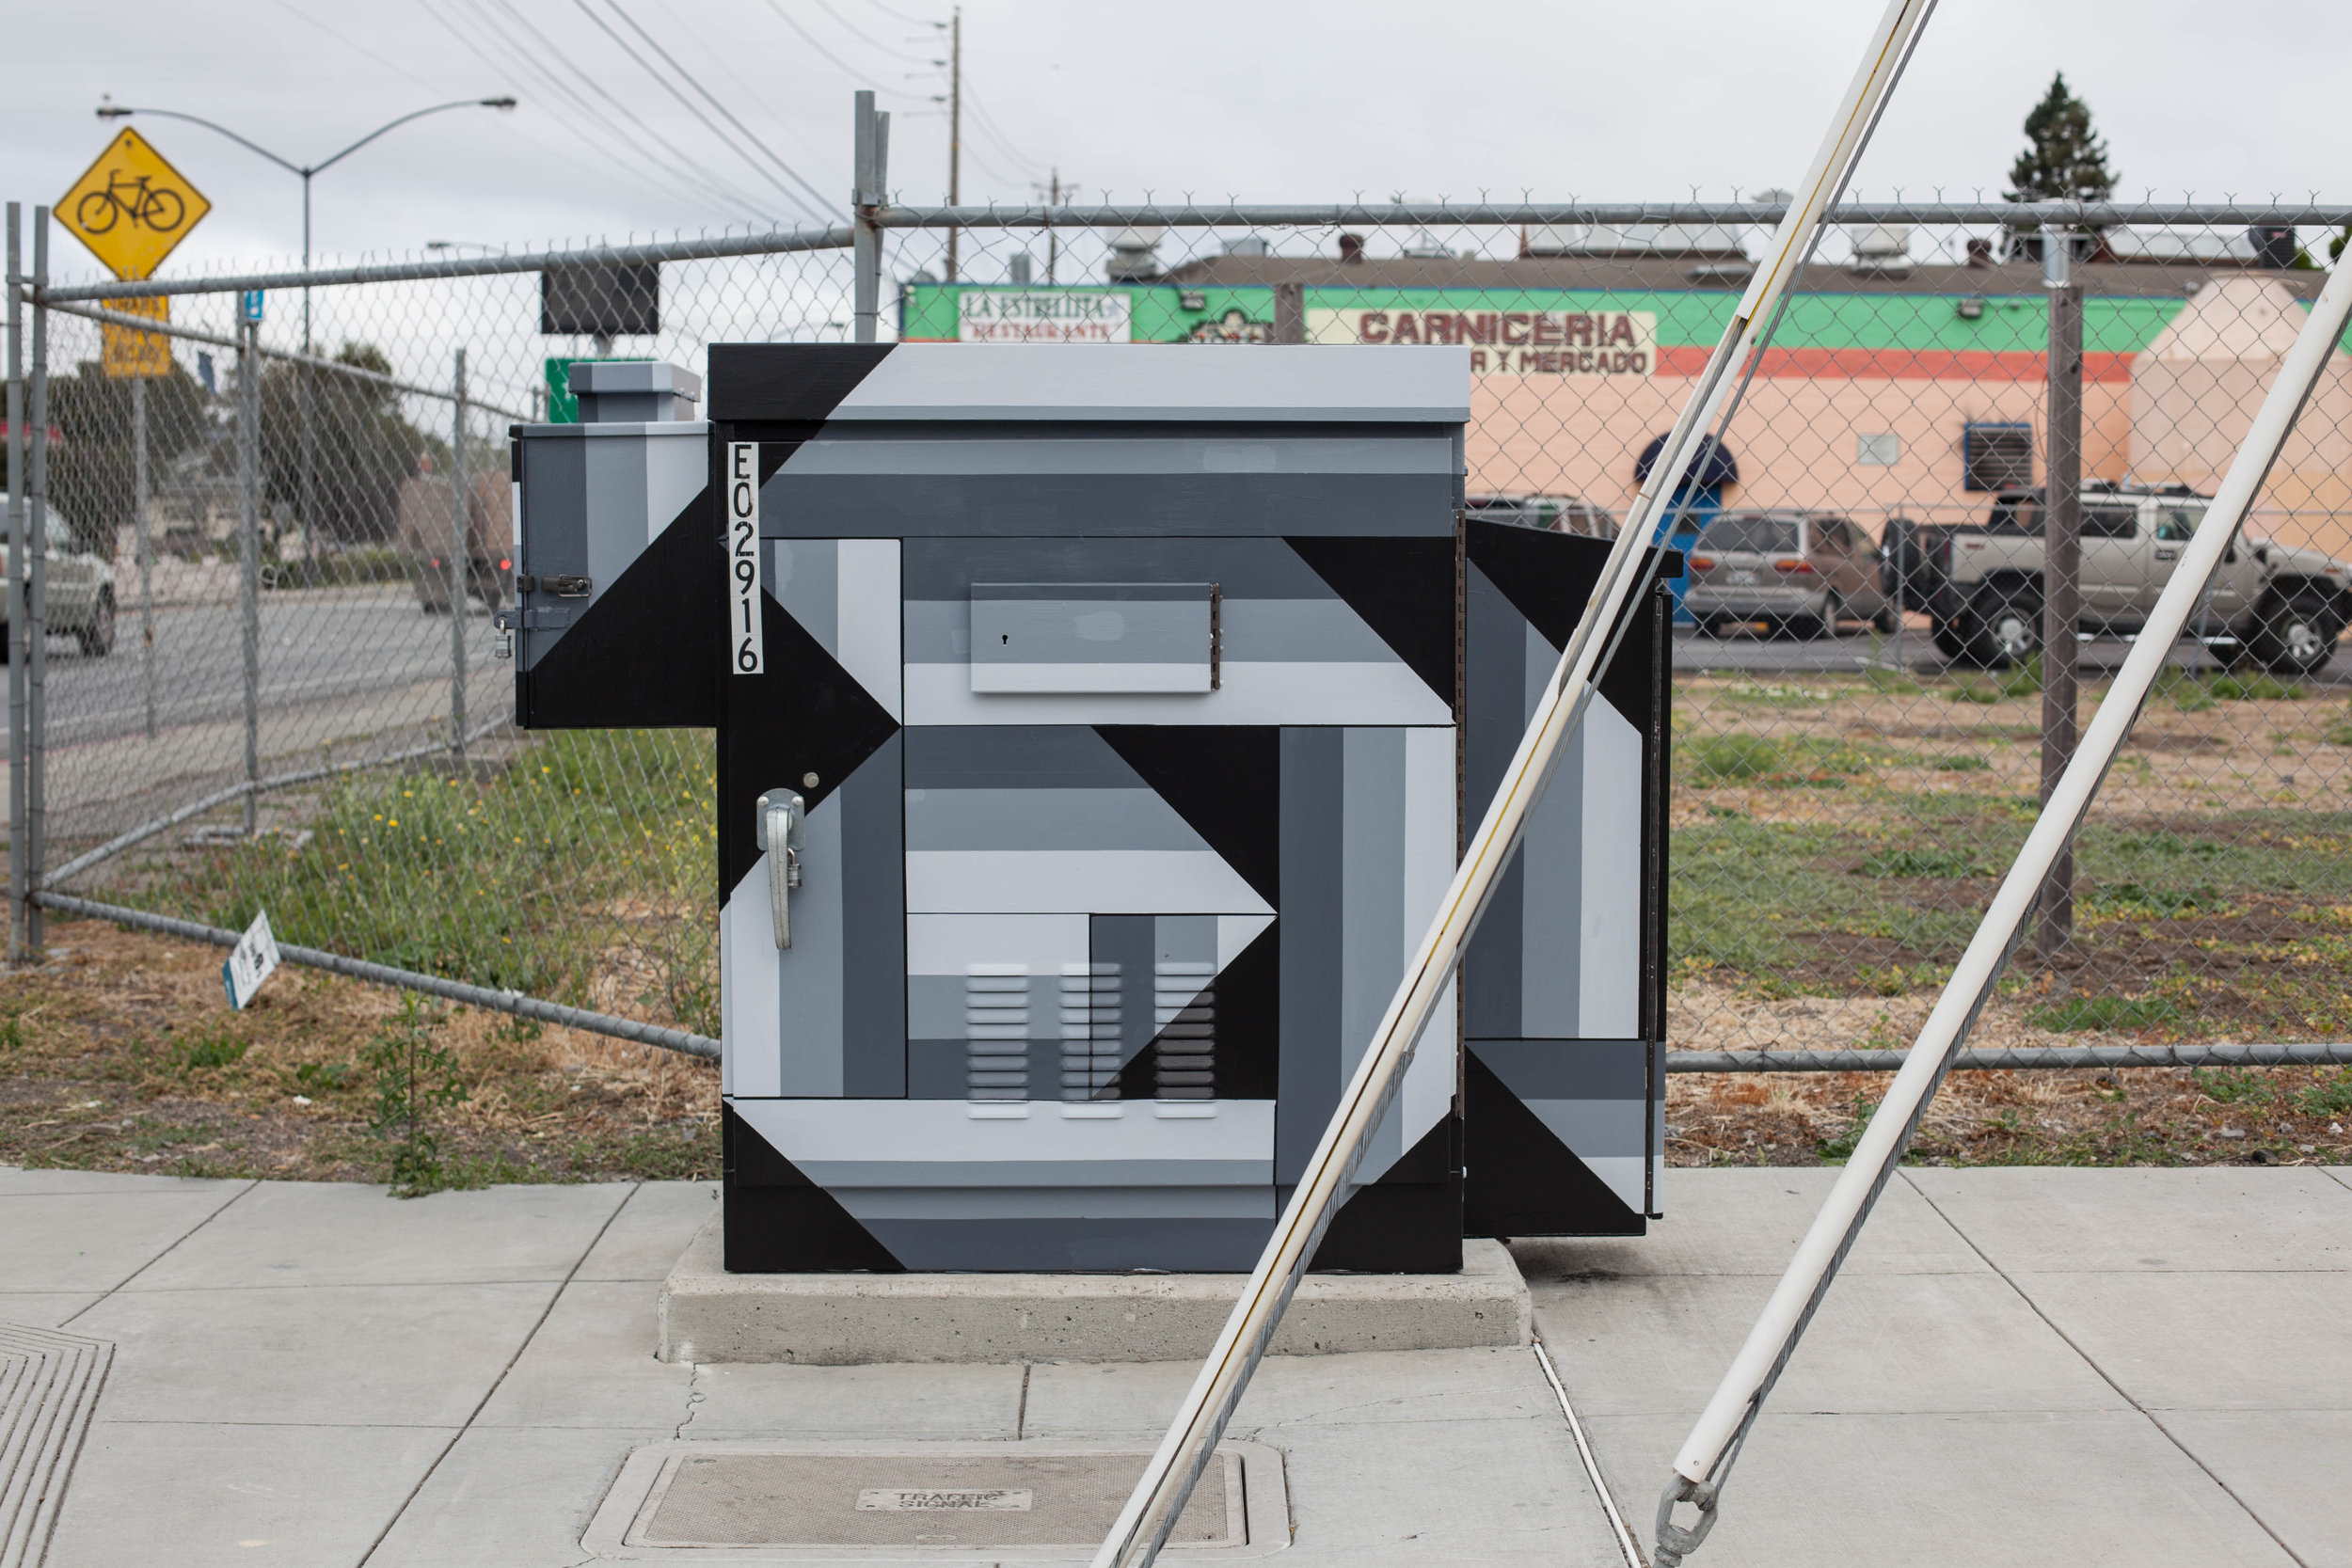

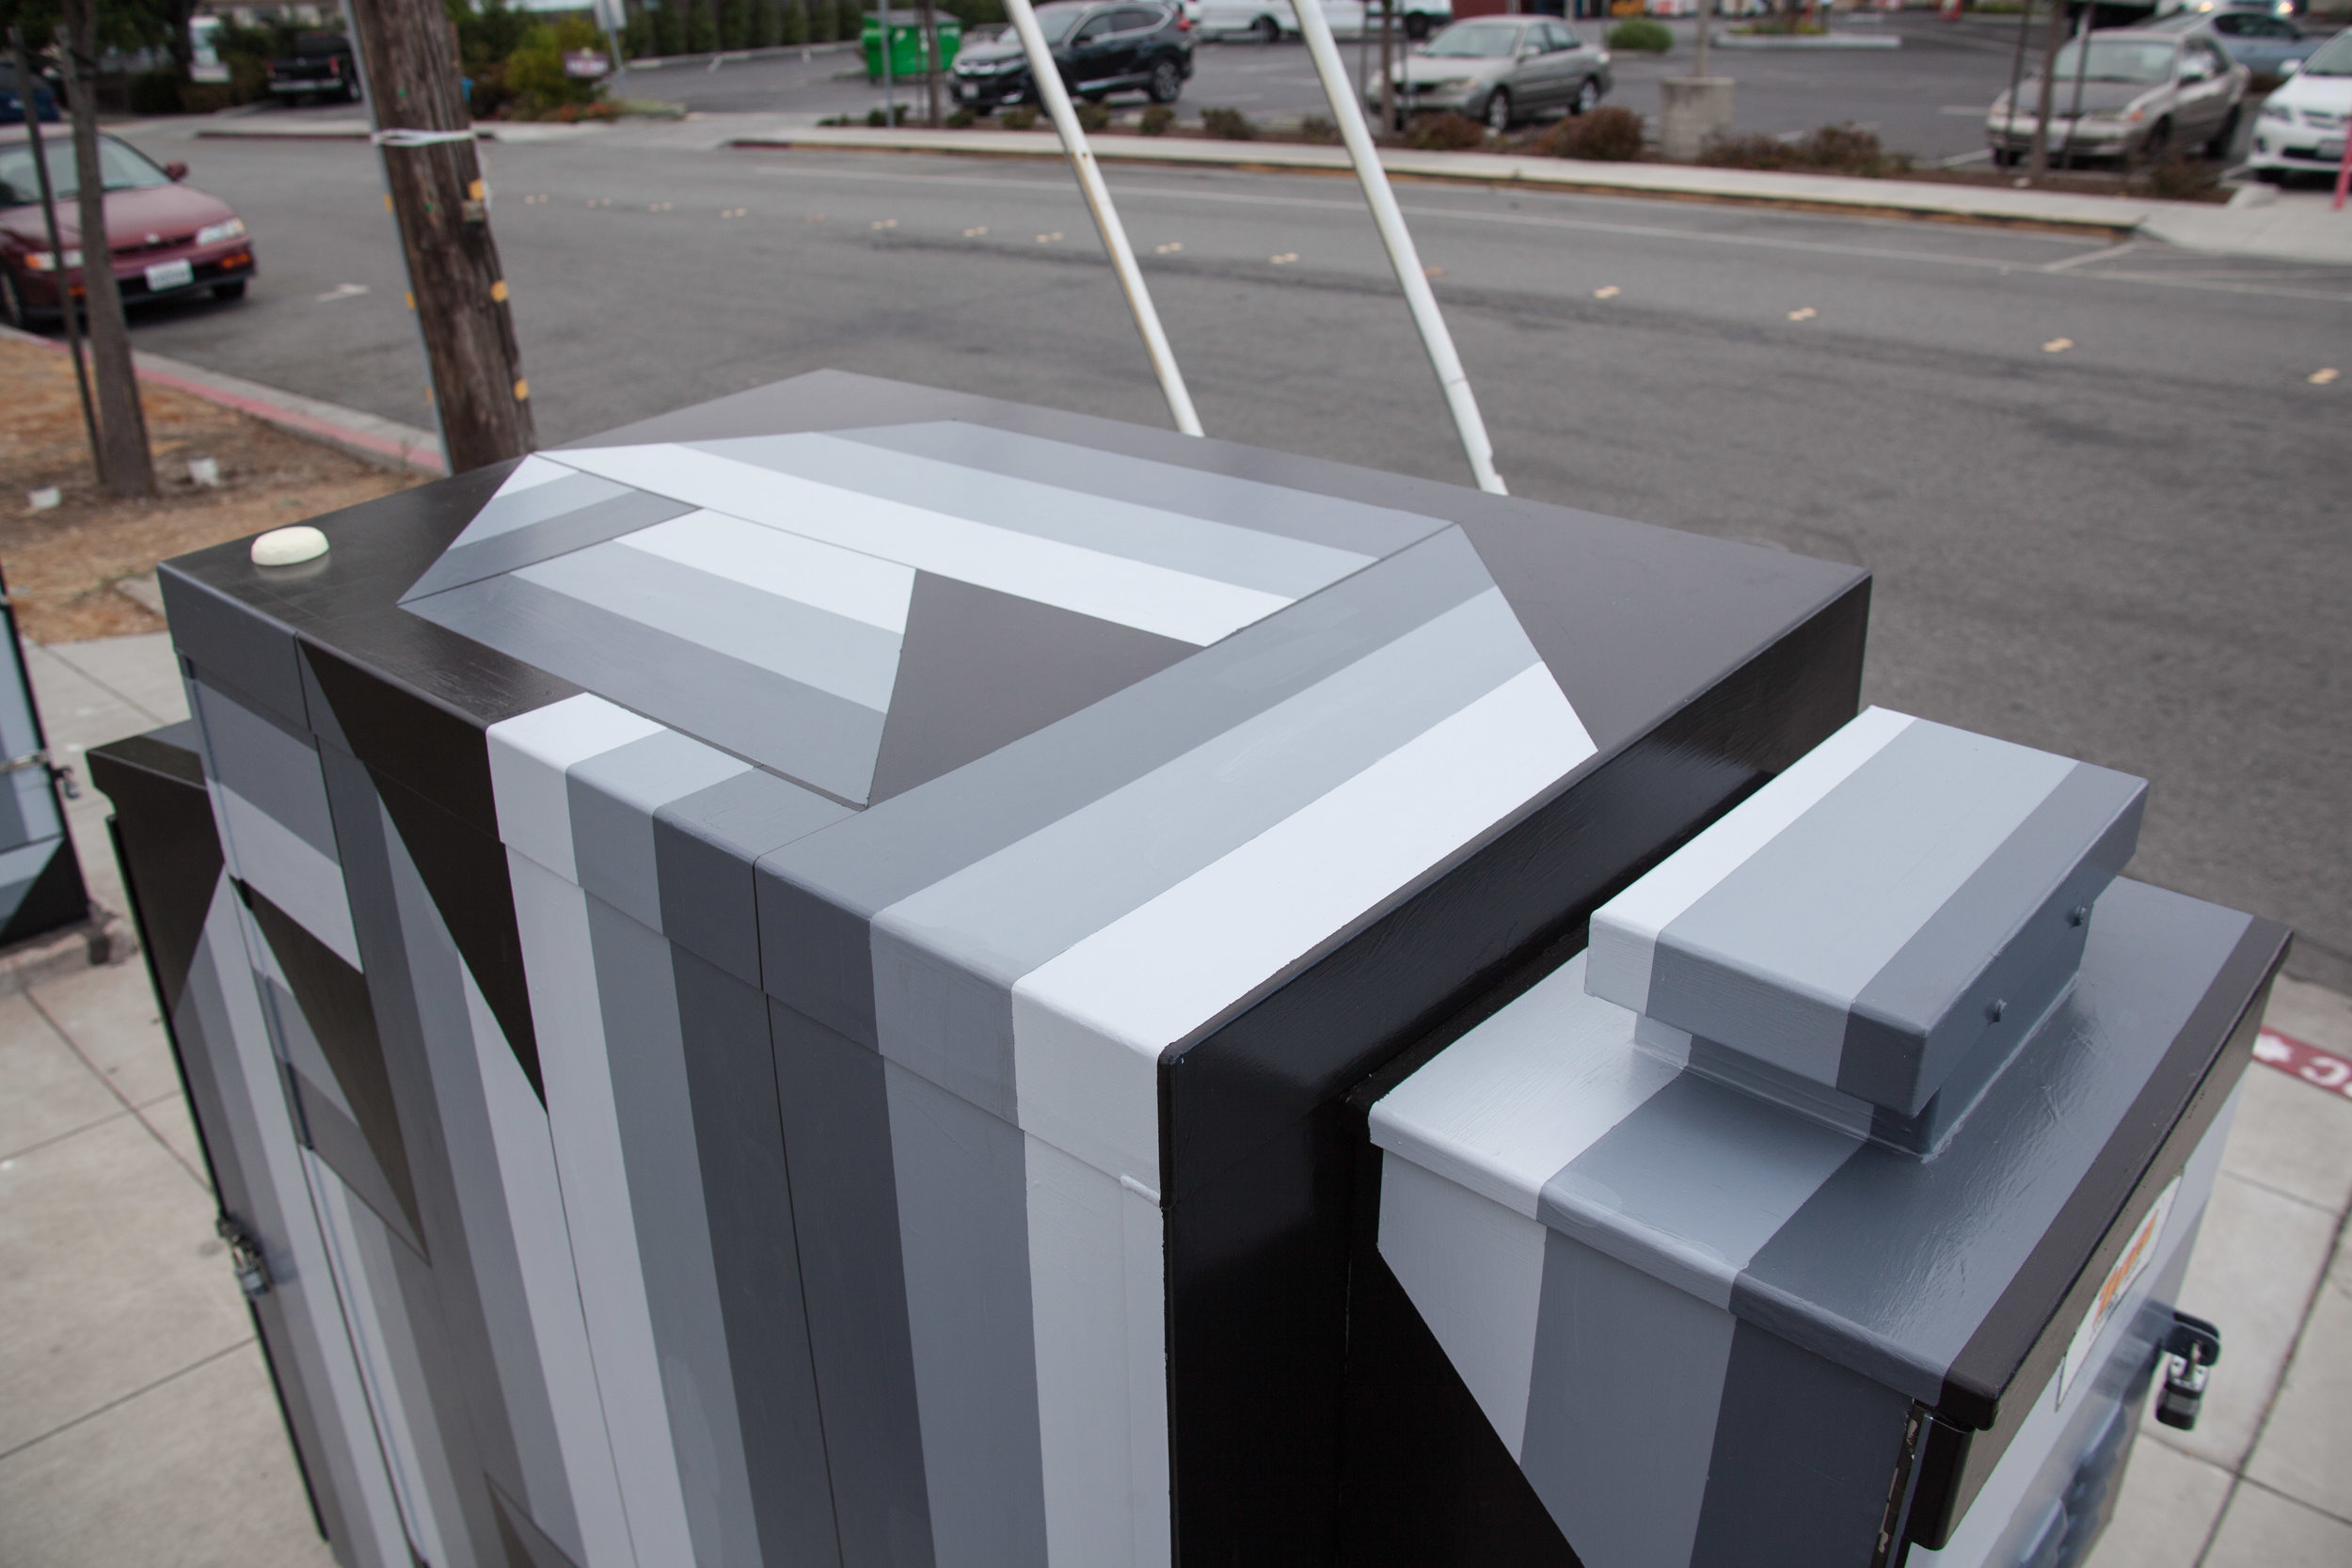


Here are some process photos:


Thank you to the following folks:
- Redwood City Parks, Recreation, and Community Service: Thank you for selecting my design and giving me this amazing opportunity! Sheila Cepero and Beth Mostovoy, thank you for supporting local artists and giving us a platform to share our work.
- Alexis Bullock: Thanks to my awesome summer intern for being down to help me paint this mural in the blazing heat!
- Sigona's Farmers Market: Thanks for being my "home base" throughout this project! Your food, parking lot, and bathroom were lifesavers, and I really enjoyed getting to meet Carmelo and a handful of your employees.
- Johnathon DeSoto: Your tape tutorials were a game-changer, Johnathon! Thanks for sharing your secrets with me.
- Jeff Goodwin, Emi Grannis, and Nicole Sweeney: Thanks, Maker Fam, for your moral support throughout this project (and always).
- Phil Reyneri: I will never forget that you drove all the way down to Redwood City just to help me with that damned shade structure -- I owe you one!
Curves Ahead
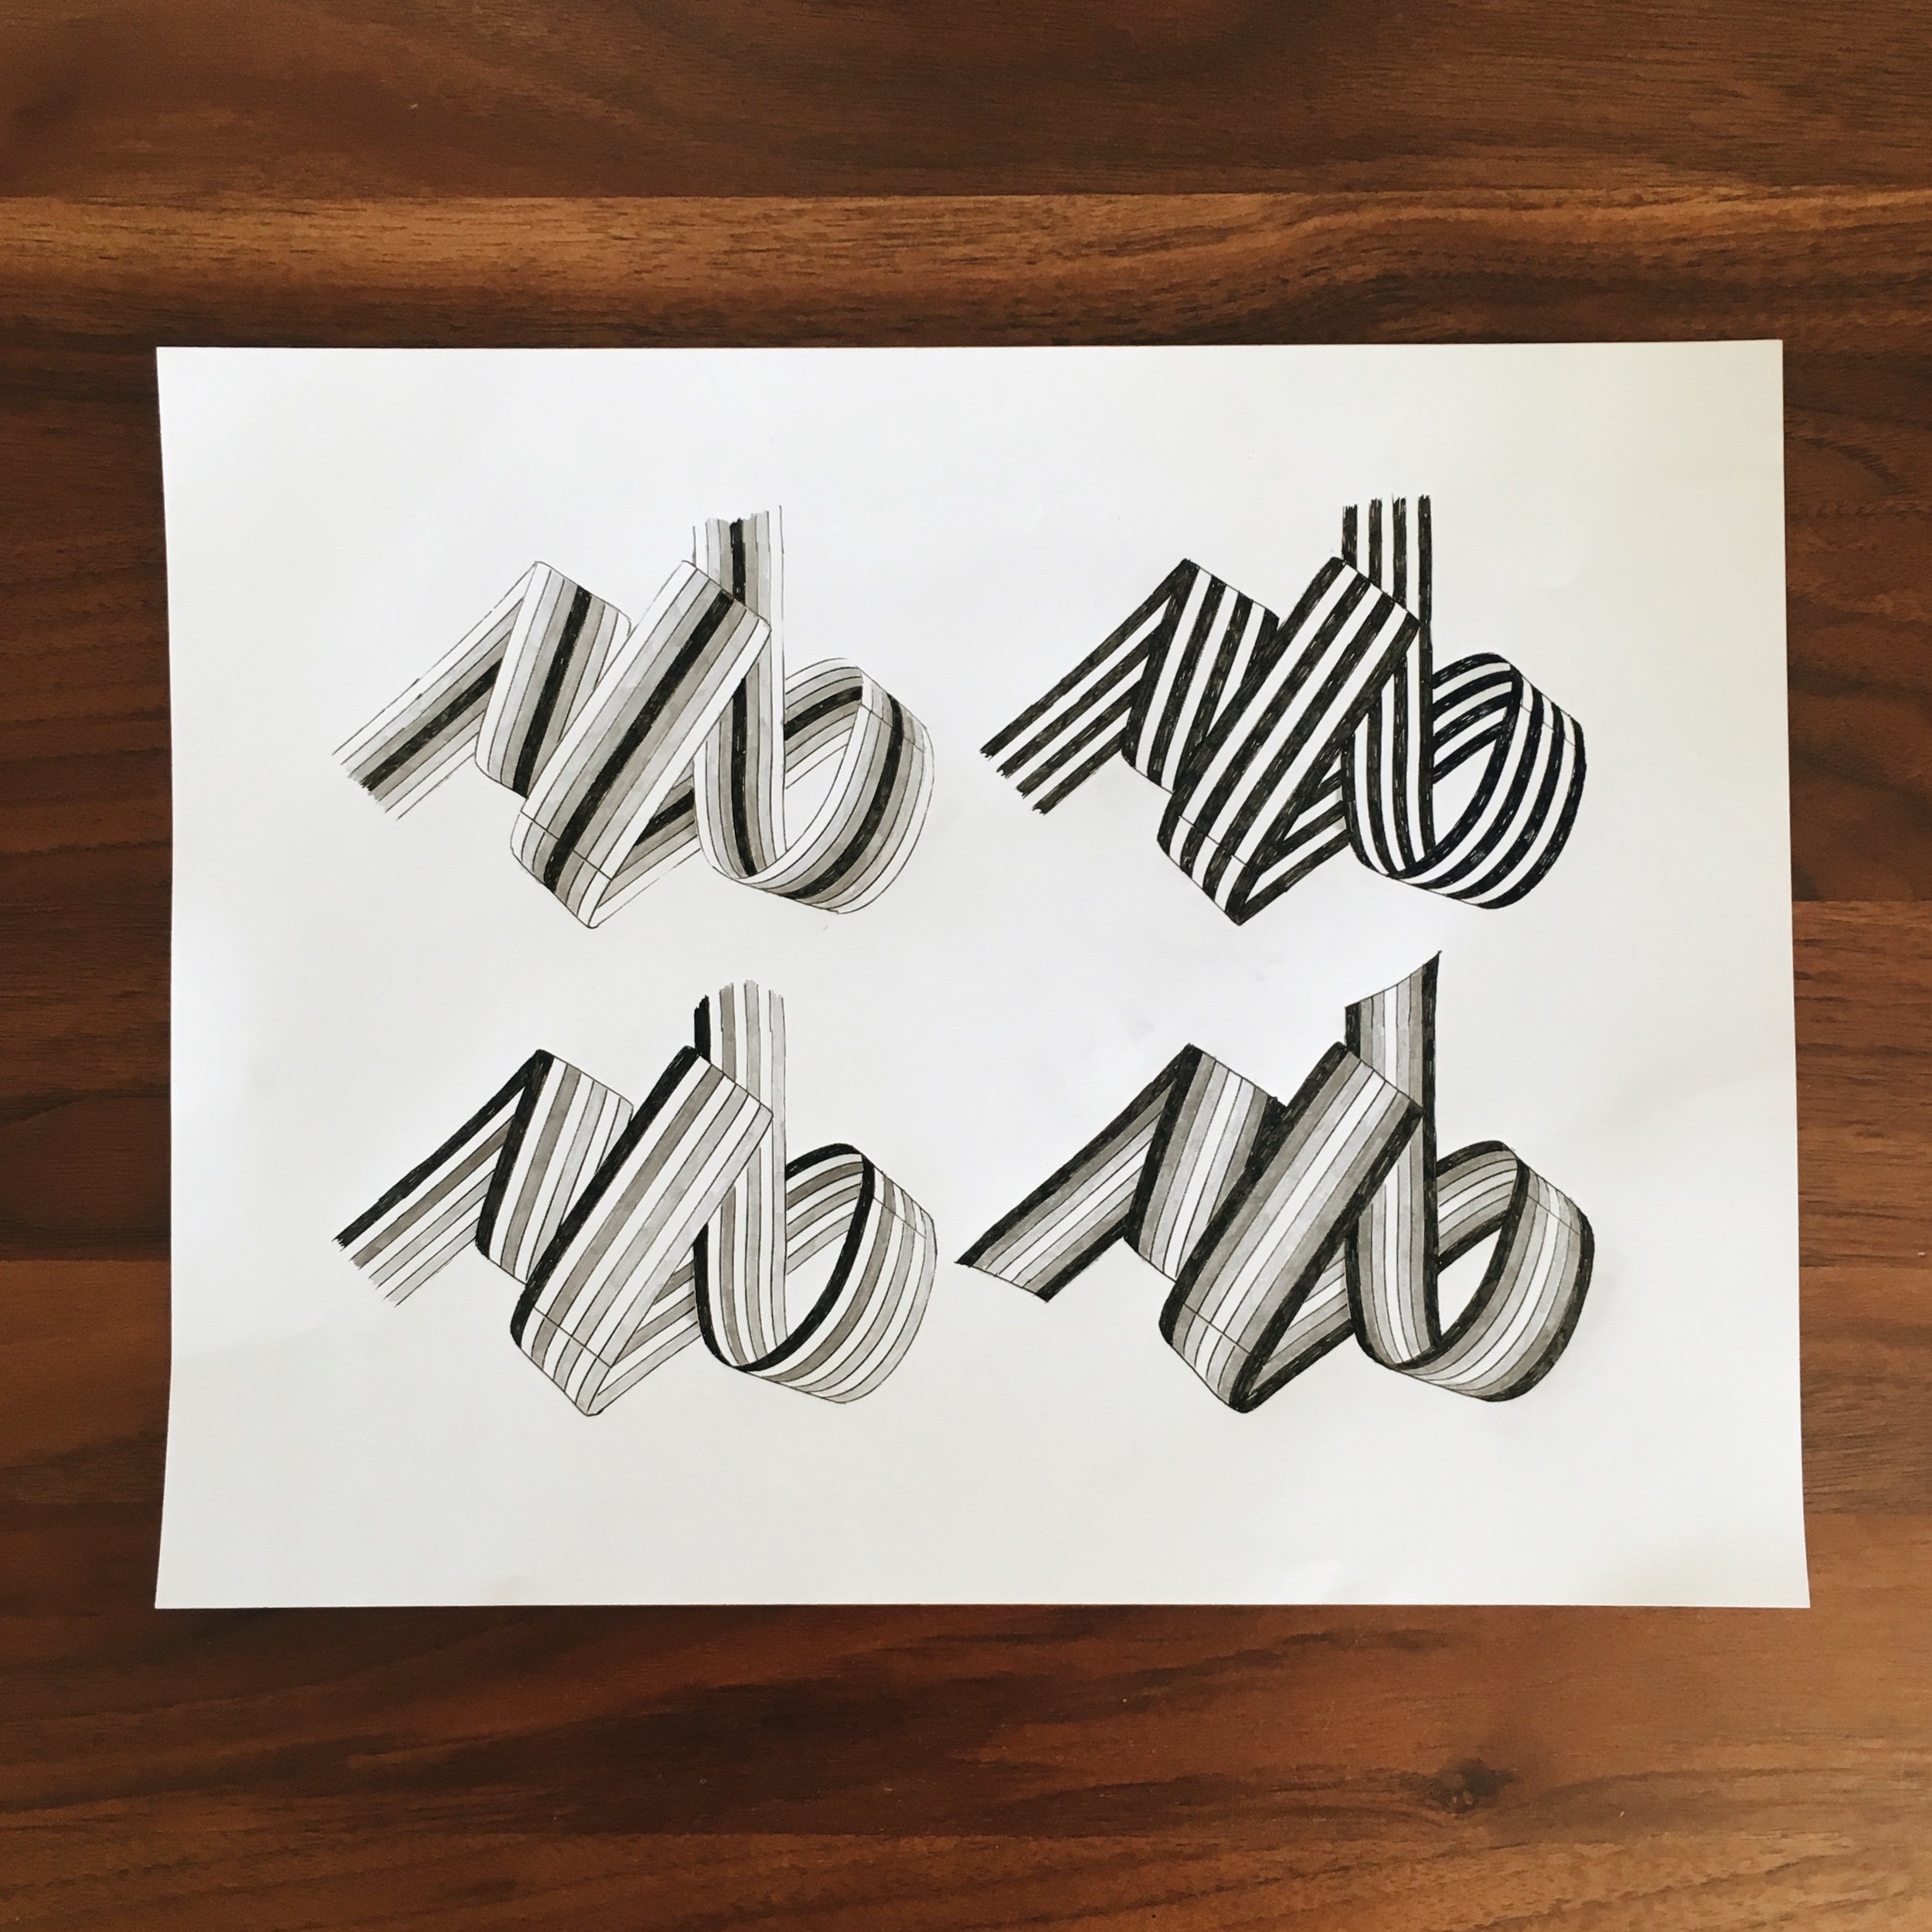
I recently wrapped up this curvy, custom ribbon, and shipped it off to its new home in New Haven, Connecticut. My clients, Marc and Horacio, were wonderful to work with. Marc was one of my professors at Yale (he runs the Yale Center for Emotional Intelligence) and his husband Horacio is a talented documentary filmmaker. Their request for flowing, organic shapes pushed me out of my comfort zone a bit -- I can't remember the last time I made anything with curves! I love how this piece turned out, and I'm looking forward to exploring curves in future pieces.


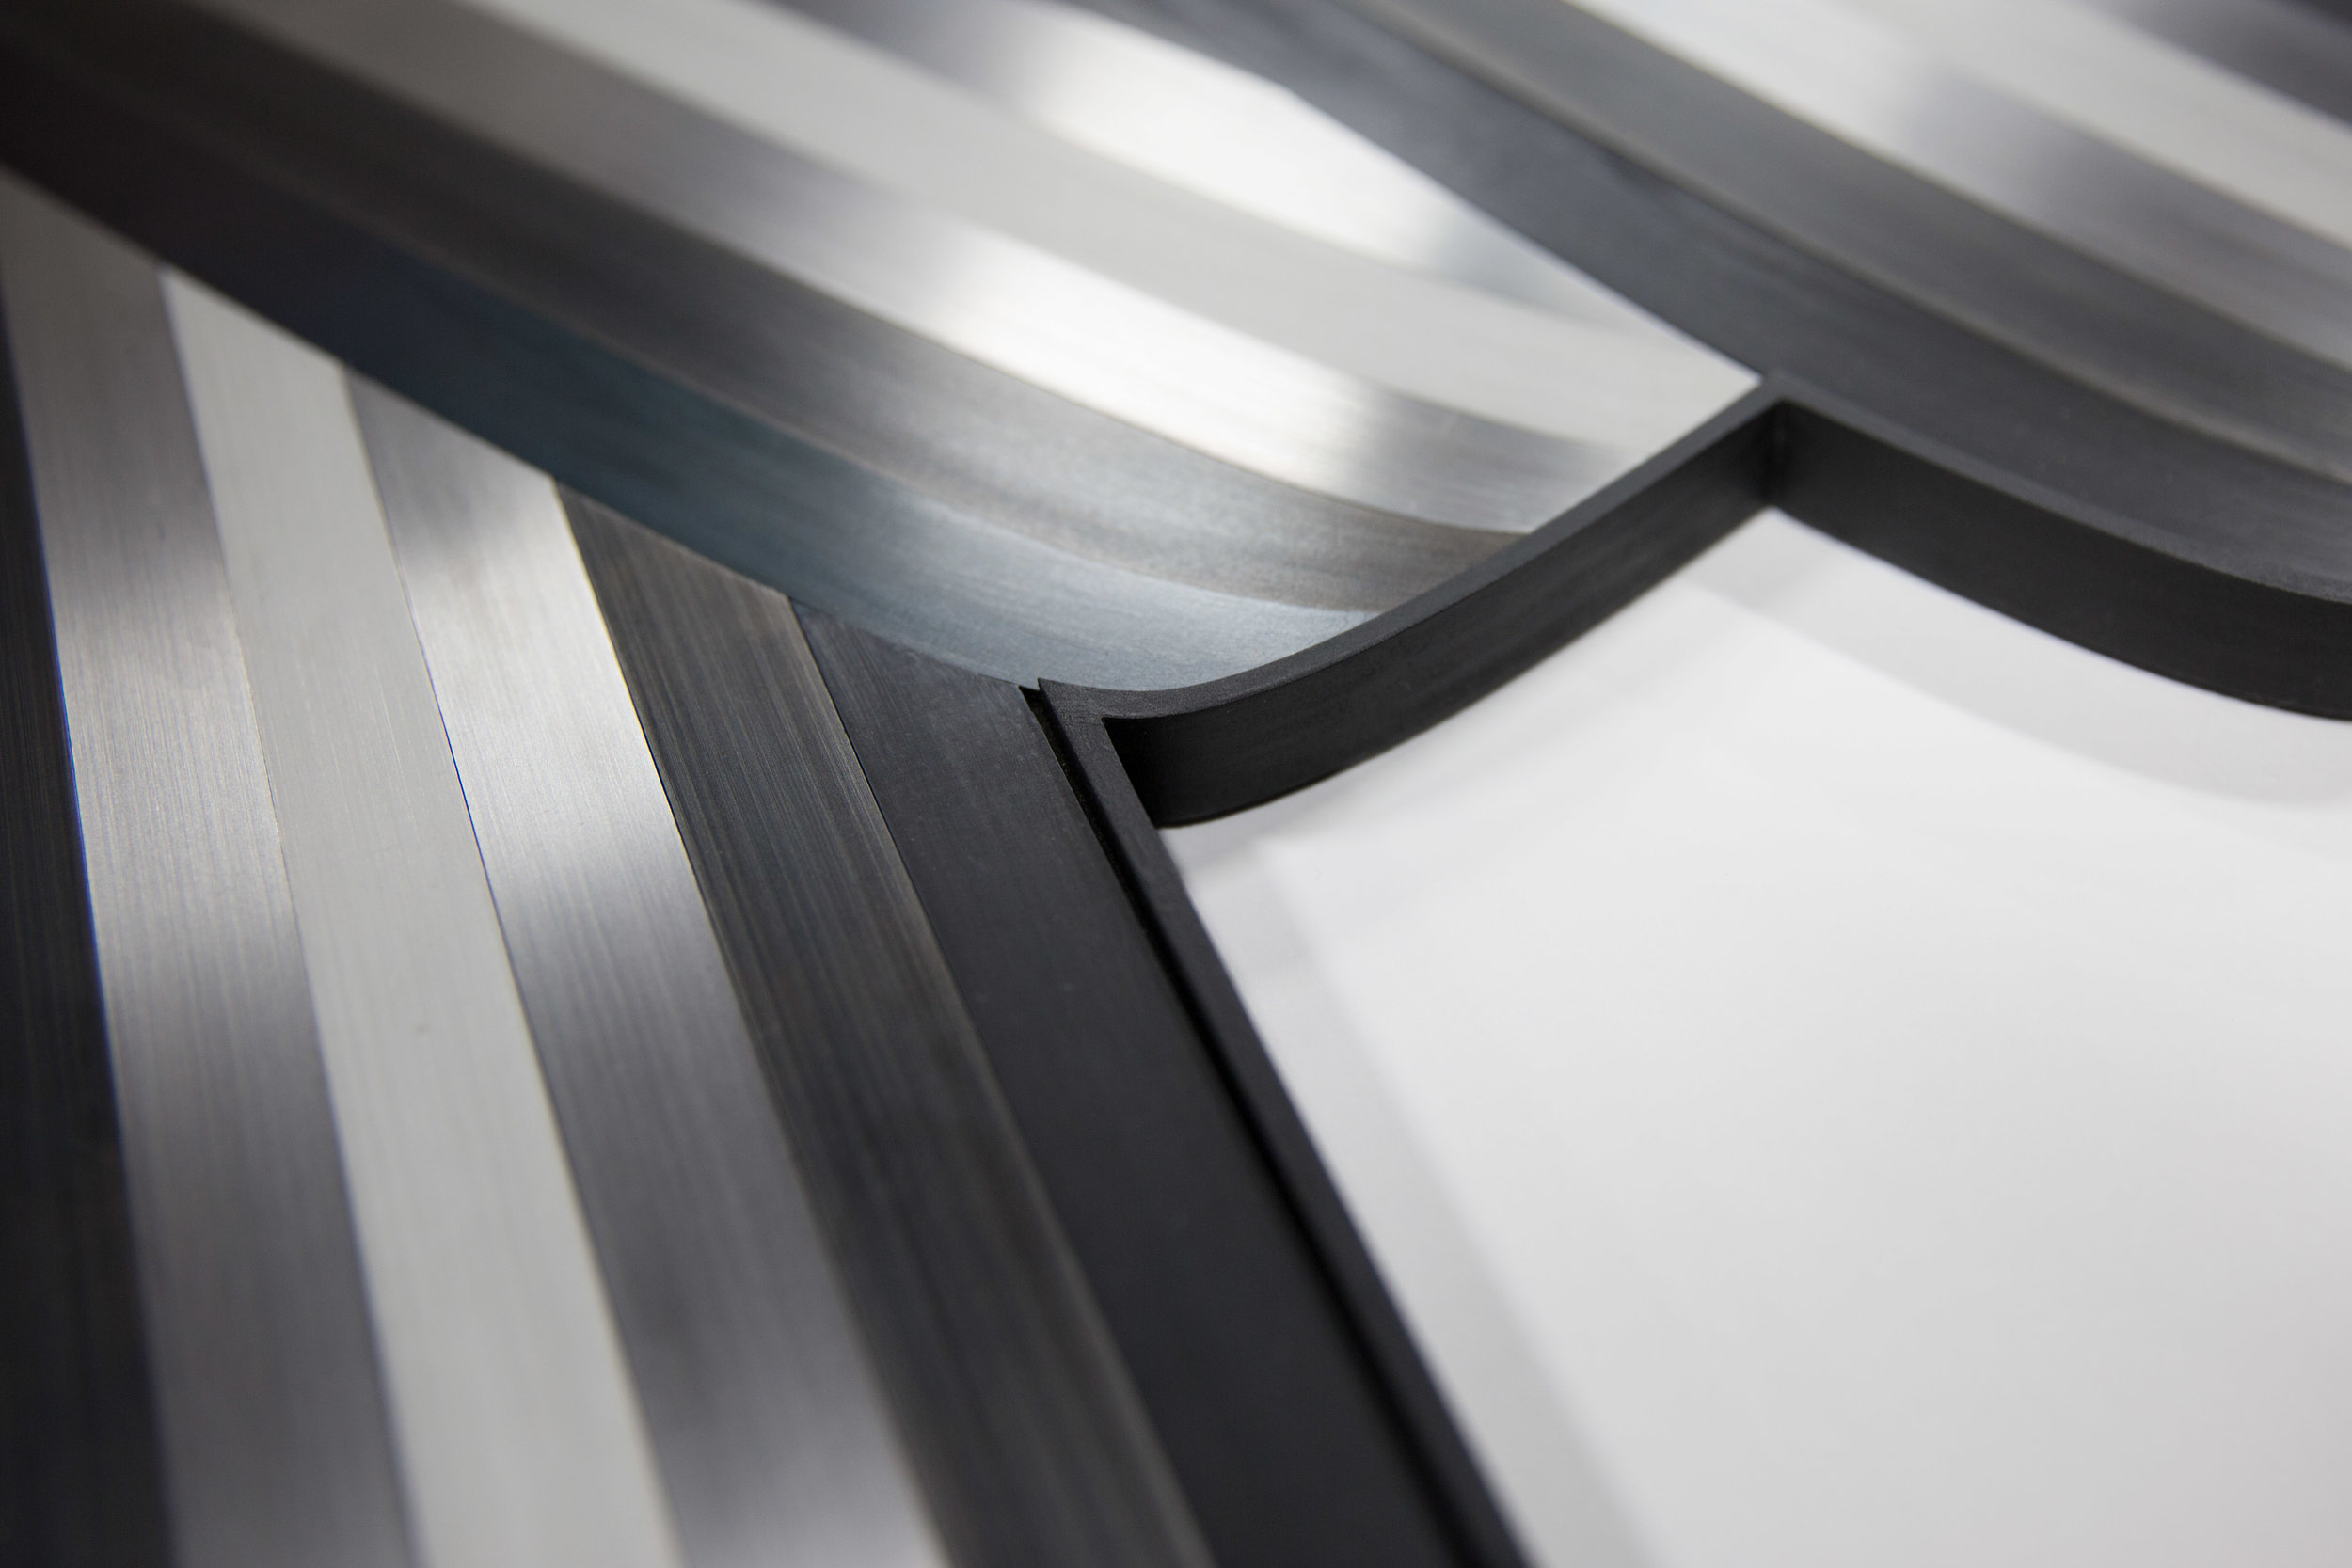


Some behind-the-scenes photos from the process of designing and fabricating this piece:


Interested in a custom piece for your home or office? Email me at zai@elektrasteel.com and let's discuss!
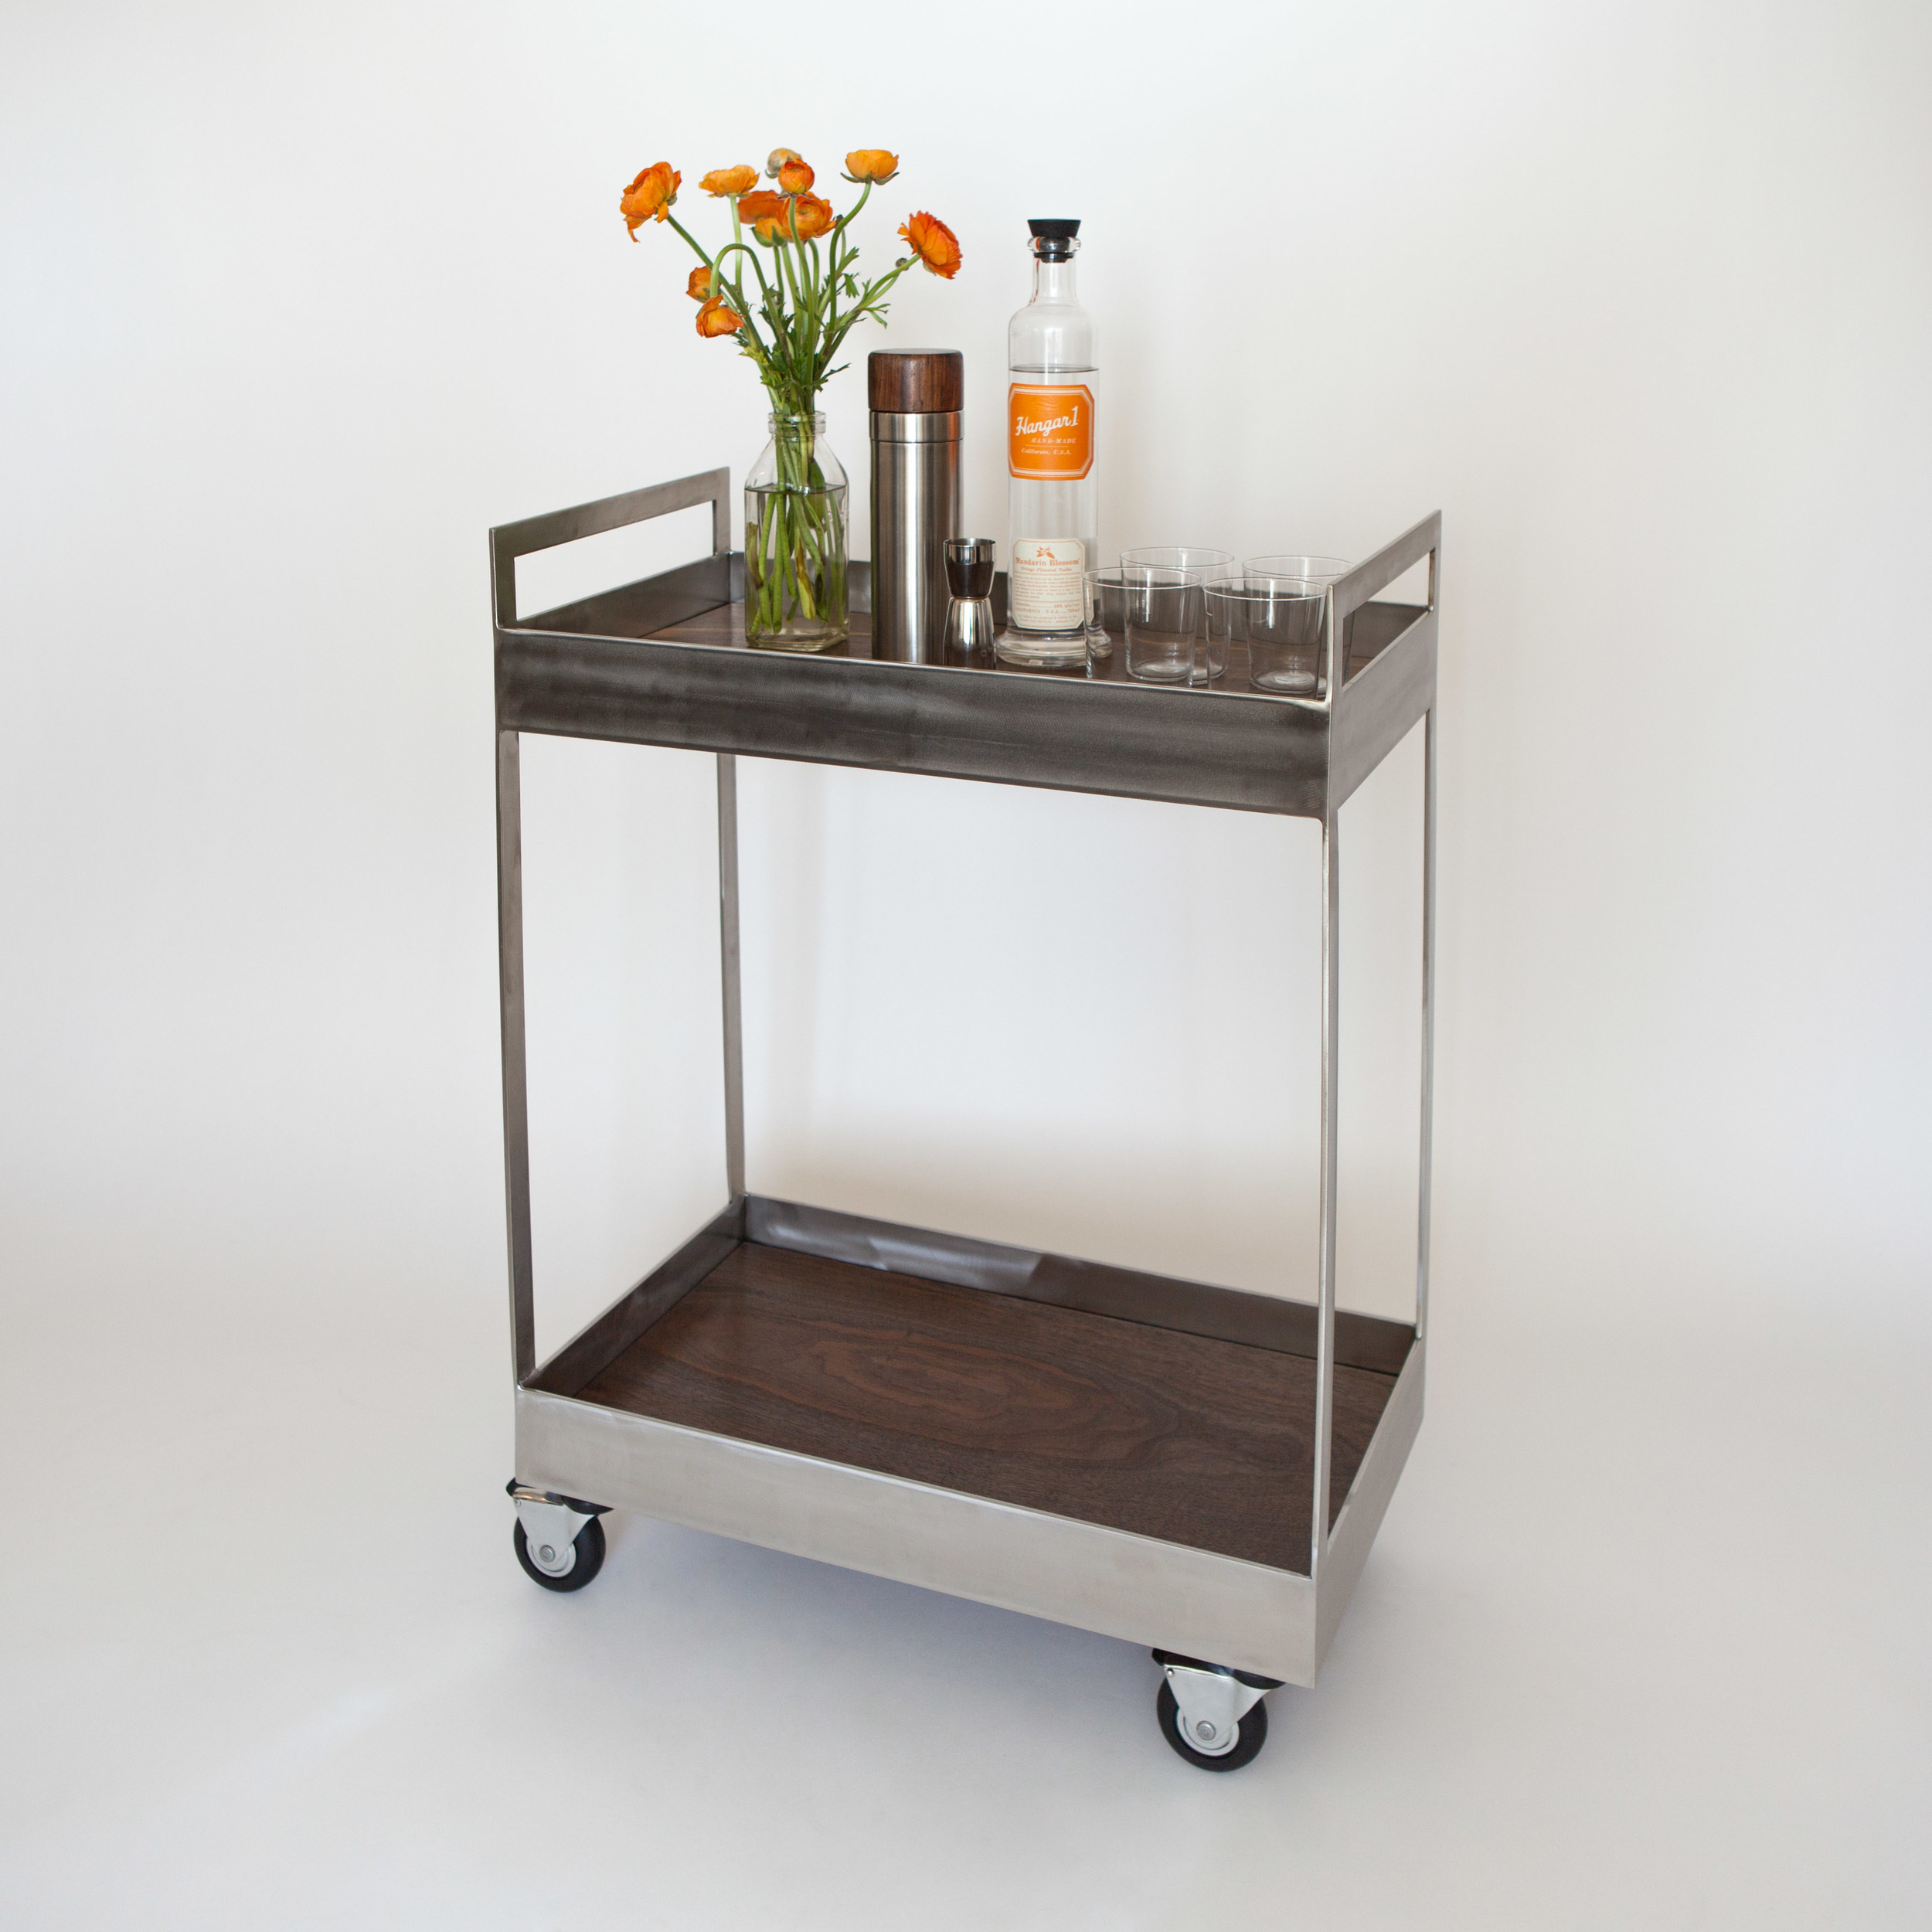
The Claro Cart: A Collaboration with Caty Moniz
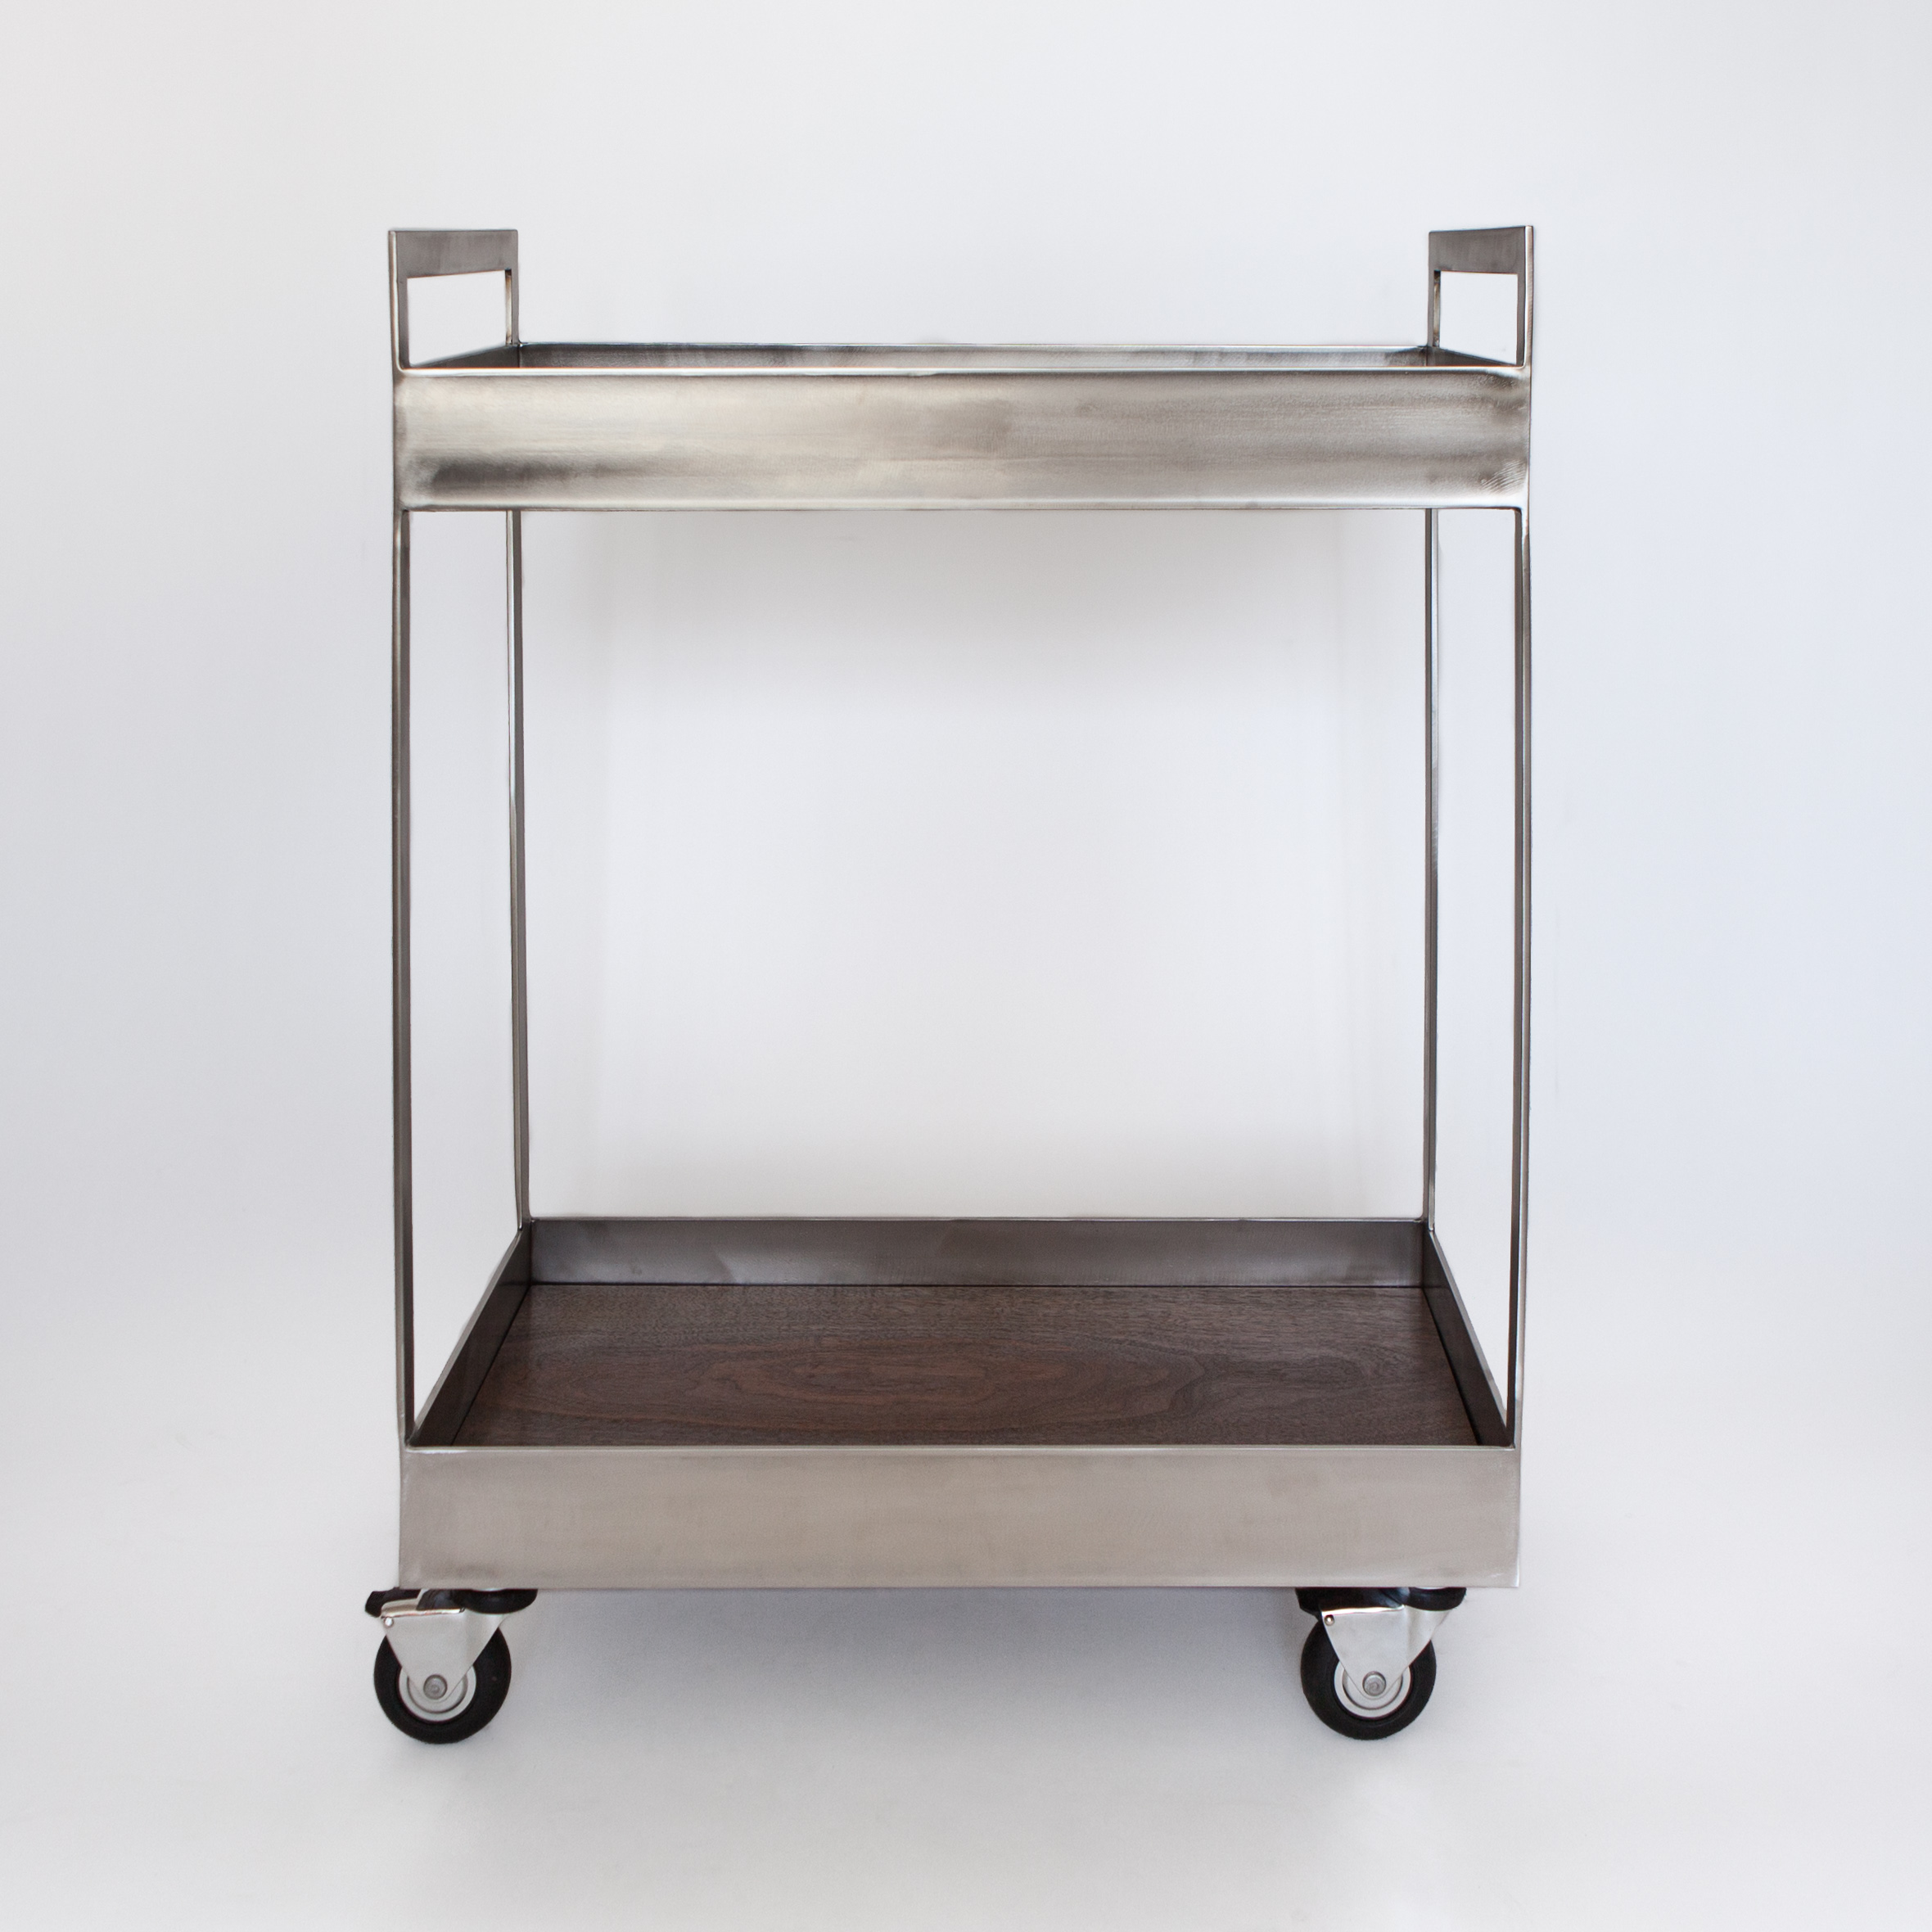
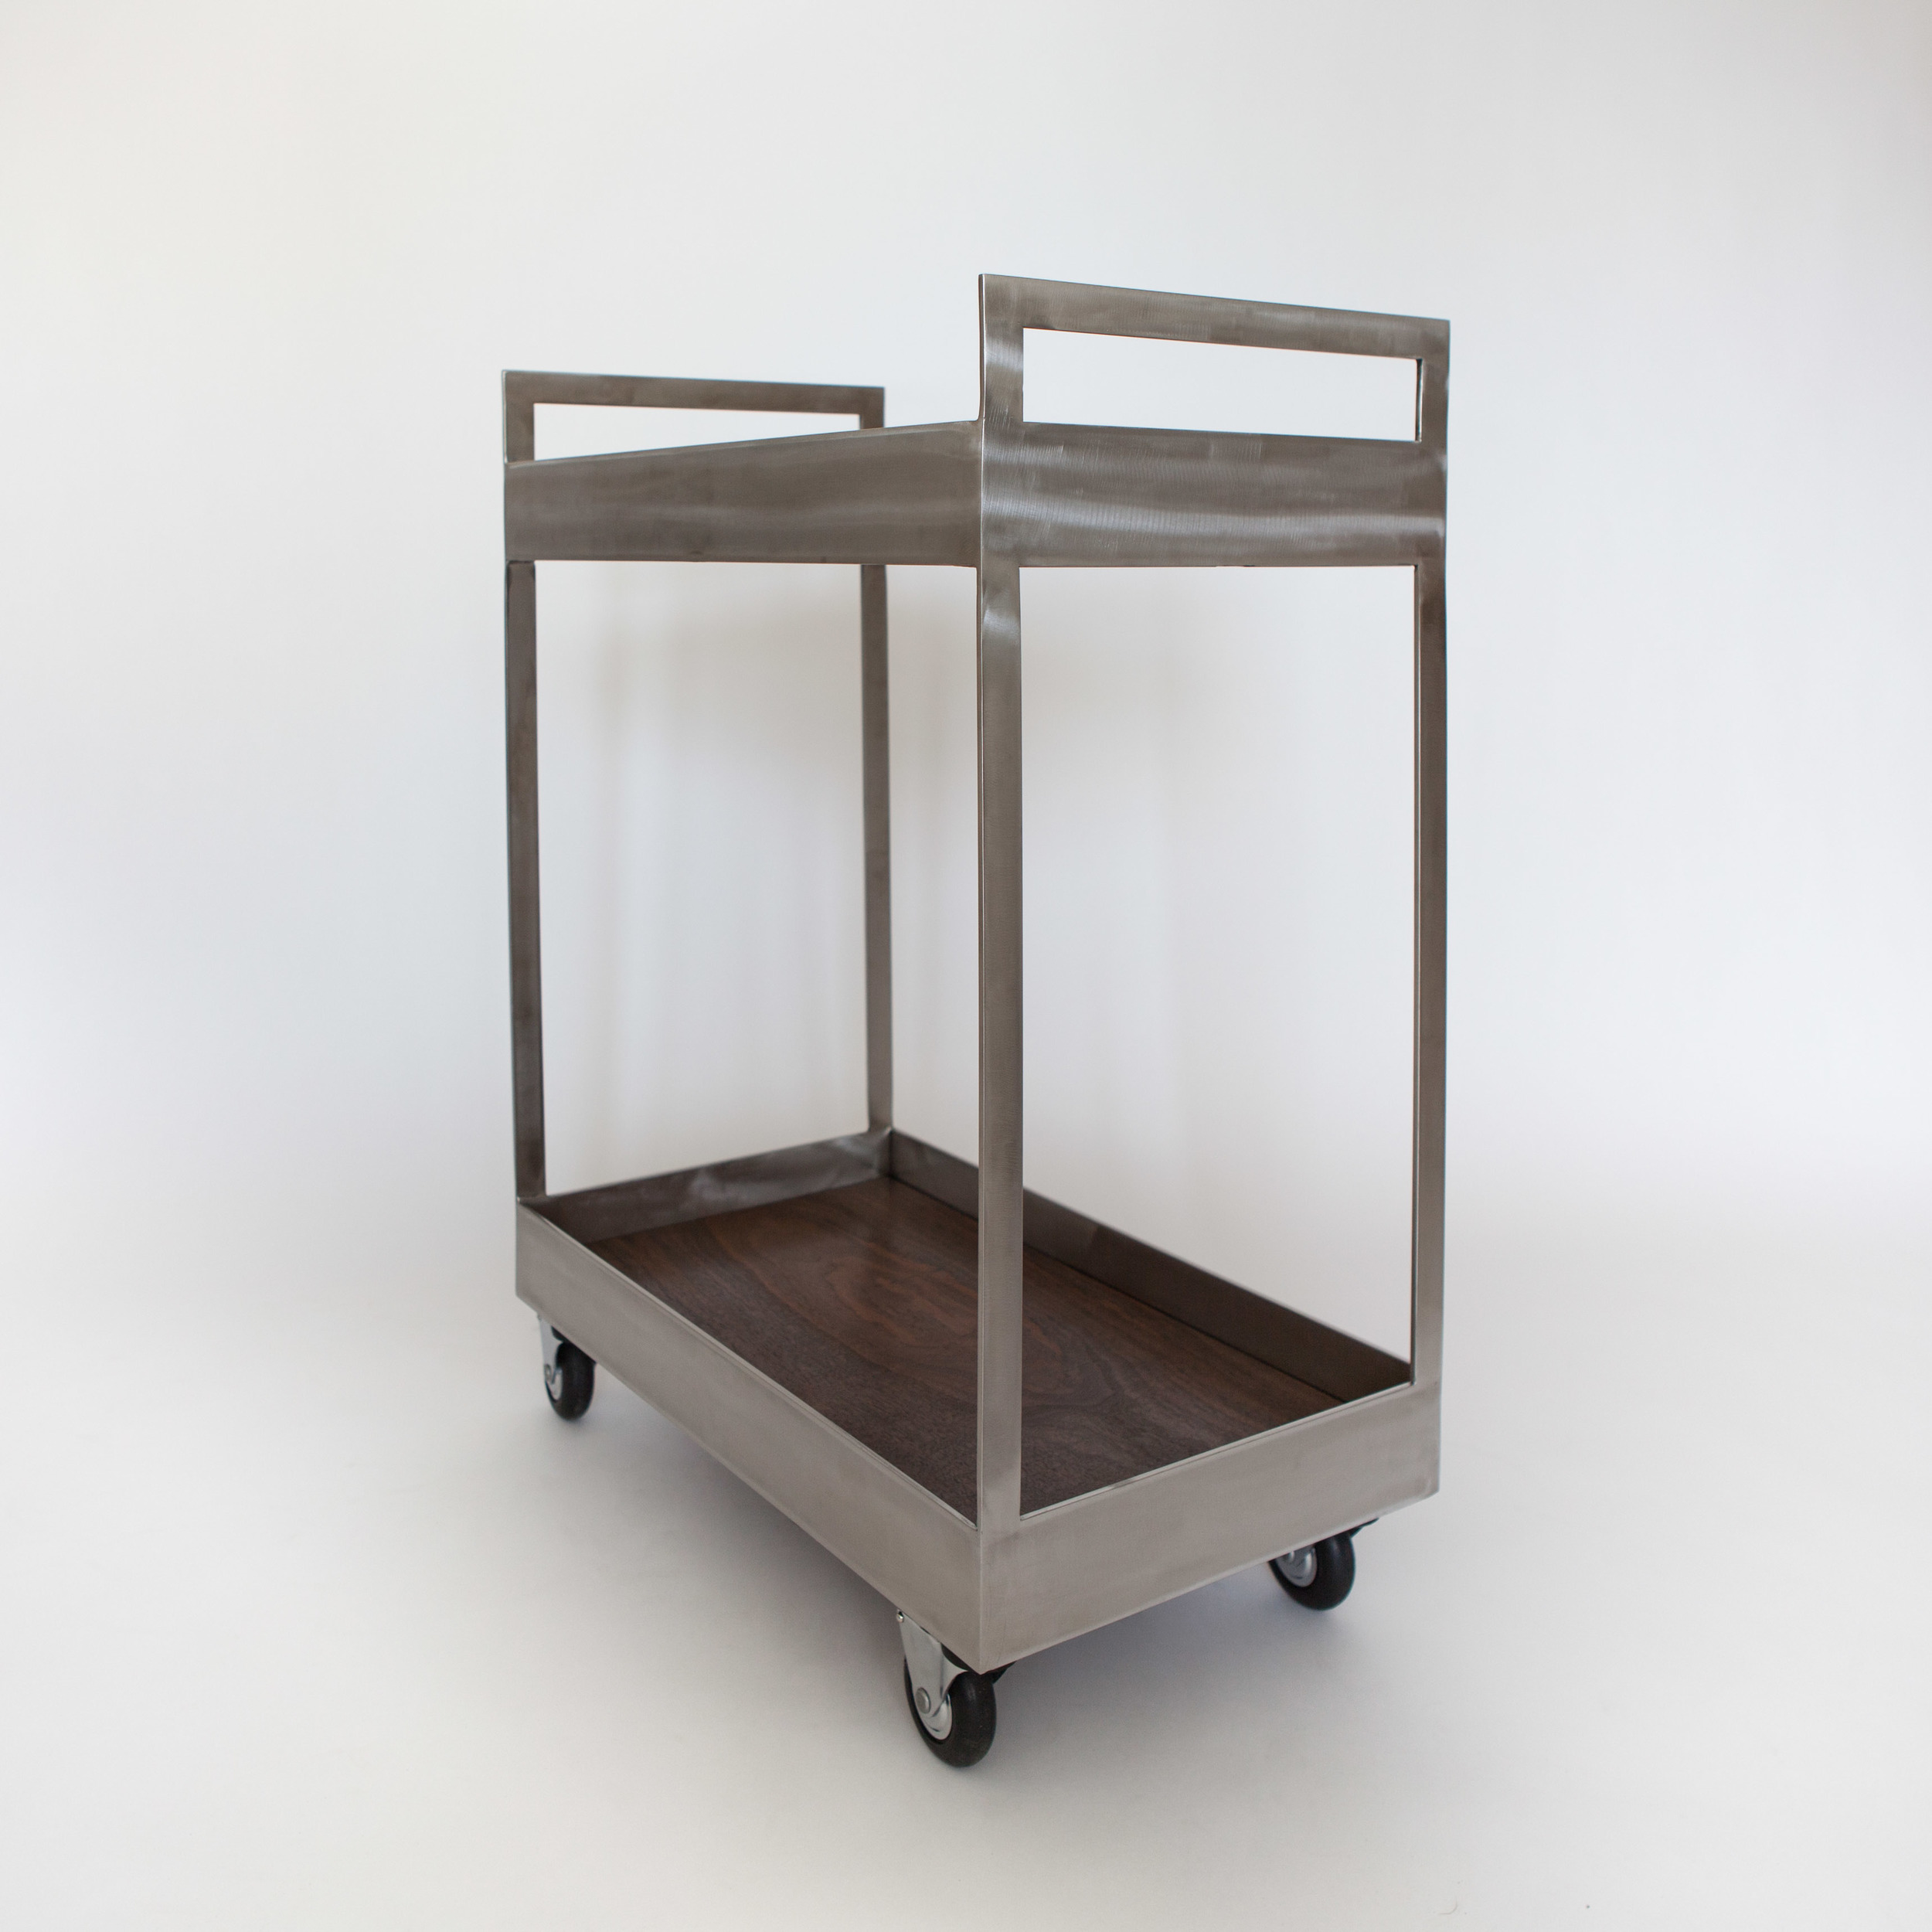
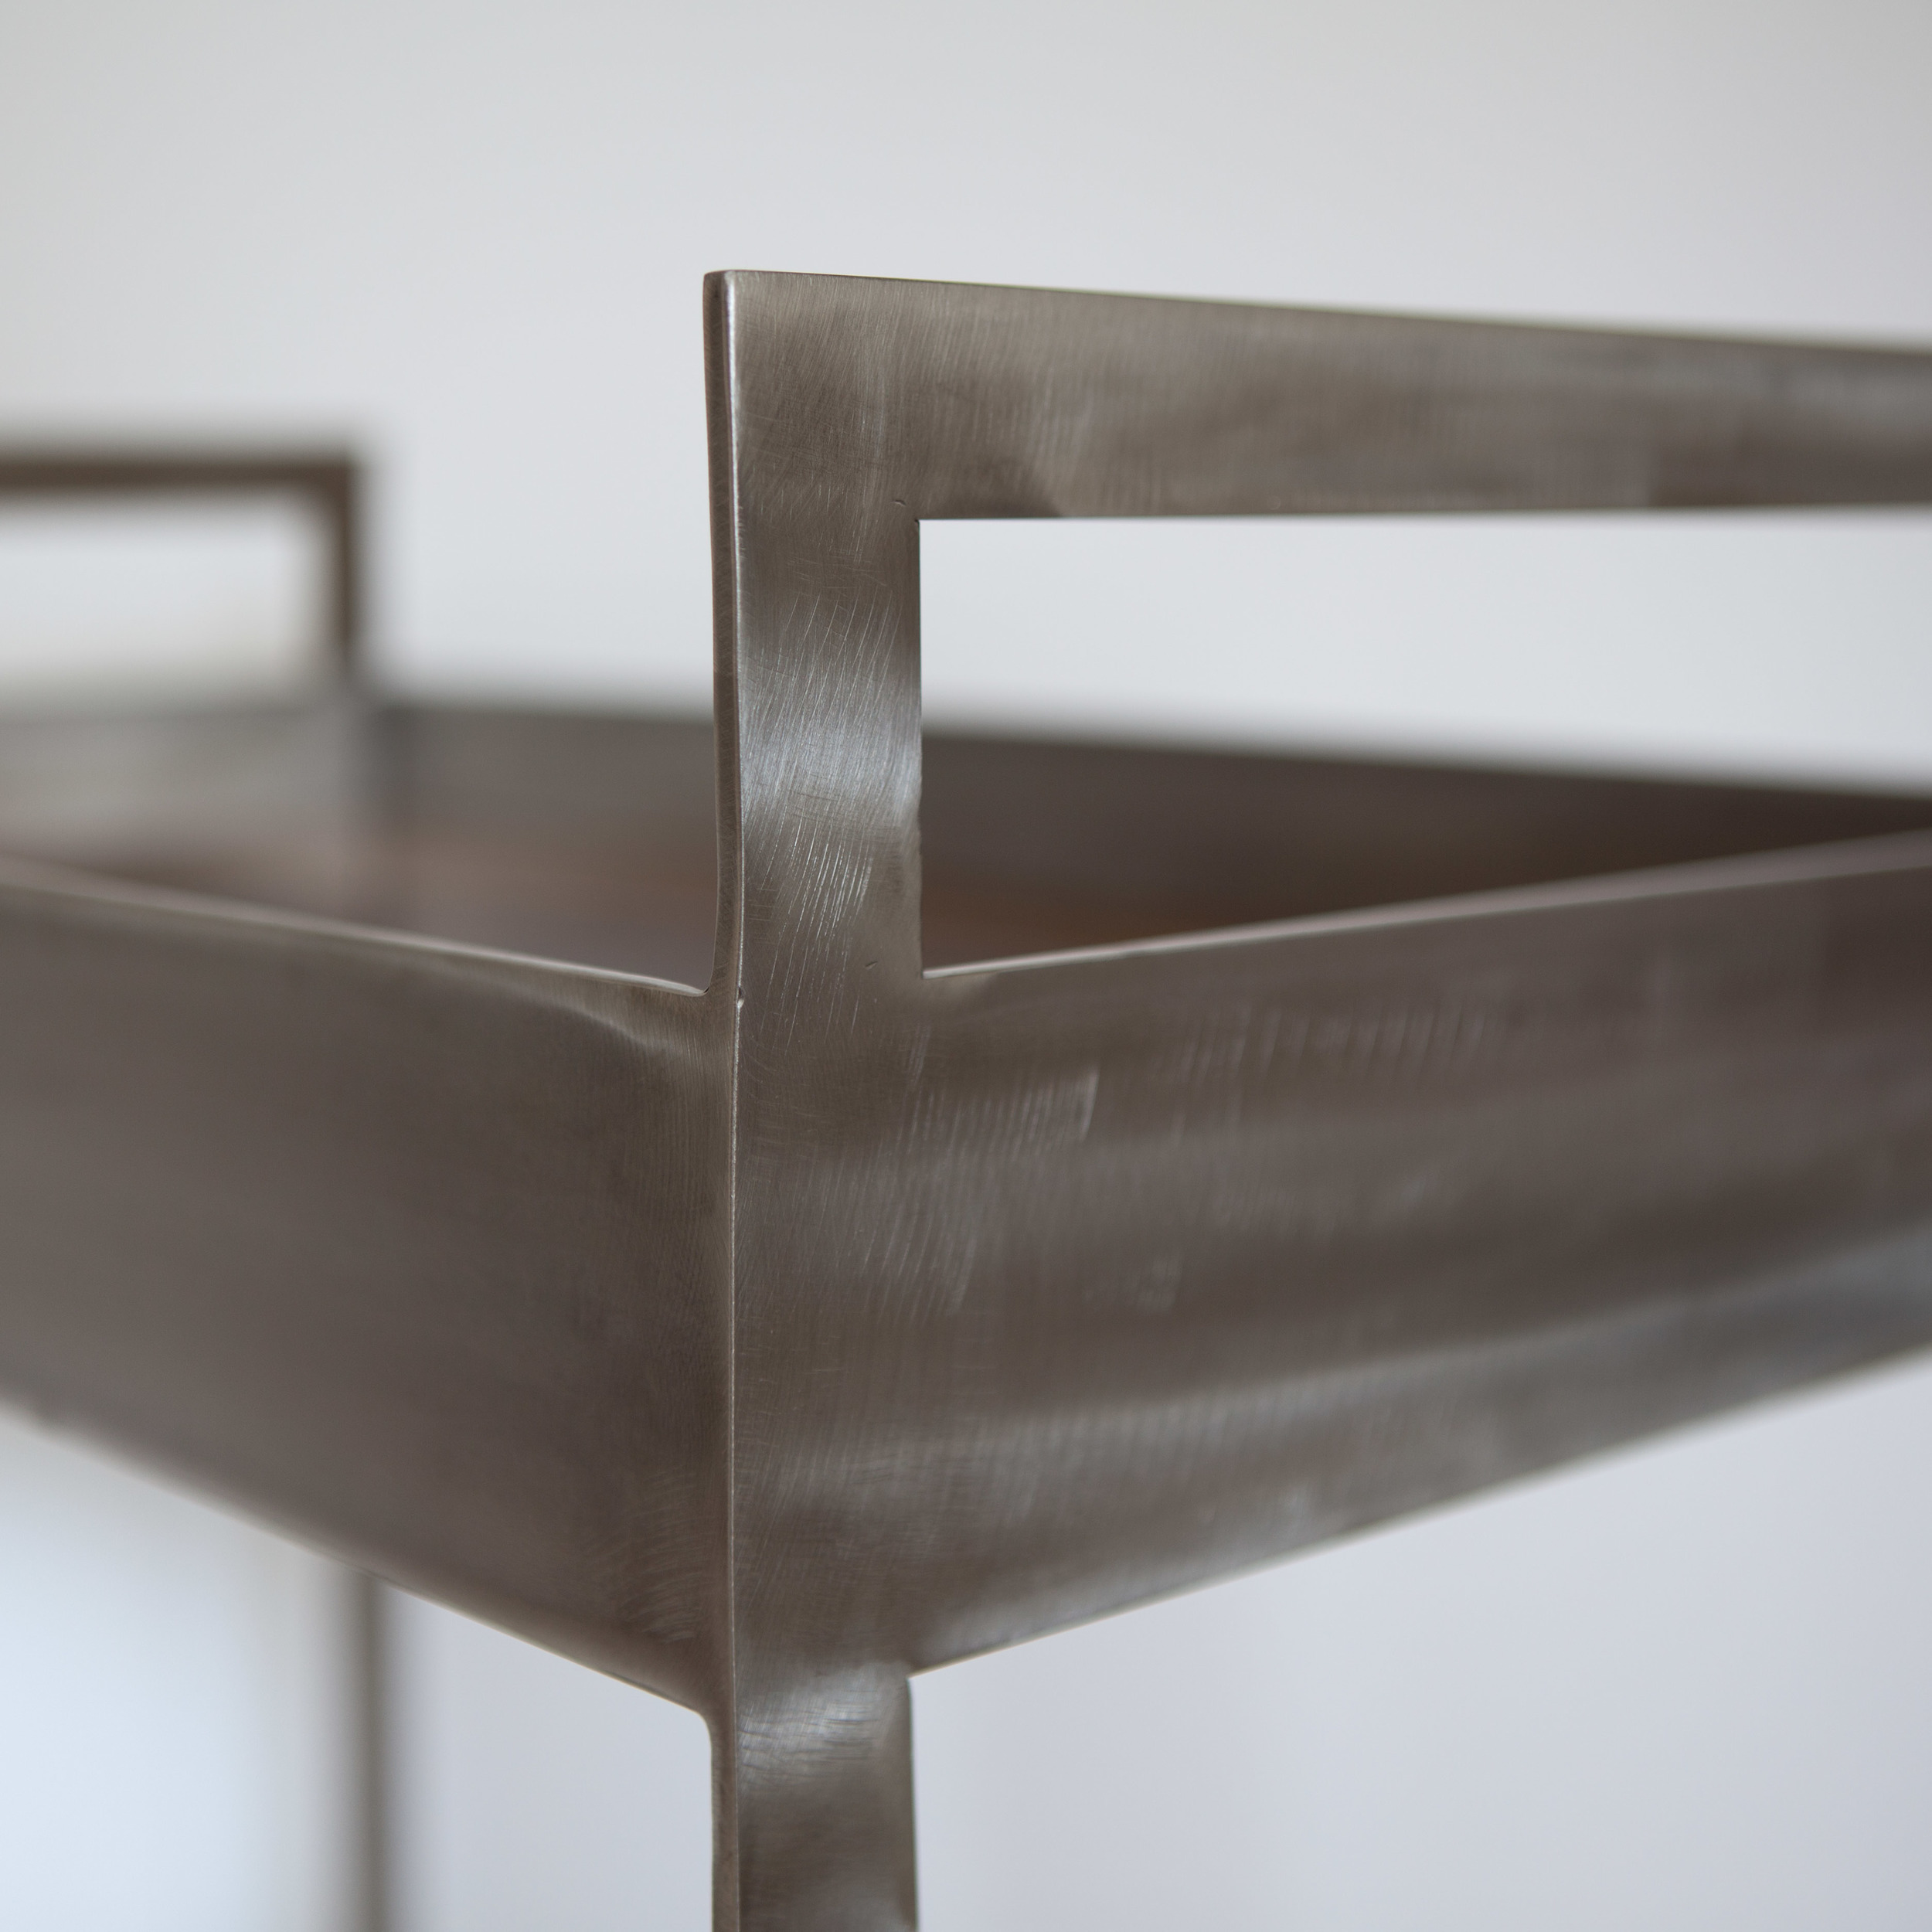
Ladies and gentlemen, I'd like to introduce to you the Claro Cart! This nifty rolling bar cart, made of stainless steel and shimmery Claro walnut, is a collaboration with my good friend and talented woodworker Caty Moniz!
I first became friends with Caty because we worked together at Box headquarters in Los Altos. On our commute home one day about a year ago, we realized that we both loved making furniture. We had a good laugh when we discovered that she had finished wood slabs lying around her garage that didn't have table bases; meanwhile, I had a steel table base in my studio without a top. We joked about collaborating on a piece of furniture one day -- I'd do the metal, and she'd do the wood.
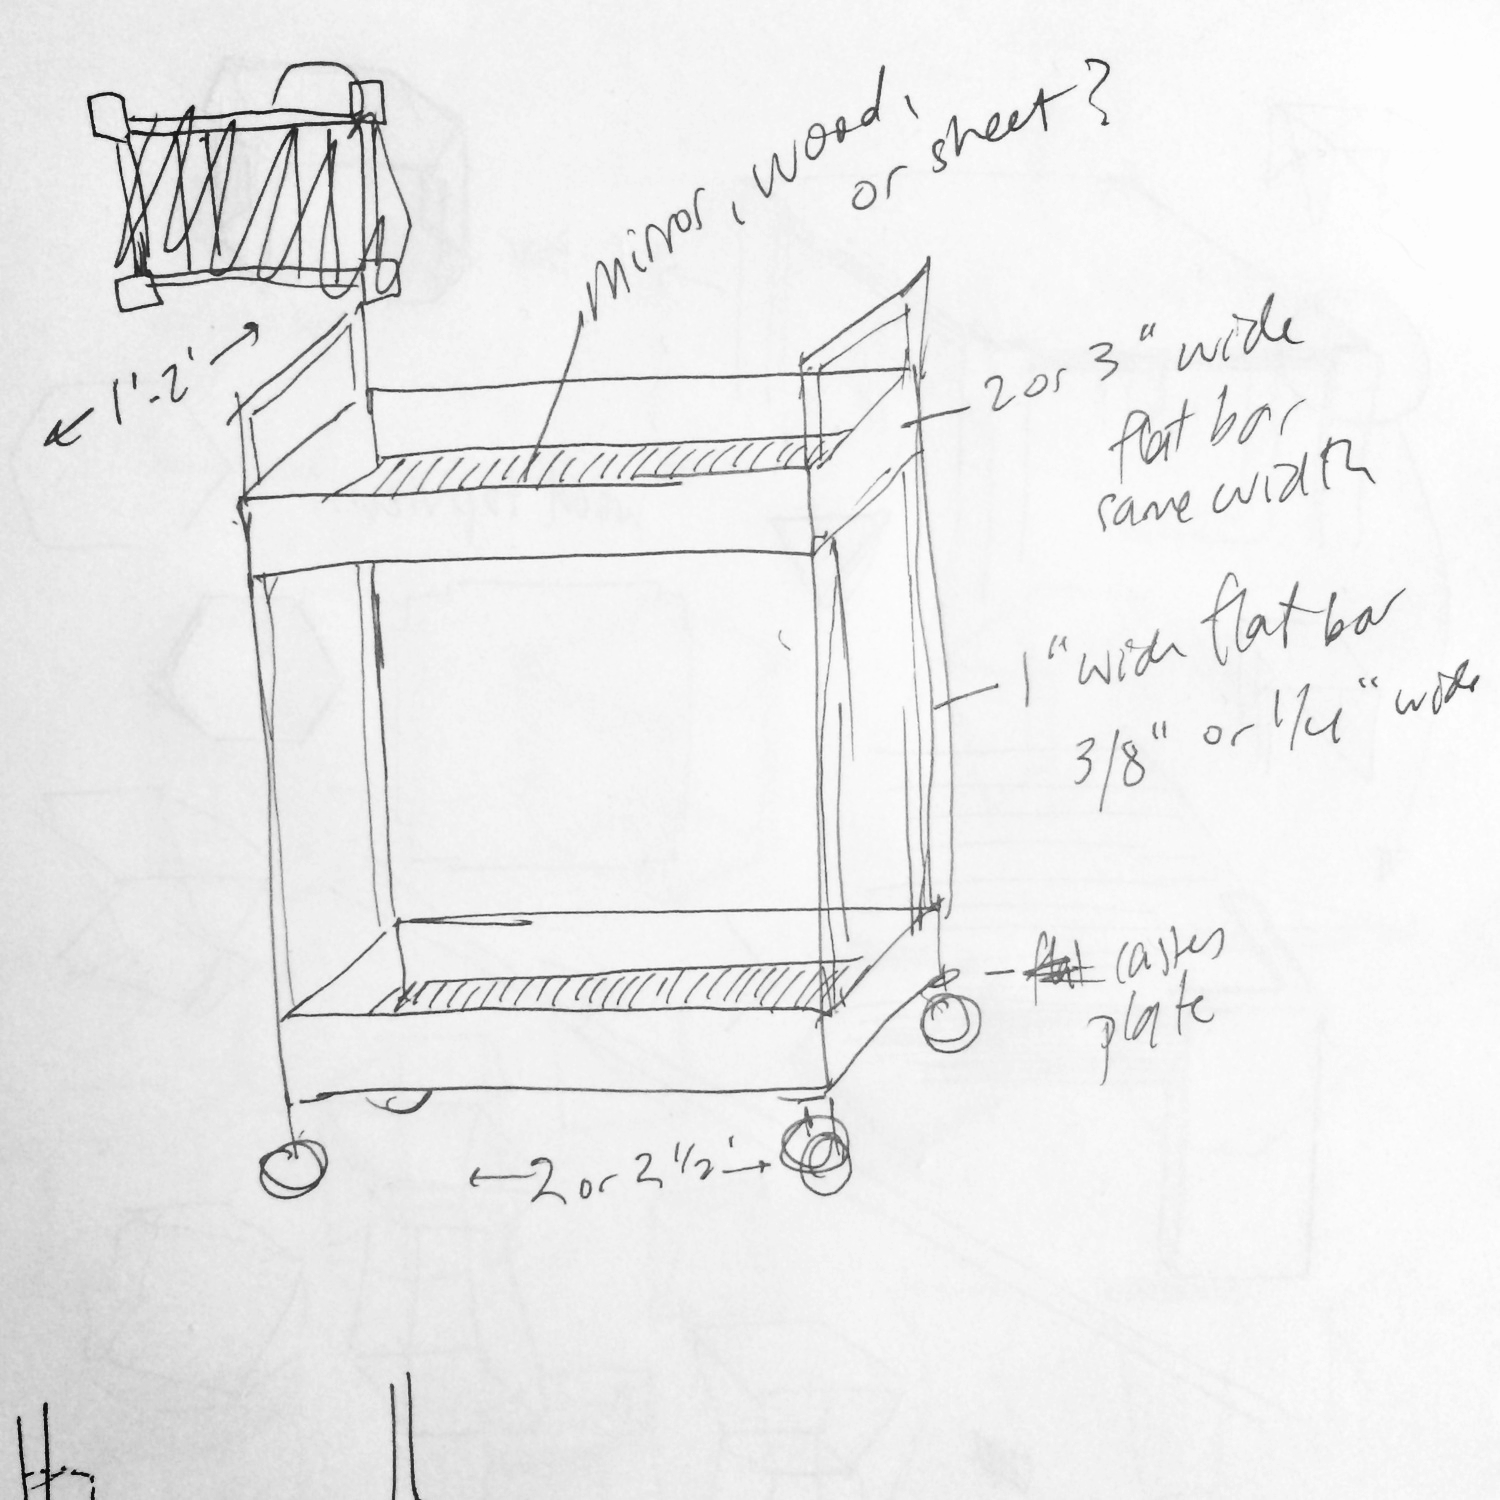
And then a few months ago, we decided to go for it! We came up with a simple, elegant design for a rolling bar cart that would show off the contrast of dark wood against bright stainless steel.
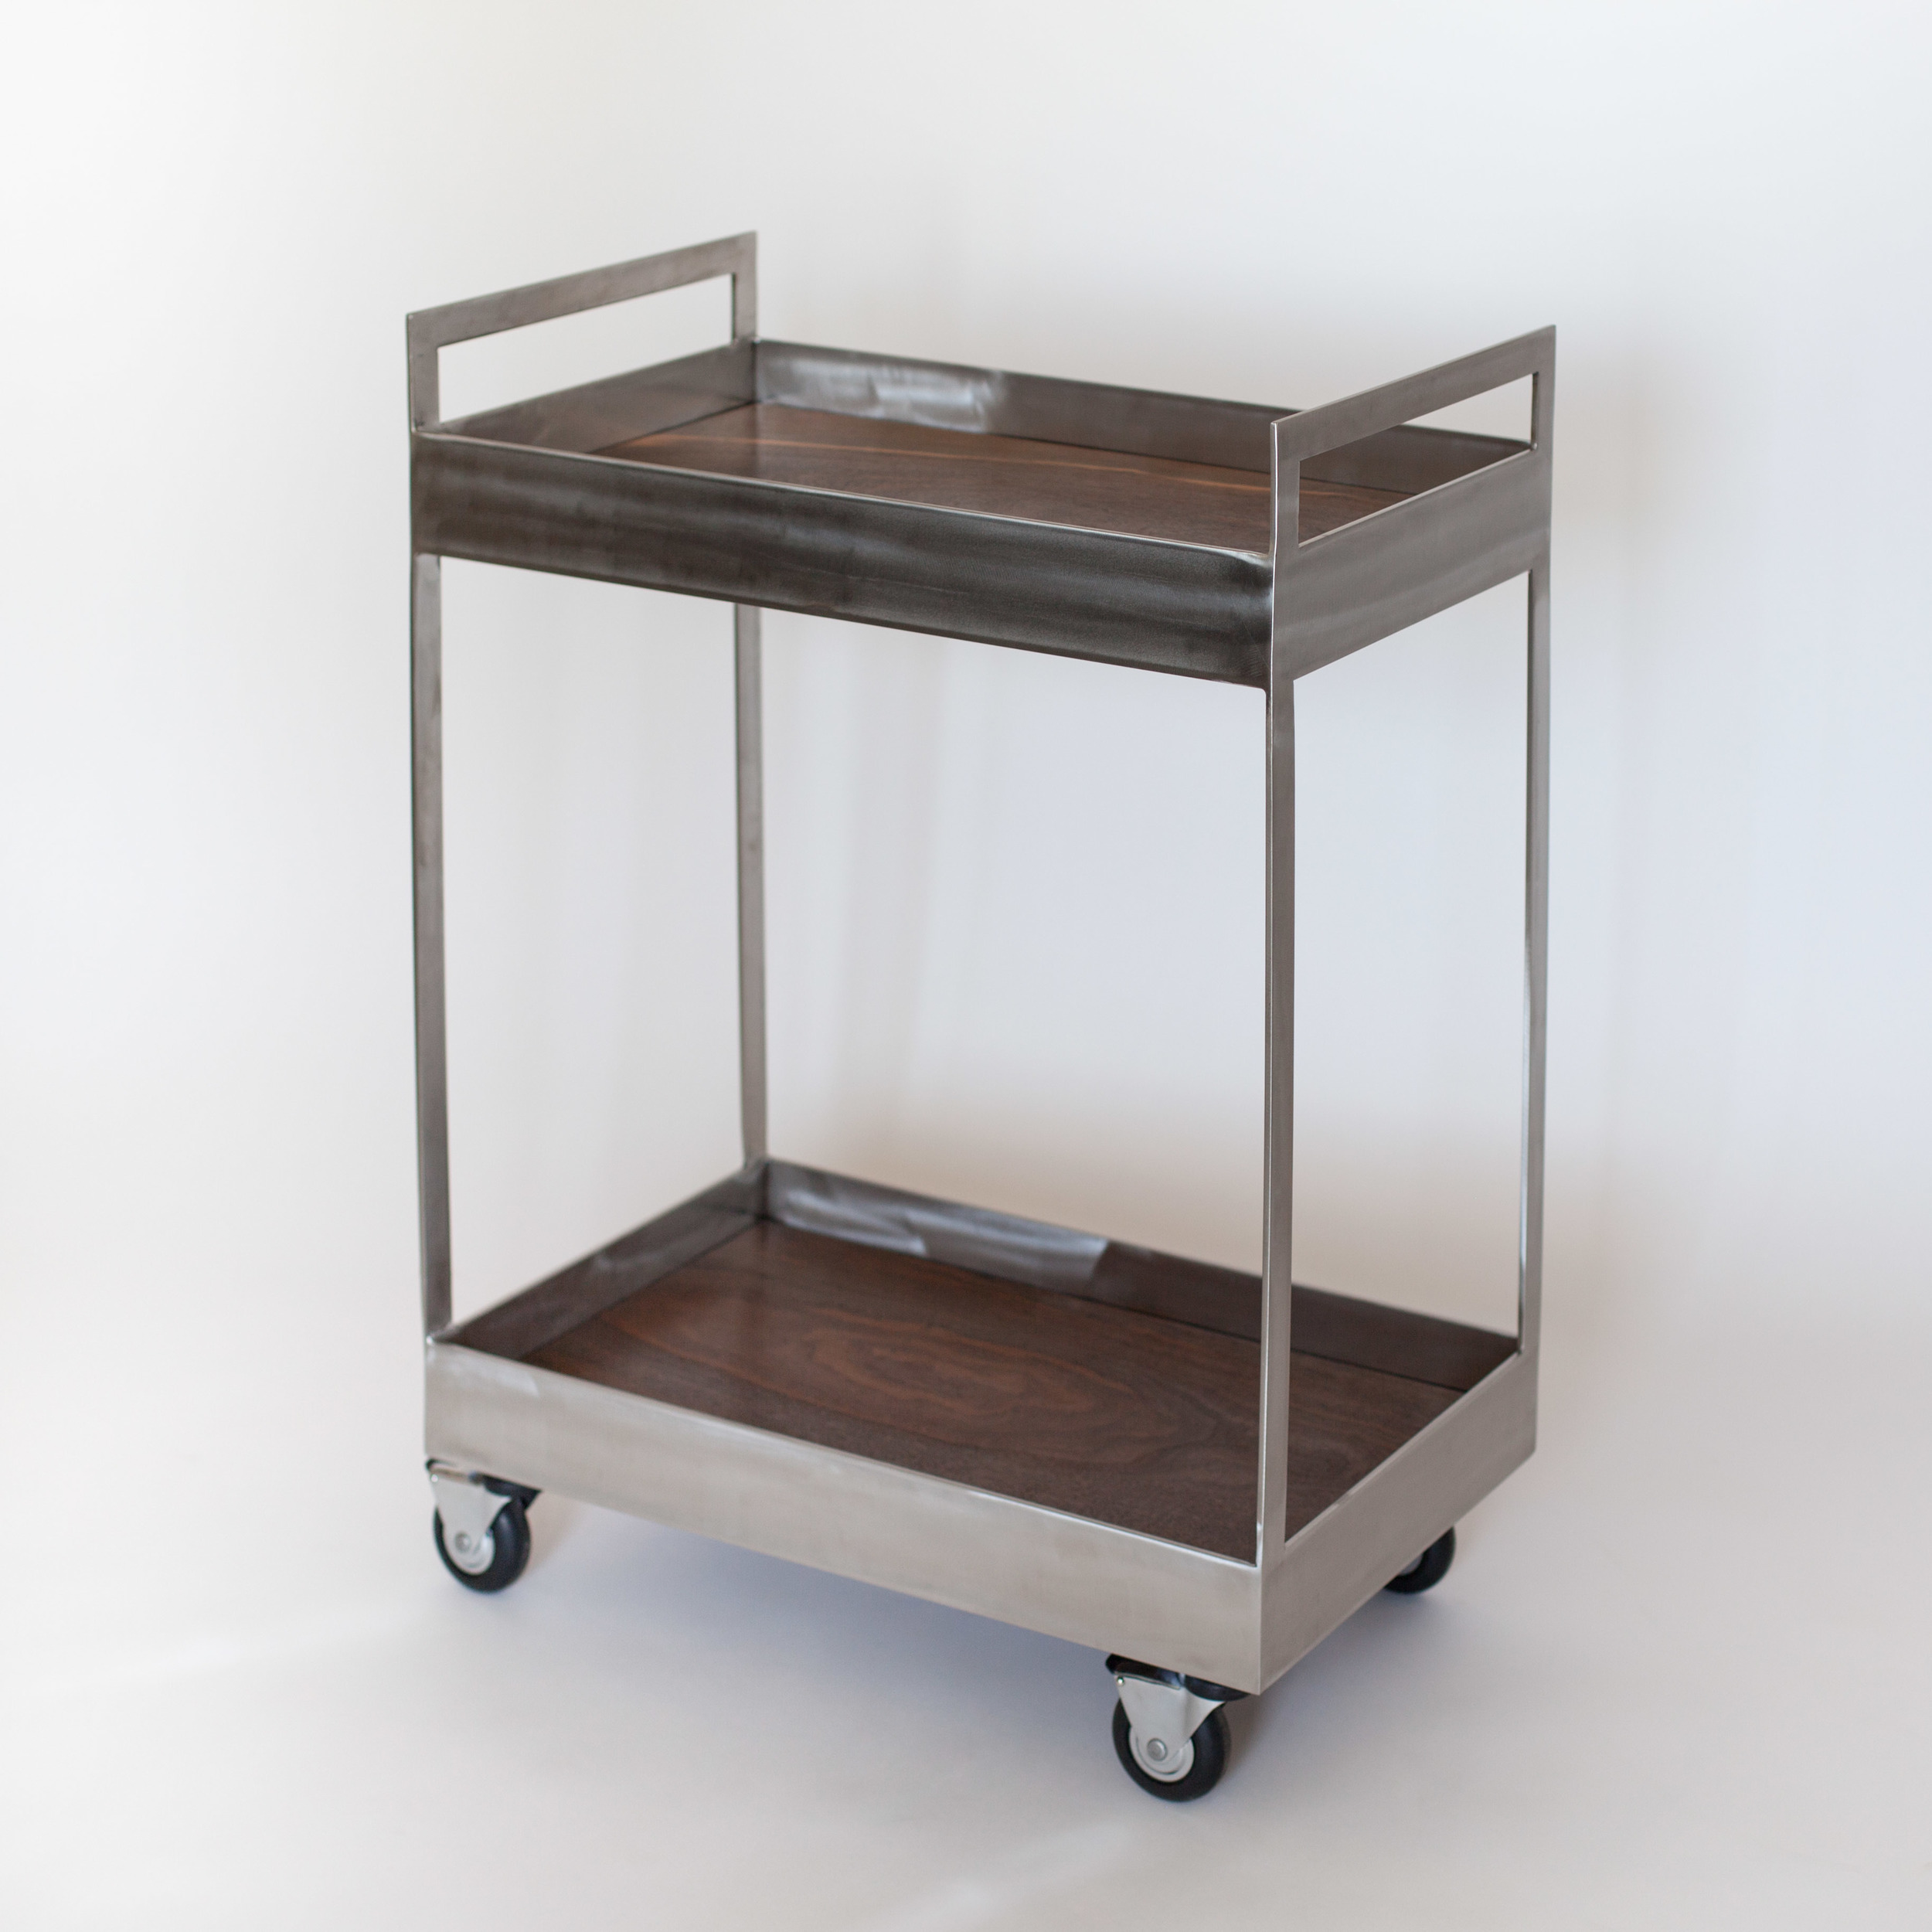
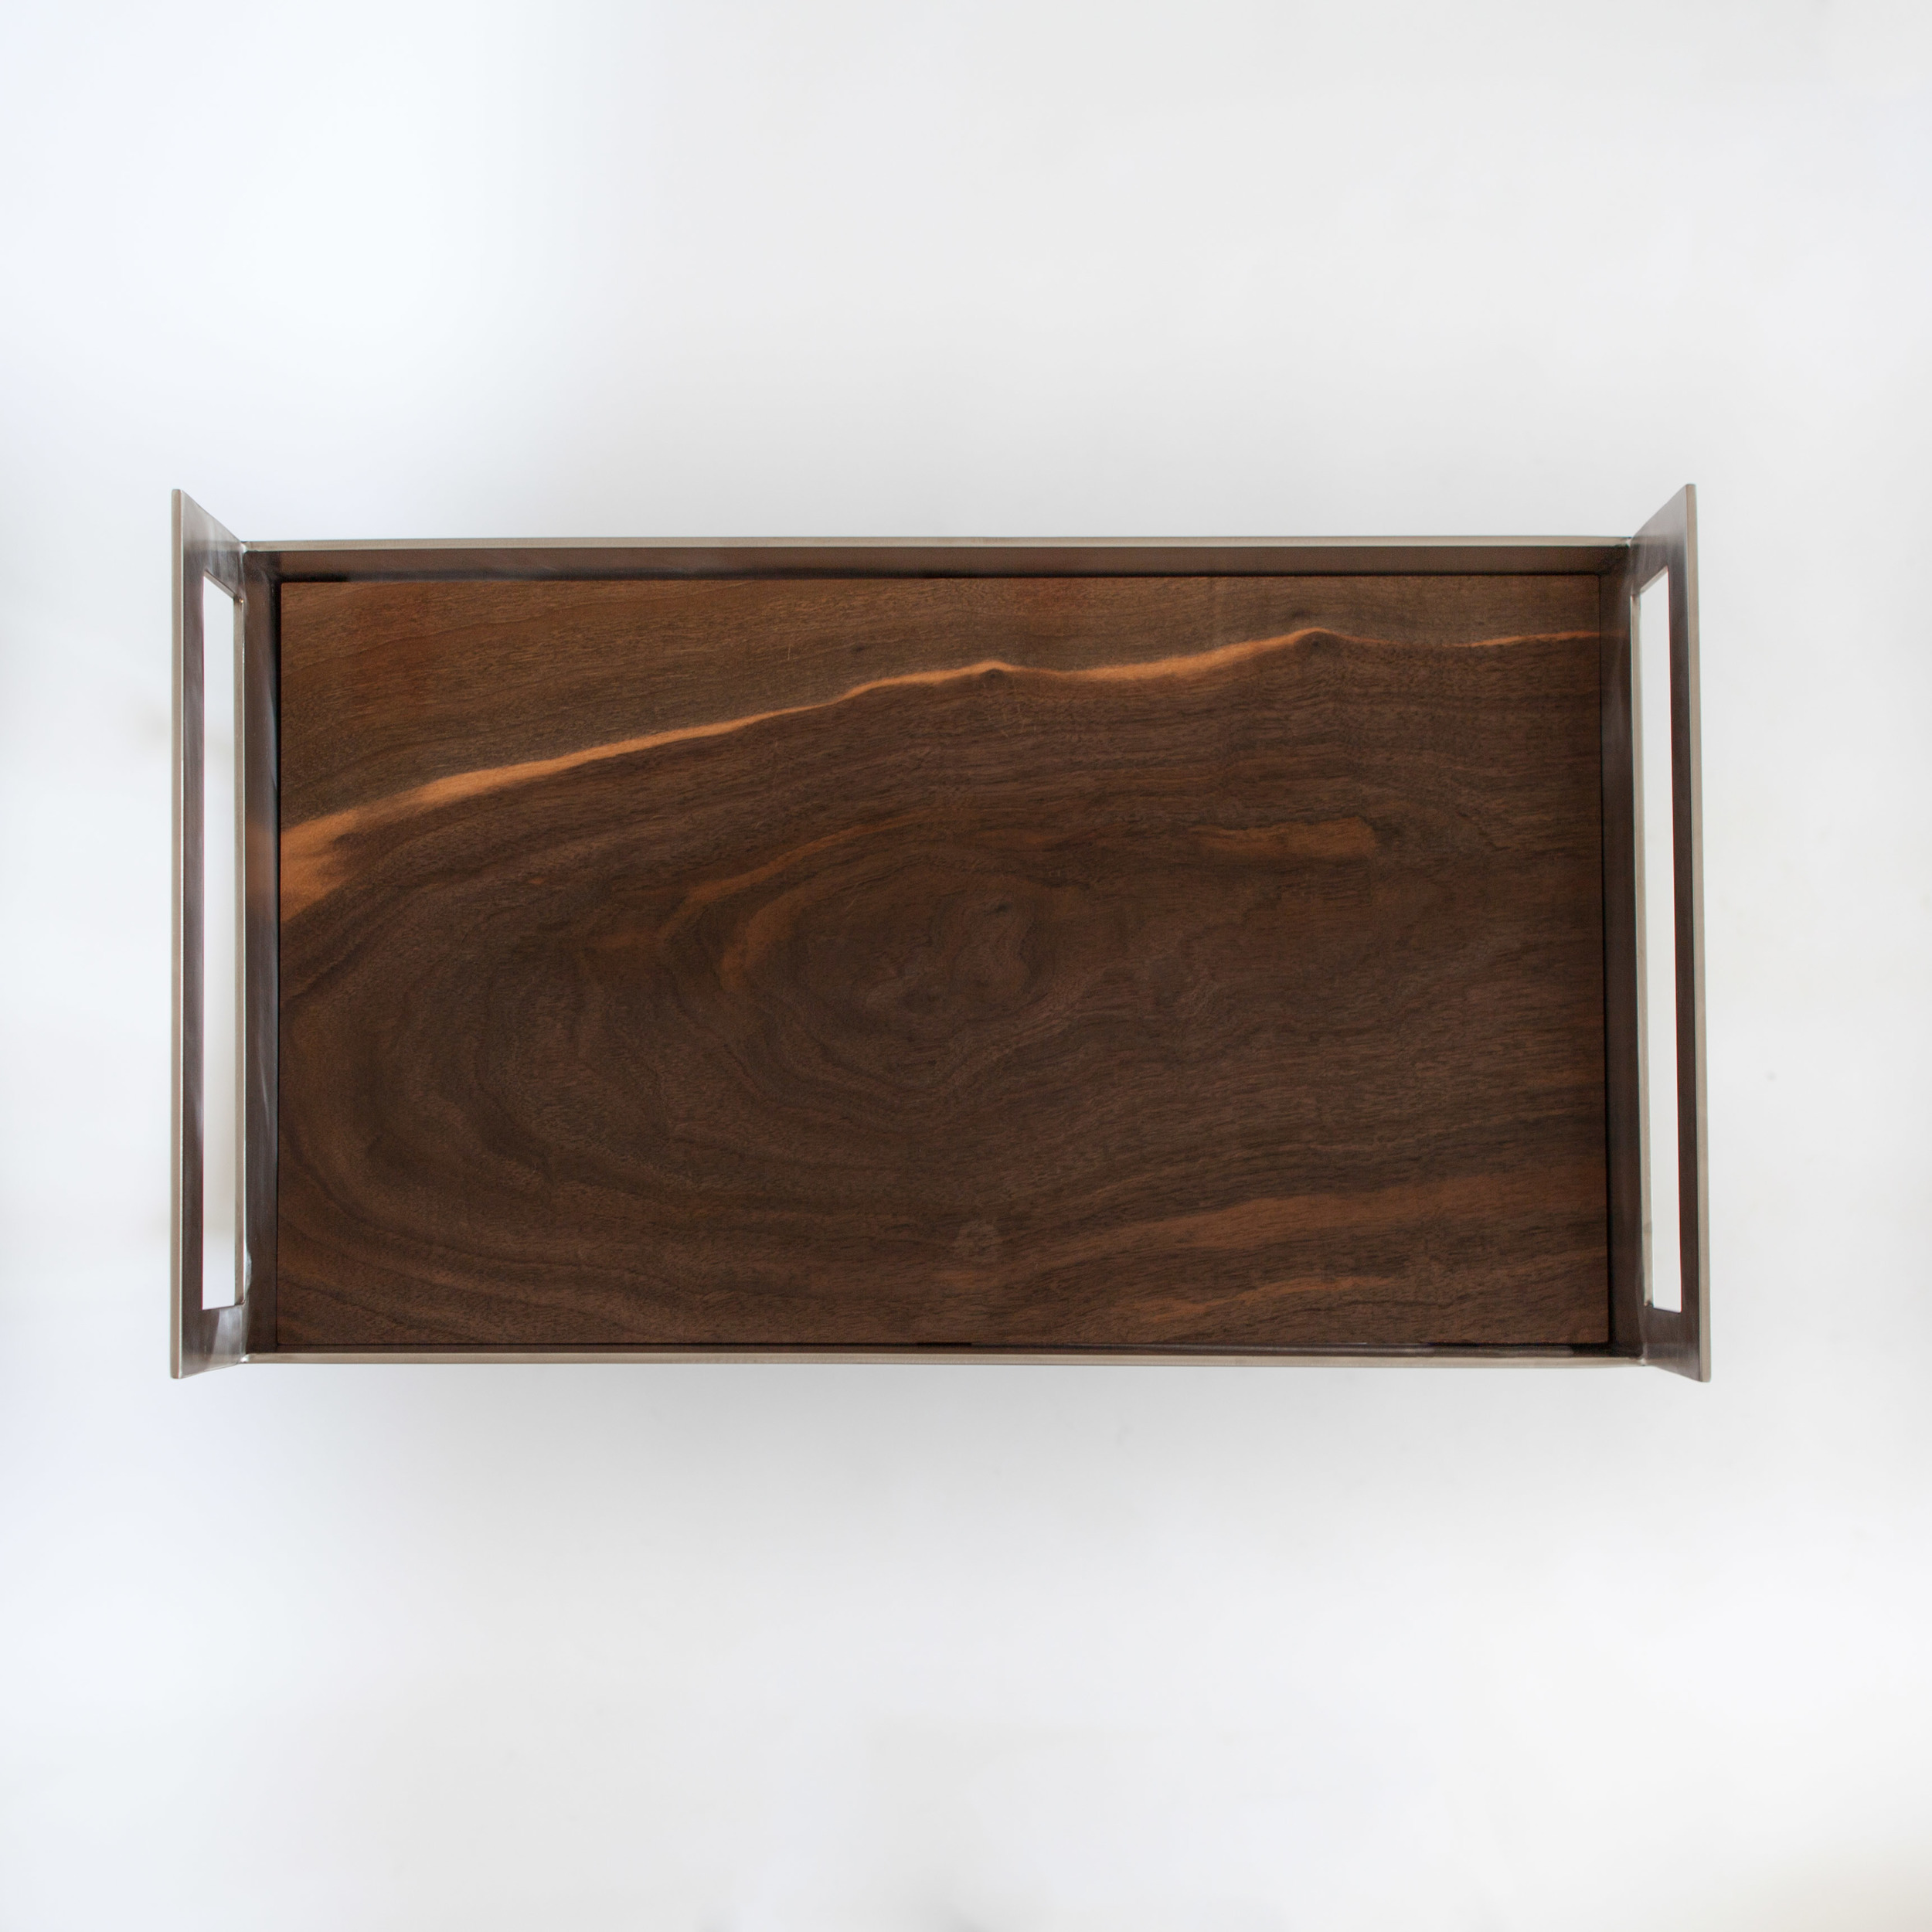
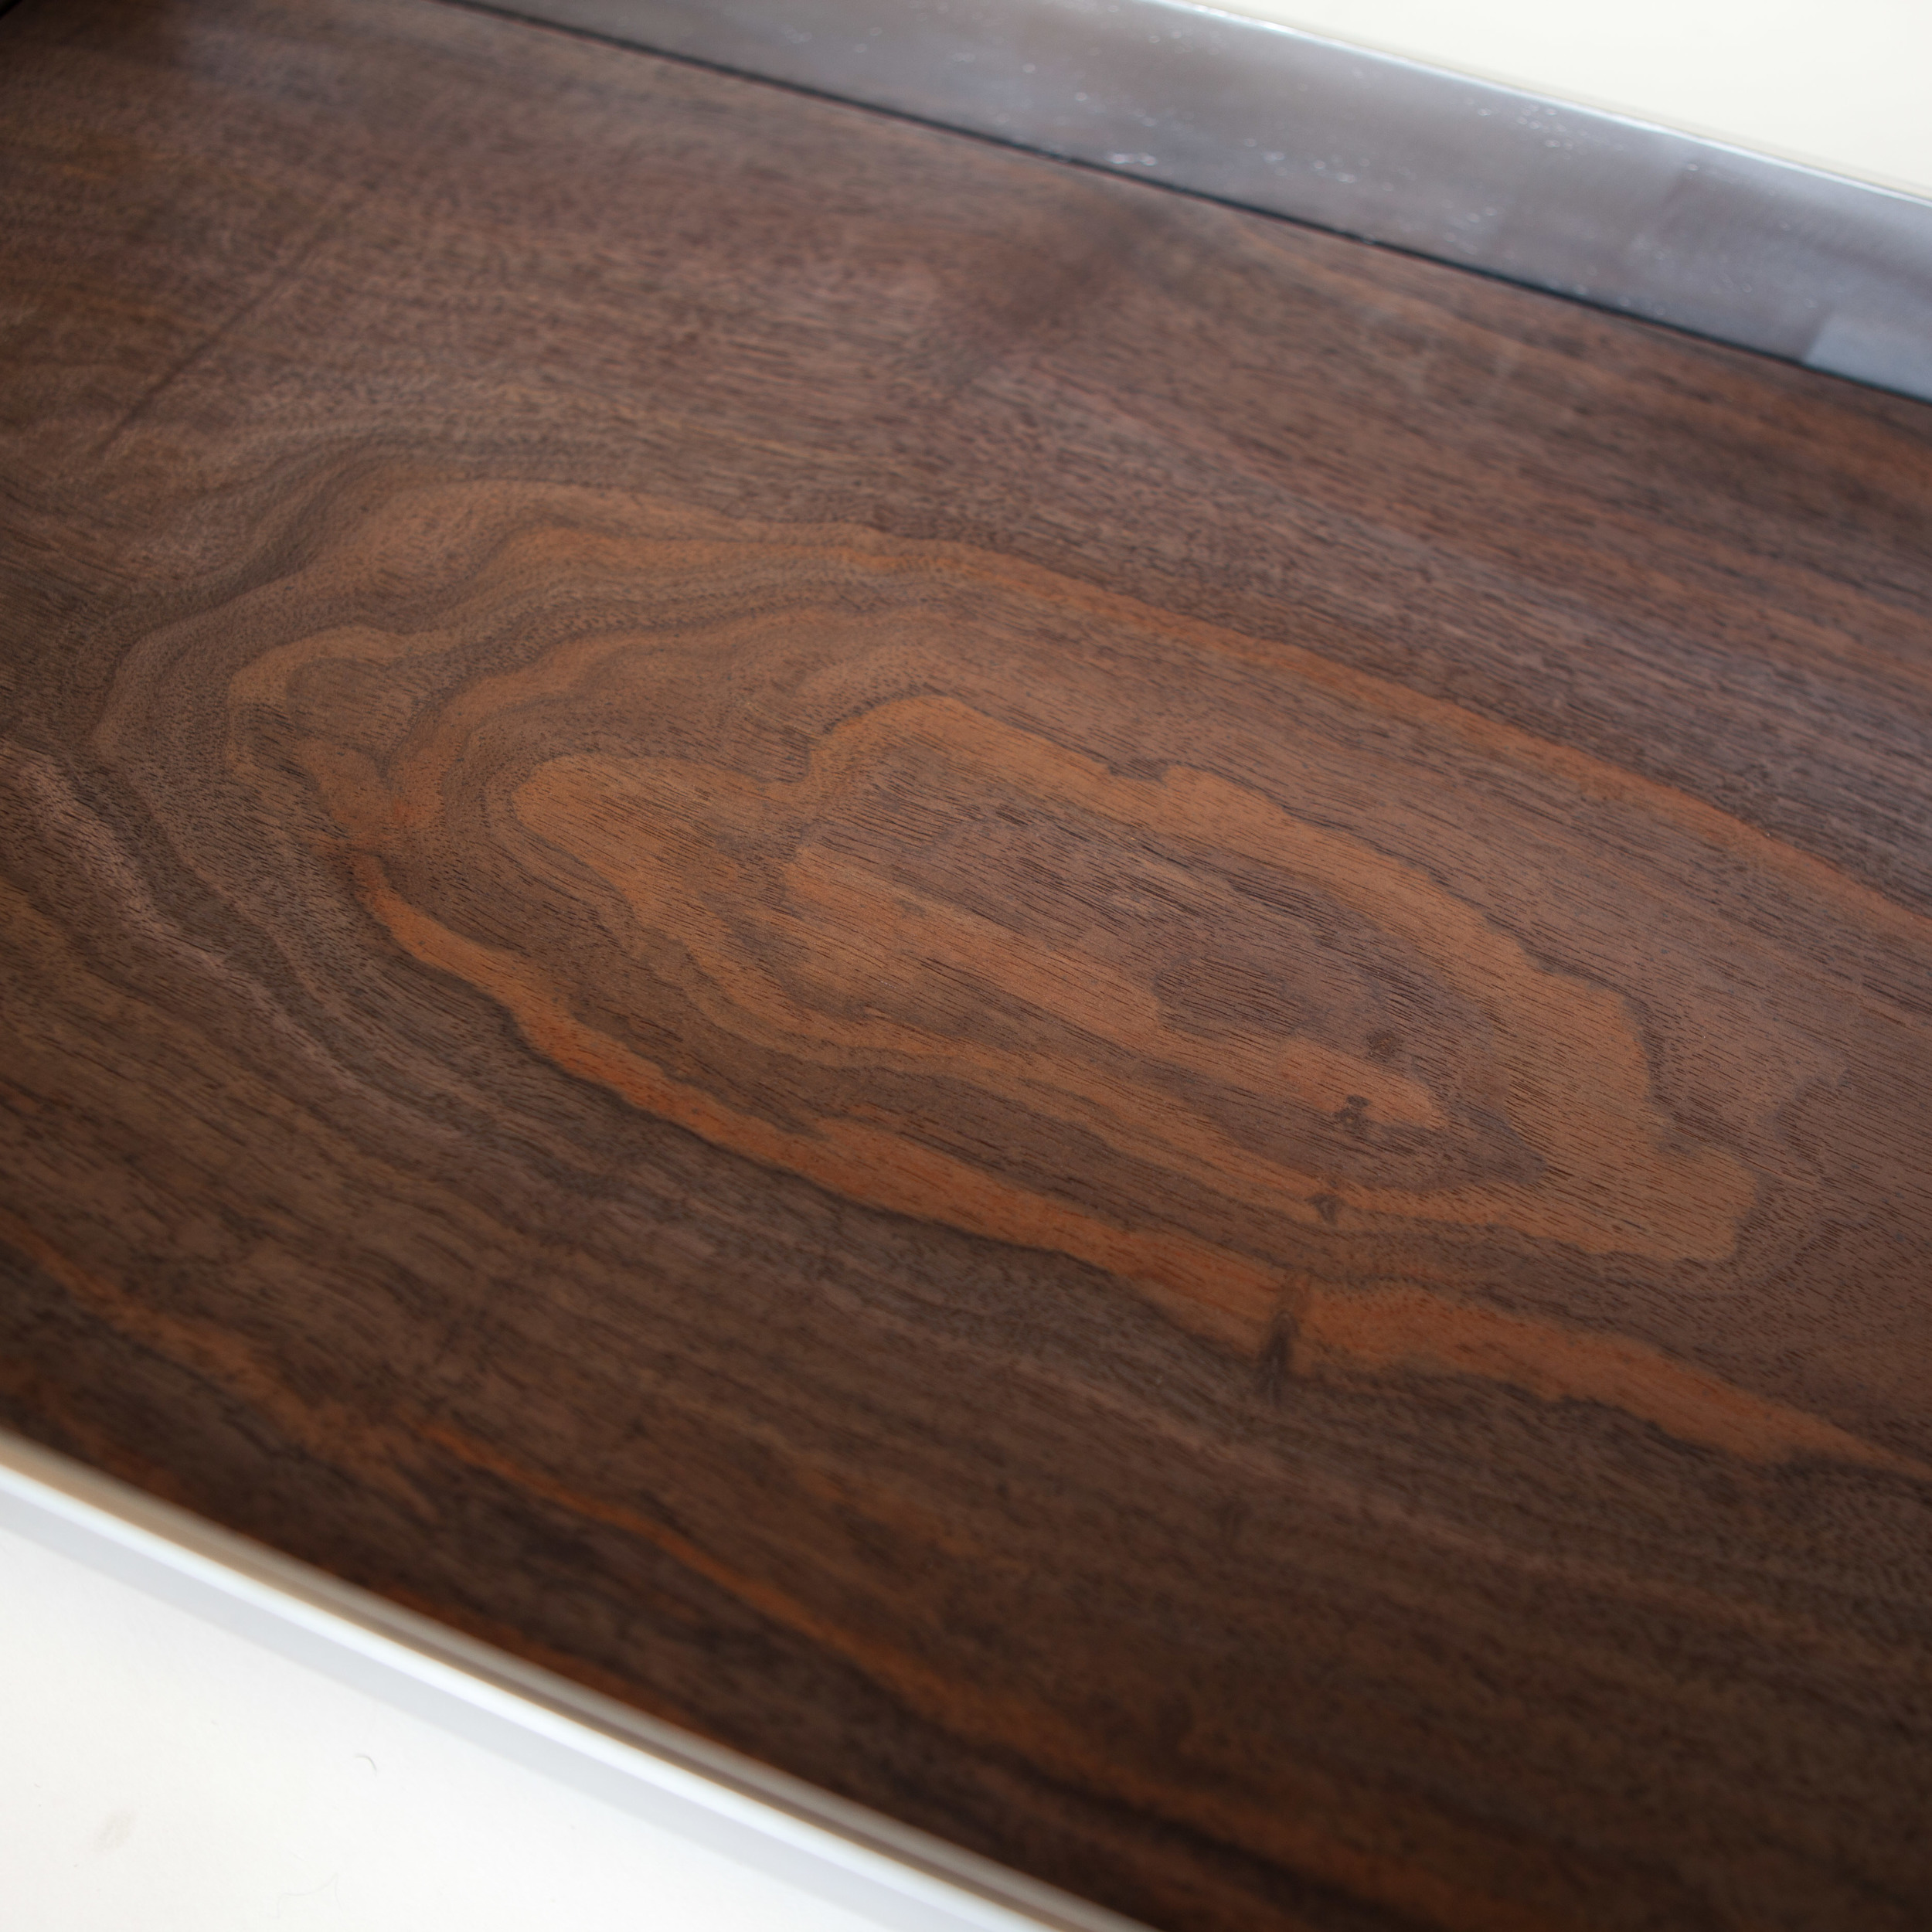
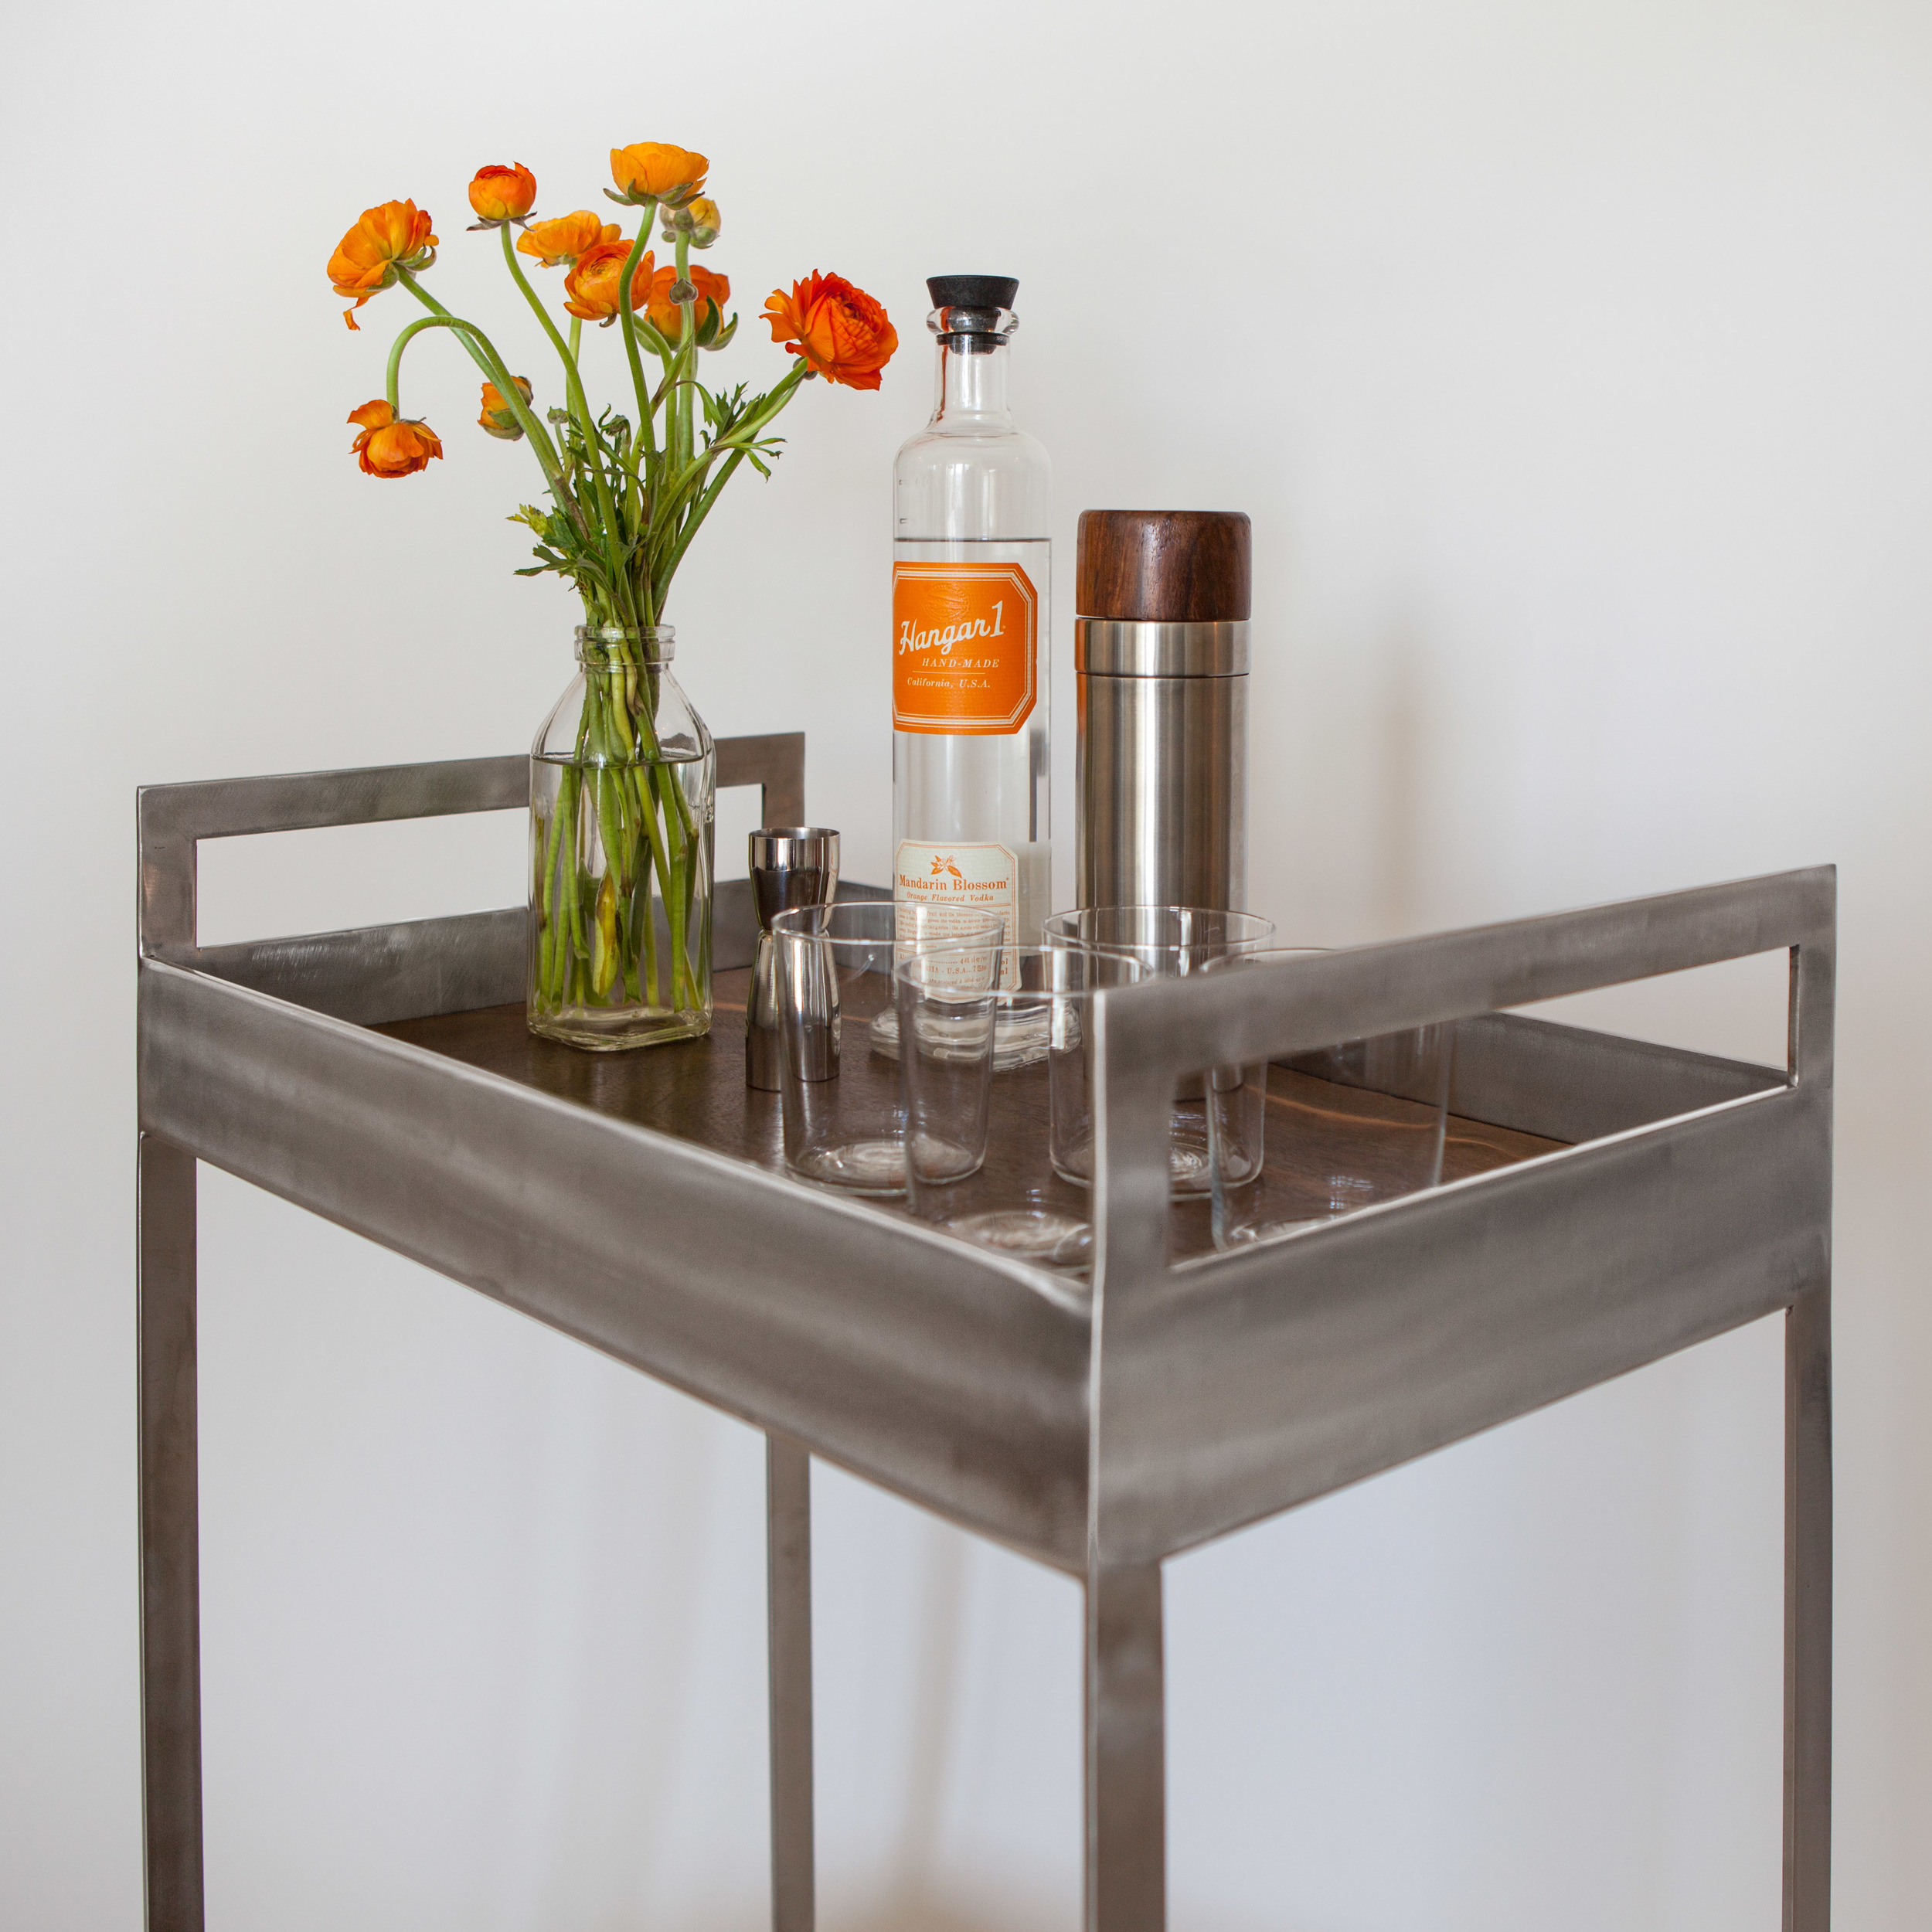
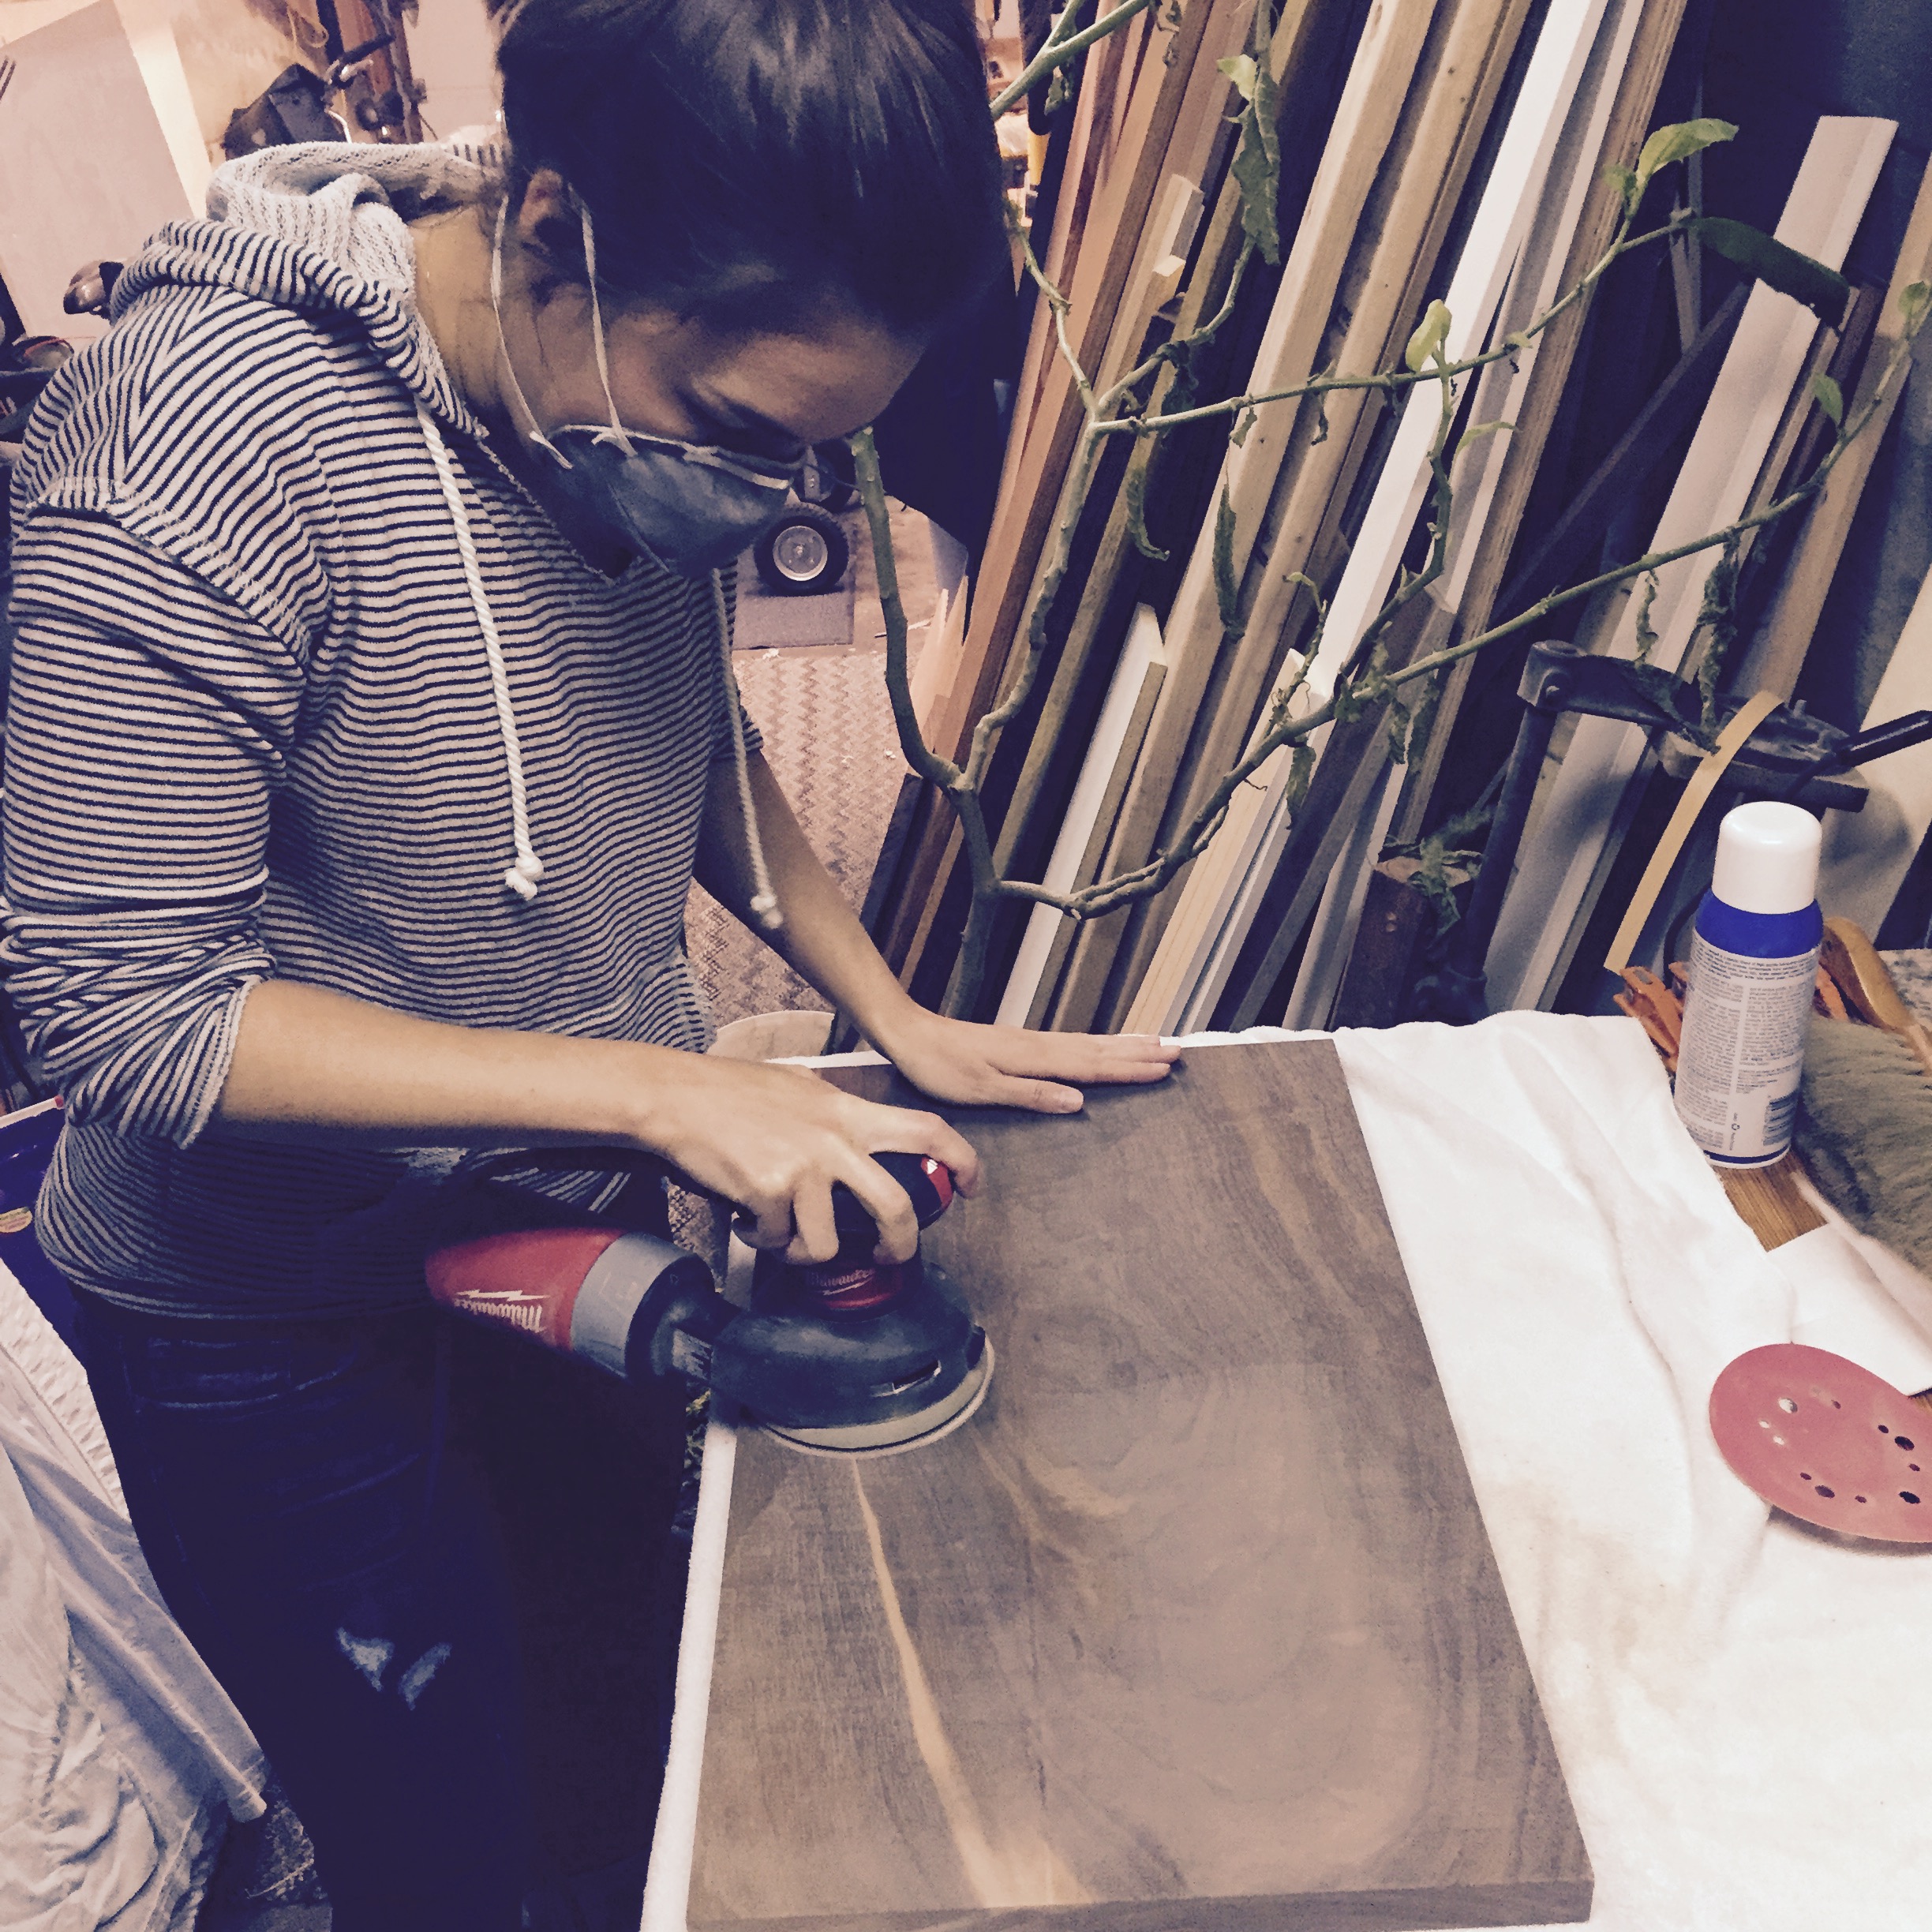
Caty hunted down a gorgeously marbled piece of solid Claro walnut while visiting family just outside of Jefferson, Oregon. Claro walnut is known for its striking figuring, often showing subtle intermixed colors of reds, browns, yellows, purples, and blacks in its grain. The piece chosen for the bar cart was no exception, with a lovely blond streak running through one of the pieces. Caty cut and sanded the walnut, increasing the grit until achieving a silky finish. In order to bring out the natural colors in the figuring of the wood, she finished the pieces with a few coats of ProFin, an oil-based finish -- no staining for this beauty!
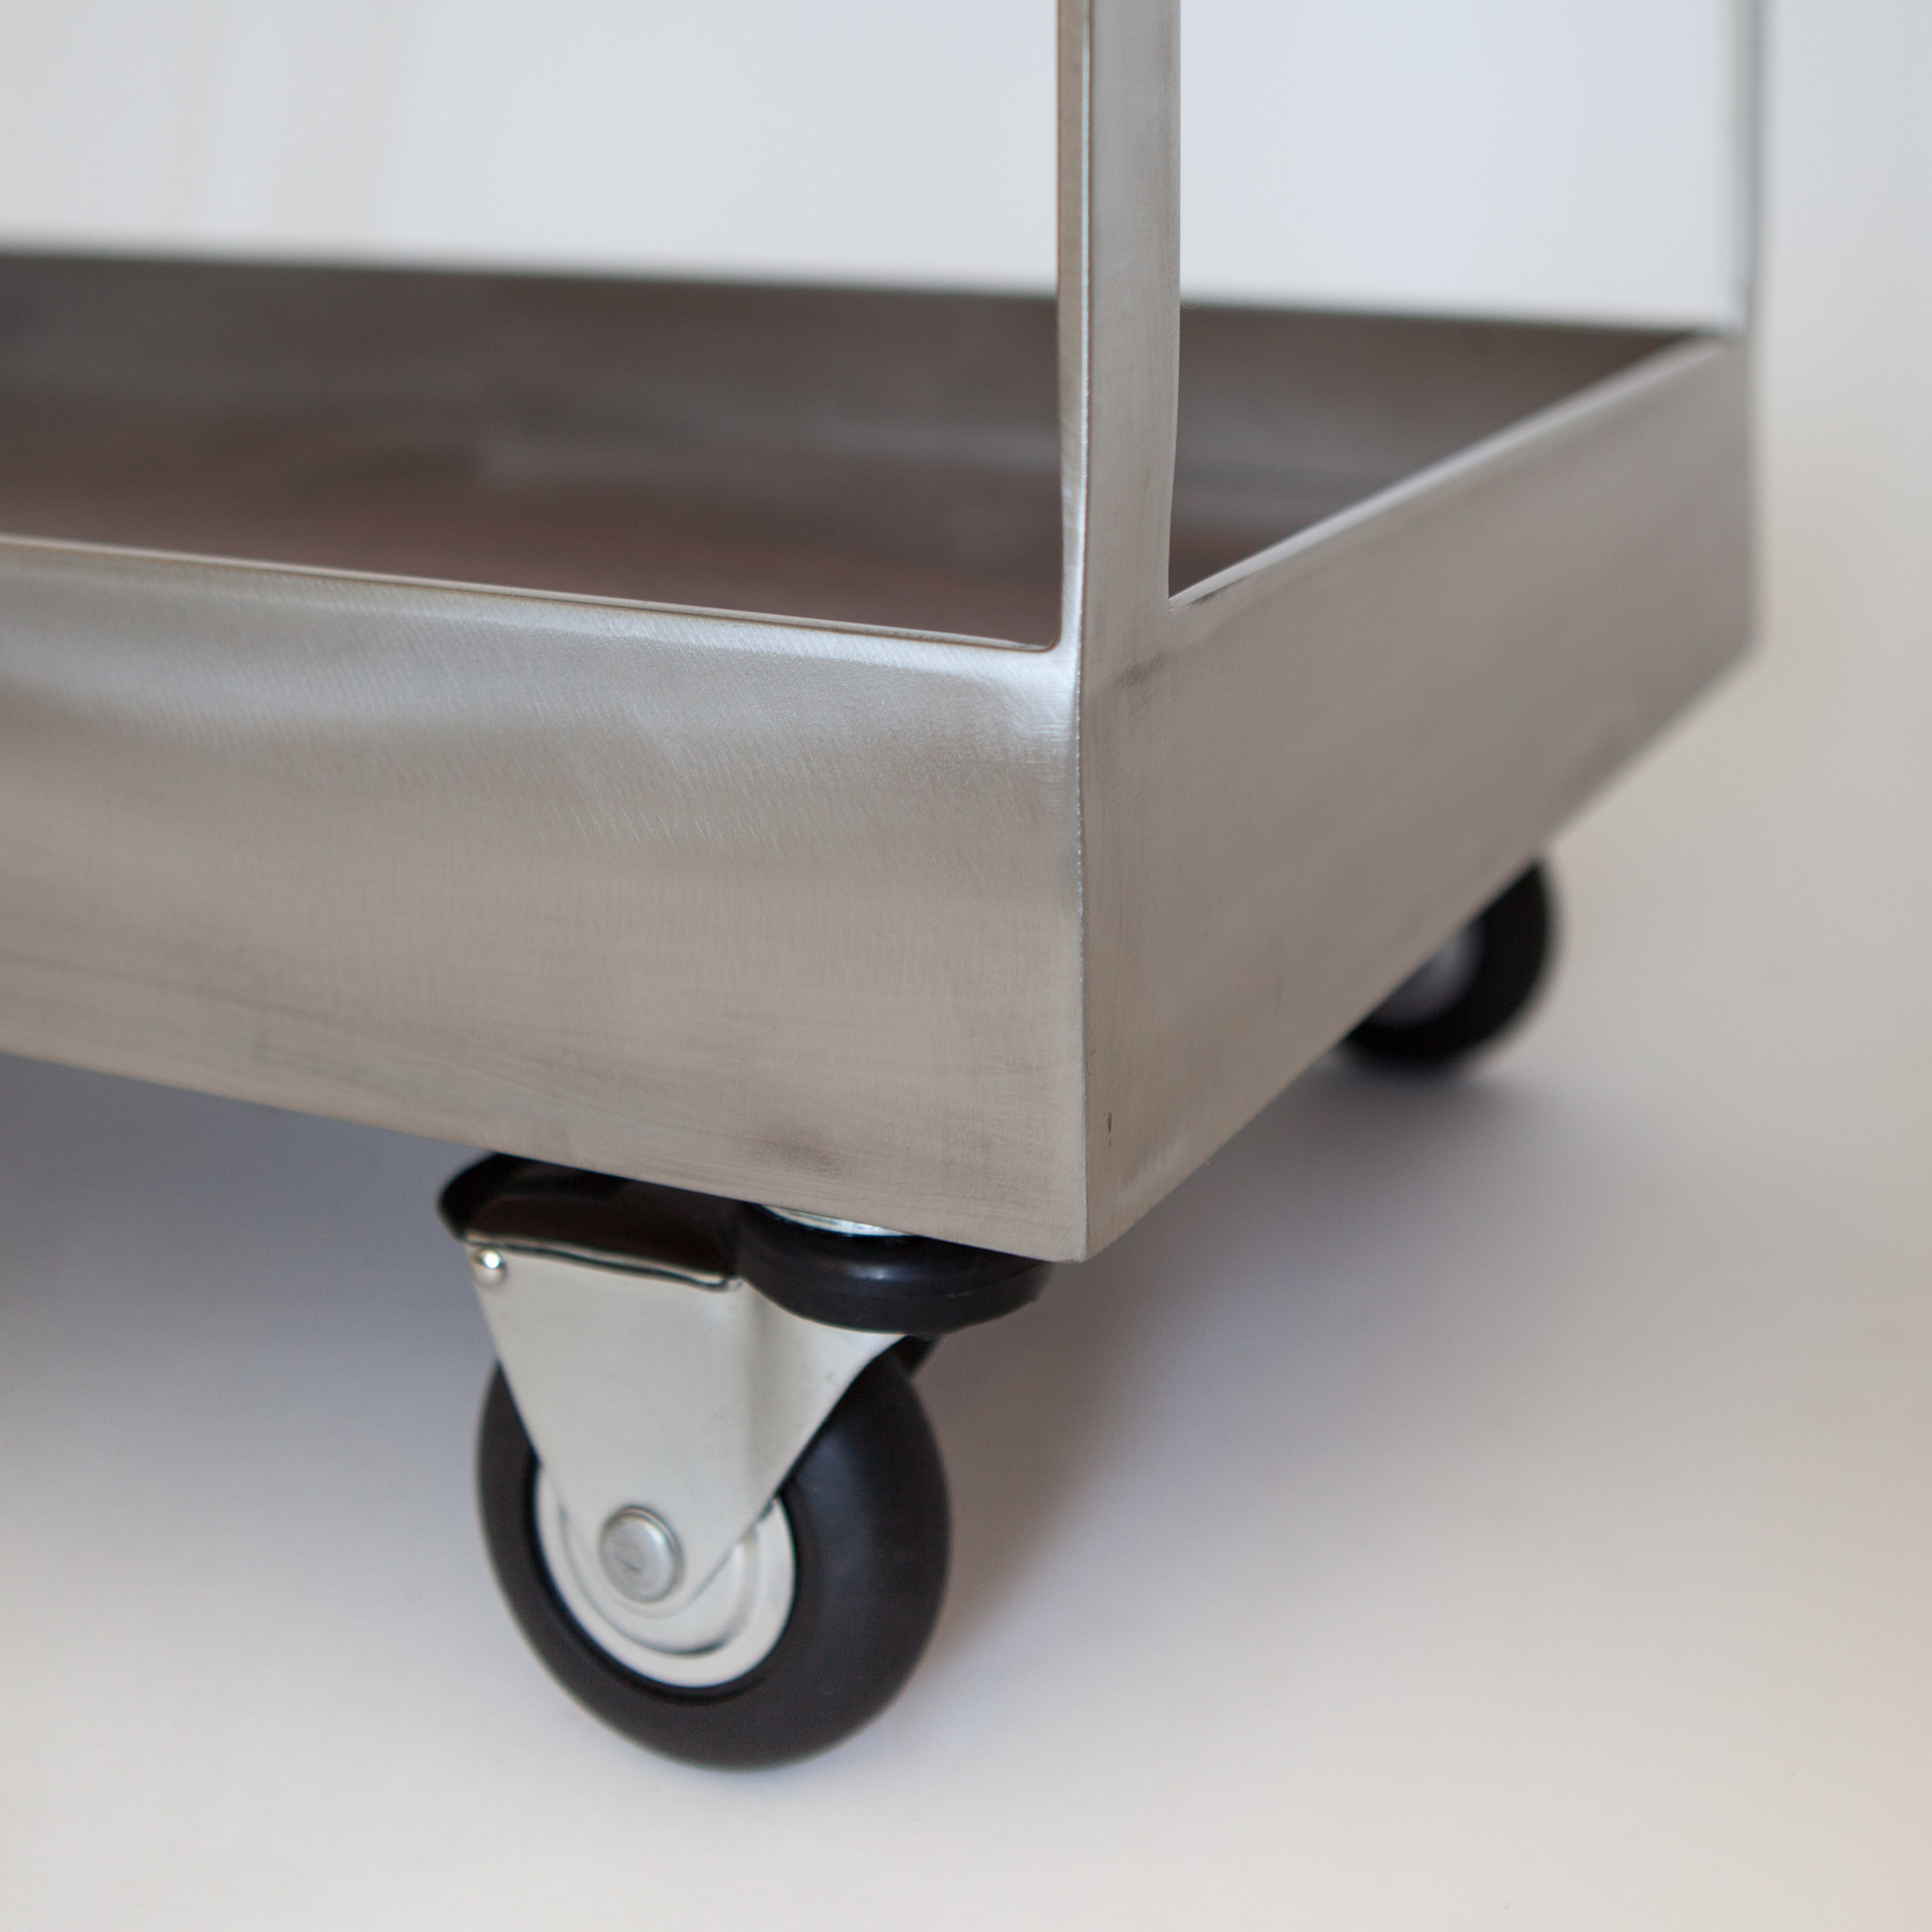
Meanwhile, I picked up a some stainless steel flatbar from my favorite woman-owned steel supplier. I cut the bar down to smaller lengths, ground down the ends a bit to create channels for welding, and then TIG welded the frame together. I sanded the entire surface with an angle grinder to create a lightly-textured satin finish. Finally, I welded the locking stainless steel casters to the frame, careful to not melt the rubber wheels.
After working on our respective pieces, Caty and I met up for dinner to join the metal and the wood. It was magical seeing it finally come together!
Here are some behind-the-scenes photos Caty and I took throughout the process of designing and building the cart:


Caty and I had so much fun making the Claro Cart together, and we hope you like it. It's available for purchase in the Elektra Steel shop for $1800. It will also be on display at The Crucible's Spring Open House this Saturday, April 11, 2015, from 12-5pm. Cheers!
Geo Bowl Instructable
I just published my very first Instructable! I did a super detailed instructional write-up of how I made those geo bowls, complete with dozens of process photos and videos. Unlike the blog post I wrote a few weeks ago about the bowls, the Instructable is geared at my fellow metalworkers -- I nerd out about TIG filler rod thickness, how to weld without clamps or vice grips, and the advantages to waxing stainless steel.
Are you a metalworker? Check out the Instructable -- I'm curious to hear your feedback, questions, and tips!

Fifteen Centerpiece Geo Bowls
I spent the last two weeks designing and fabricating 15 custom geometric bowls for a global tech company based in San Francisco. Their annual client and developer conference is coming up in a few days, and the bowls will be used as table centerpieces.
A friend on their events team had seen a photo of the geo planter I made a few months ago, and reached out to see if the design could be customized for their needs. I'd never done a production run this large before, but I was excited for the challenge.
Here's how I made the bowls!
First, I created a 3D model of the design in SketchUp. I started with a dodecahedron (my favorite platonic solid) and modified it to create an open, faceted bowl. As soon as I got the thumbs-up from the client, it was time to waterjet cut the pieces. I used Adobe Illustrator to create a vector line drawing of all of the pieces that I'd need to cut out of stainless steel sheet.
The last time I made a piece like this, I did all the waterjet cutting myself, which was time-consuming because I was still learning. Due to the scale of this project, I decided to outsource the cutting. So glad I did! The company I used, Triton Waterjet, was super pro -- clean edges, no burrs or tabs, flawless steel, and quick turnaround time. Here are one hundred pounds of beautiful pentagons, ready to go:
And then the welding marathon began! I started by tacking the faces together at each vertex. A number of metalworkers have asked me how I clamp down the pieces for this type of project. I actually don't use clamps or jigs at all. Instead, I just prop up the pieces on a block -- or even hold them together with my gloved hands -- and do a quick flash-tack to join the pieces. Then I bend the pieces into the correct angle before continuing to weld.
Once the form was tacked together, it was time to weld all the edges. TIG welding is my absolute favorite part of metalworking, and I was thrilled when the moment finally arrived to lay down a bead. And then another one. And then another one. And then another one...
Stainless steel is one of my favorite metals to work with because it welds cleanly and makes shimmery rainbows patterns.
Here's what the bowl looked like after welding all the edges.
For those of you who are really curious about this whole process, here's a four-minute time-lapse video of me tacking and welding a bowl.

Aaaannnd repeat x15!
It was both luxurious and exhausting doing nothing but weld all day long. I welded all fifteen bowls in two and a half days, which is definitely some sort of personal record. What's interesting is how much I improved over the course of the project: When I made the initial prototype, the welding took me six hours (lots of trial and error!). Bowl number one took two and a half hours to weld (better, but still learning). By bowl number four, I'd gotten it down to 40 minutes (I'm a machine!!). I learned a lot about efficiency and scale with this project!
Once the bowls were assembled, it was time for sanding and buffing. I like this step because it's like the big reveal -- I finally get to see the sharp jumble of sheet metal transformed into the lovely and smooth piece I'd envisioned in my mind. For sanding and buffing, a variable-speed angle grinder is my best friend. I started with an 80-grit flapwheel disc to sand down the welds, and then went over the entire outer surface with a Scotch-Brite disc to give it a satiny sheen.
Here's a time-lapse video of me sanding and buffing a bowl. It shortens 45 minutes of elbow grease into a snappy 35 seconds.

Not gonna lie, I was physically exhausted after sanding all 15 bowls. The weight, vibrations, and centrifugal force of the angle grinder did a number on my forearms and hands. My neck ached from bending over, and I was covered in a fine layer of metal dust at the end of each day. It was a relief to finally move on from this stage!
For the last step, I gave each bowl a coat of clear metal wax, which hardens and cures after being buffed. A protective sealant isn't really necessary for stainless steel, as it won't rust or tarnish, but I like the way wax looks. It gives the piece a little extra sheen, and it keeps fingerprints from appearing on the surface.
Here's a close-up of the bottom of a bowl, on which I'd stamped my company name, letter by letter. I had recently gotten coffee with Meyghan Hill from Whorehaus Studios (she's a kickass LA-based designer, welder, and business woman), and when chatting about this project, she insisted that I mark each piece with my company name -- brilliant. I immediately ordered metal alphabet stamps for myself. Thank you for the tip, Meyghan!
And here's a photo of the bowl at the conference!
Time-Lapse Sanding
I took a time-lapse video of me sanding down one of the stainless steel bowls I welded earlier this week. First I used a variable-speed angle grinder with an 80-grit flapwheel disc to sand down the welds. Then used a Scotch-Brite disc to buff the entire outside of the bowl to a lovely, satin finish. This speedy, 35-second video captures 45 minutes of elbow grease!

Time-Lapse TIG Welding
This week, I'm making 15 stainless steel centerpiece bowls for a tech company's annual conference. This is the largest production run I've done so far. It took me two and a half hours to weld the first bowl together, but by bowl number six, I'd gotten it down to 40 minutes. Here's a four-minute time-lapse video I made of me welding one bowl at 12x speed.

Photo Editing with Lightroom
It took two solid days to narrow down my 1000+ photos down to ten, but I did it. And after that was done, I spent another three days obsessively tweaking the contrast, exposure, whites, blacks, highlights, and shadows using Lightroom. For someone who's detail-oriented and has a perfectionist streak, I could have easily just disappeared down the rabbit hole. But! It's time to post the photos and move on with my life. I have things to make!
Here's a before-and-after example of the kind of photo editing I was doing:
Pretty amazing how some basic adjustments can bring a dull photo to life.
And without further ado, here are the final photos!
I still don't feel like the photos are perfect yet -- feel free comment if you have suggestions or advice! -- but they're good enough for now. I still have a lot to learn about product photography and photo editing, but I'm excited to have added both abilities to my skill set! If anyone is interested in doing the same, I highly recommend the online tutorials on Lynda. Thanks, Jen and Phil, for the tip!
Crash Course in Product Photography
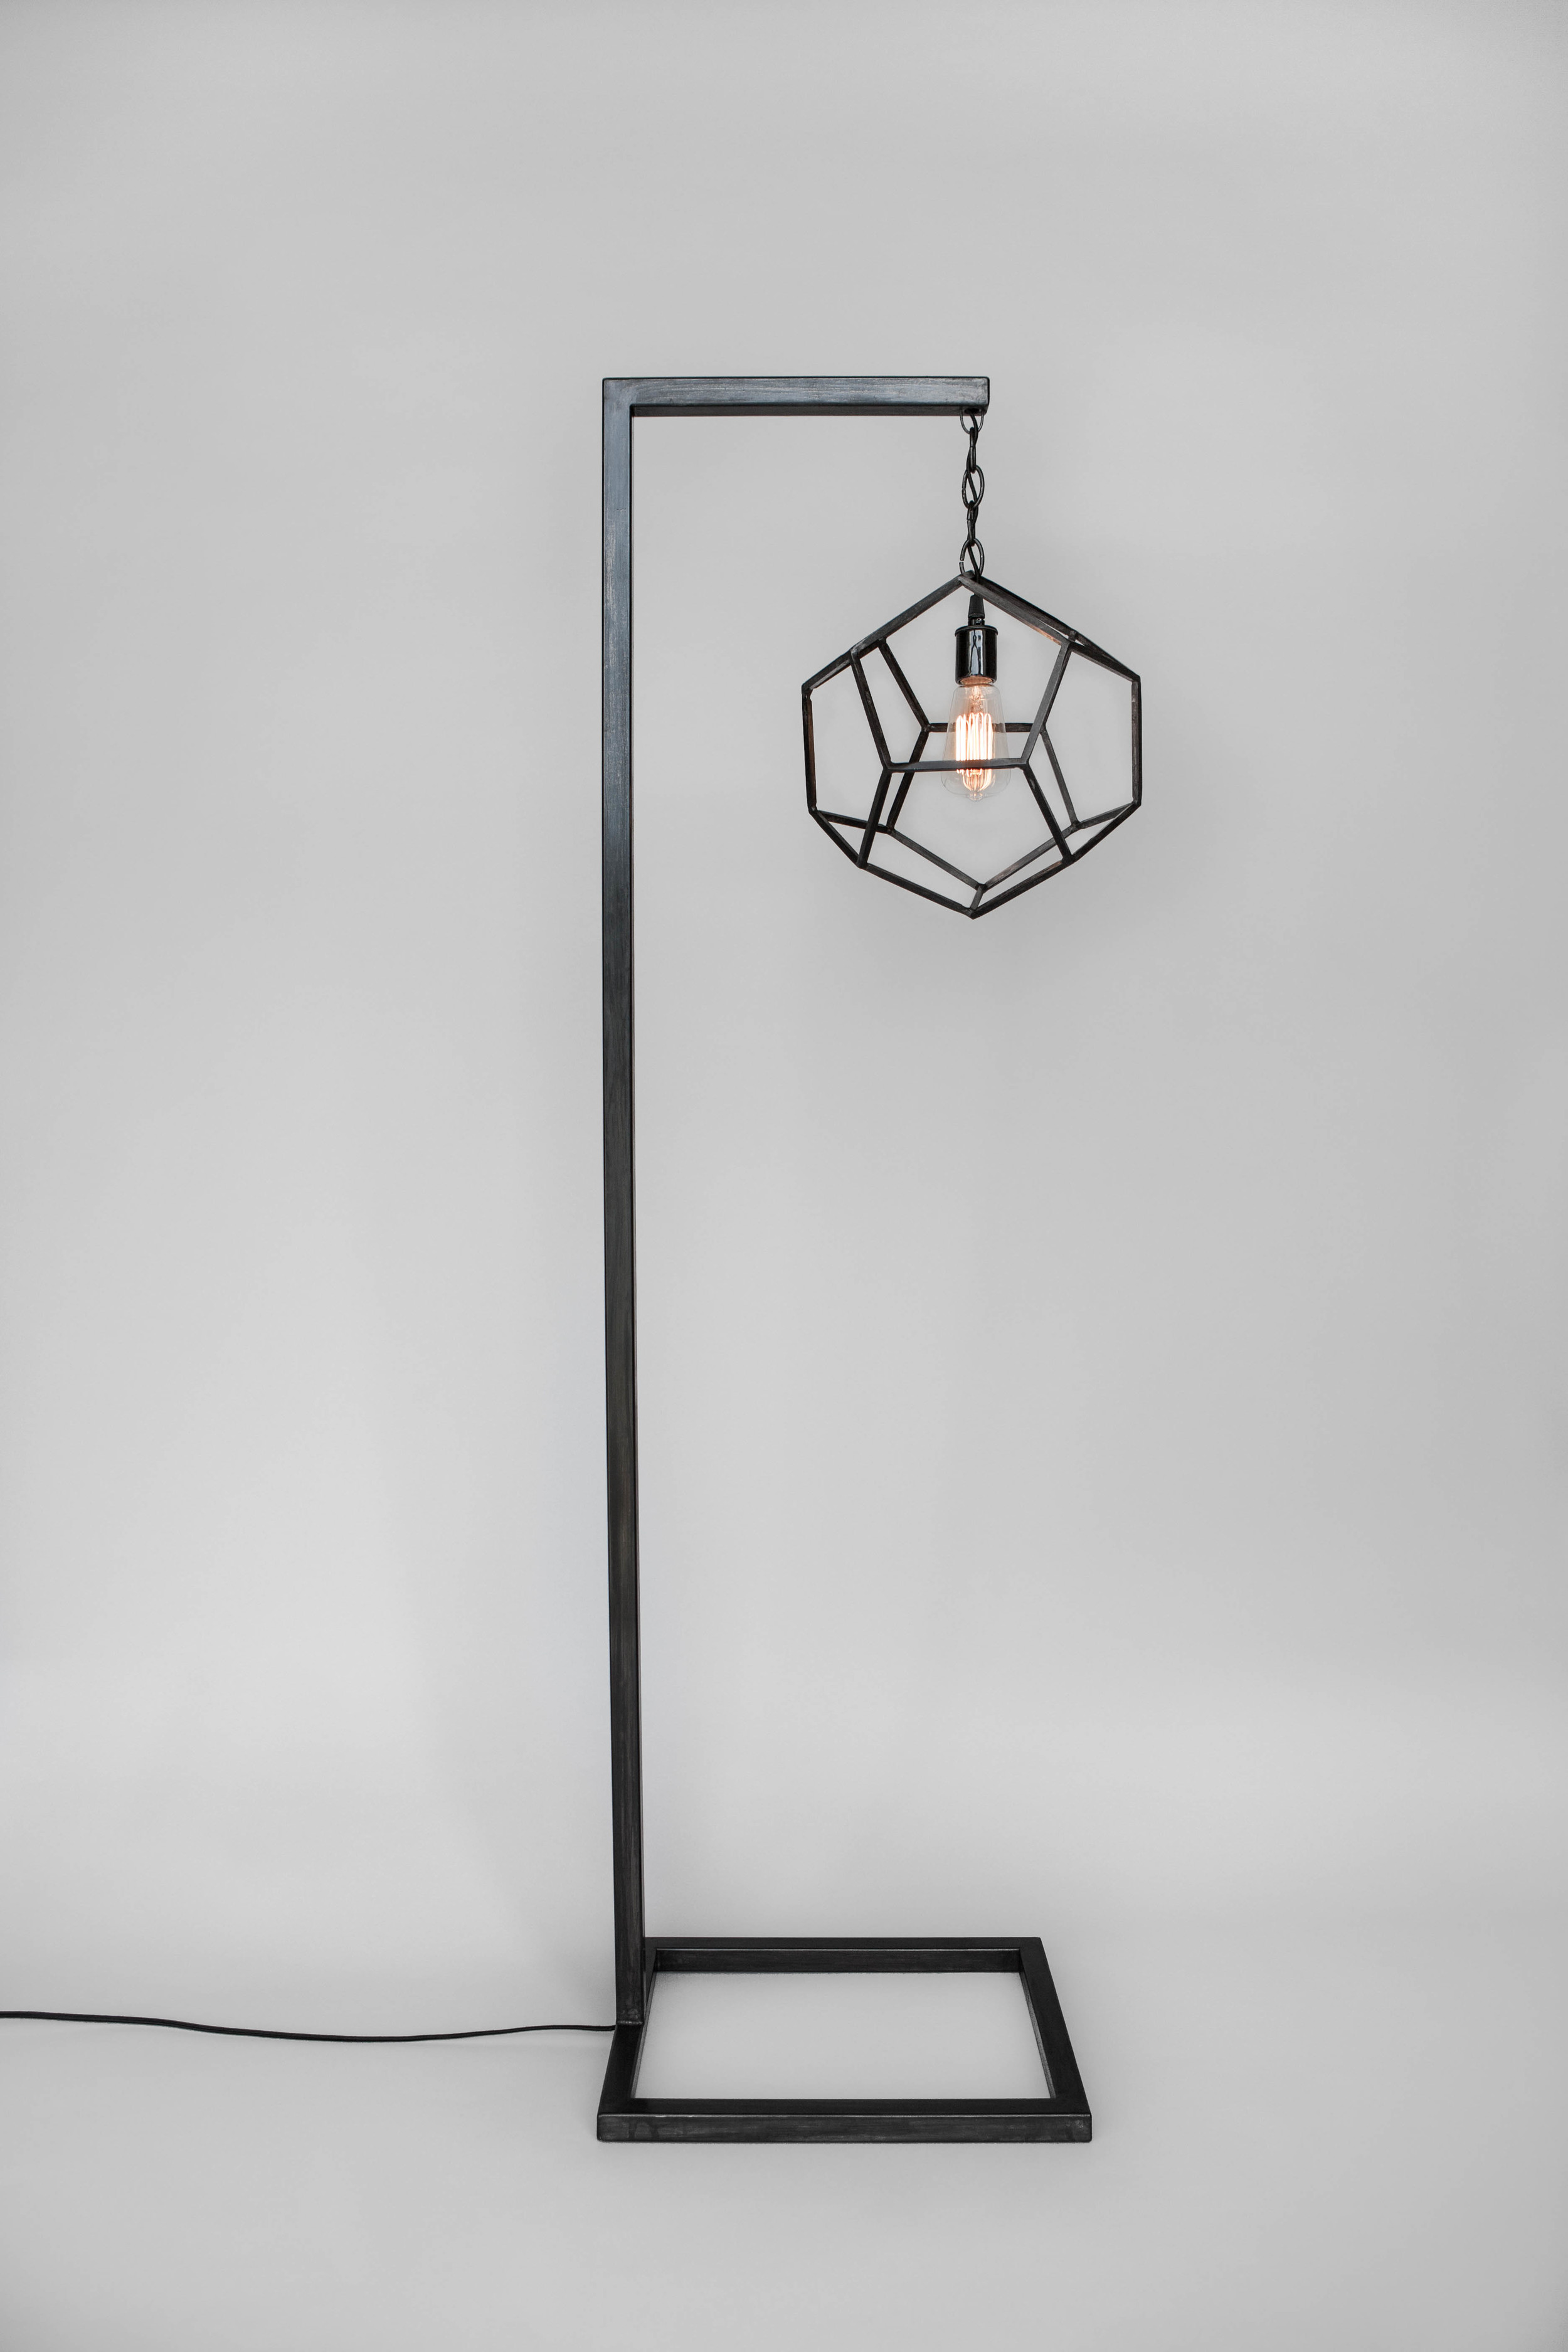
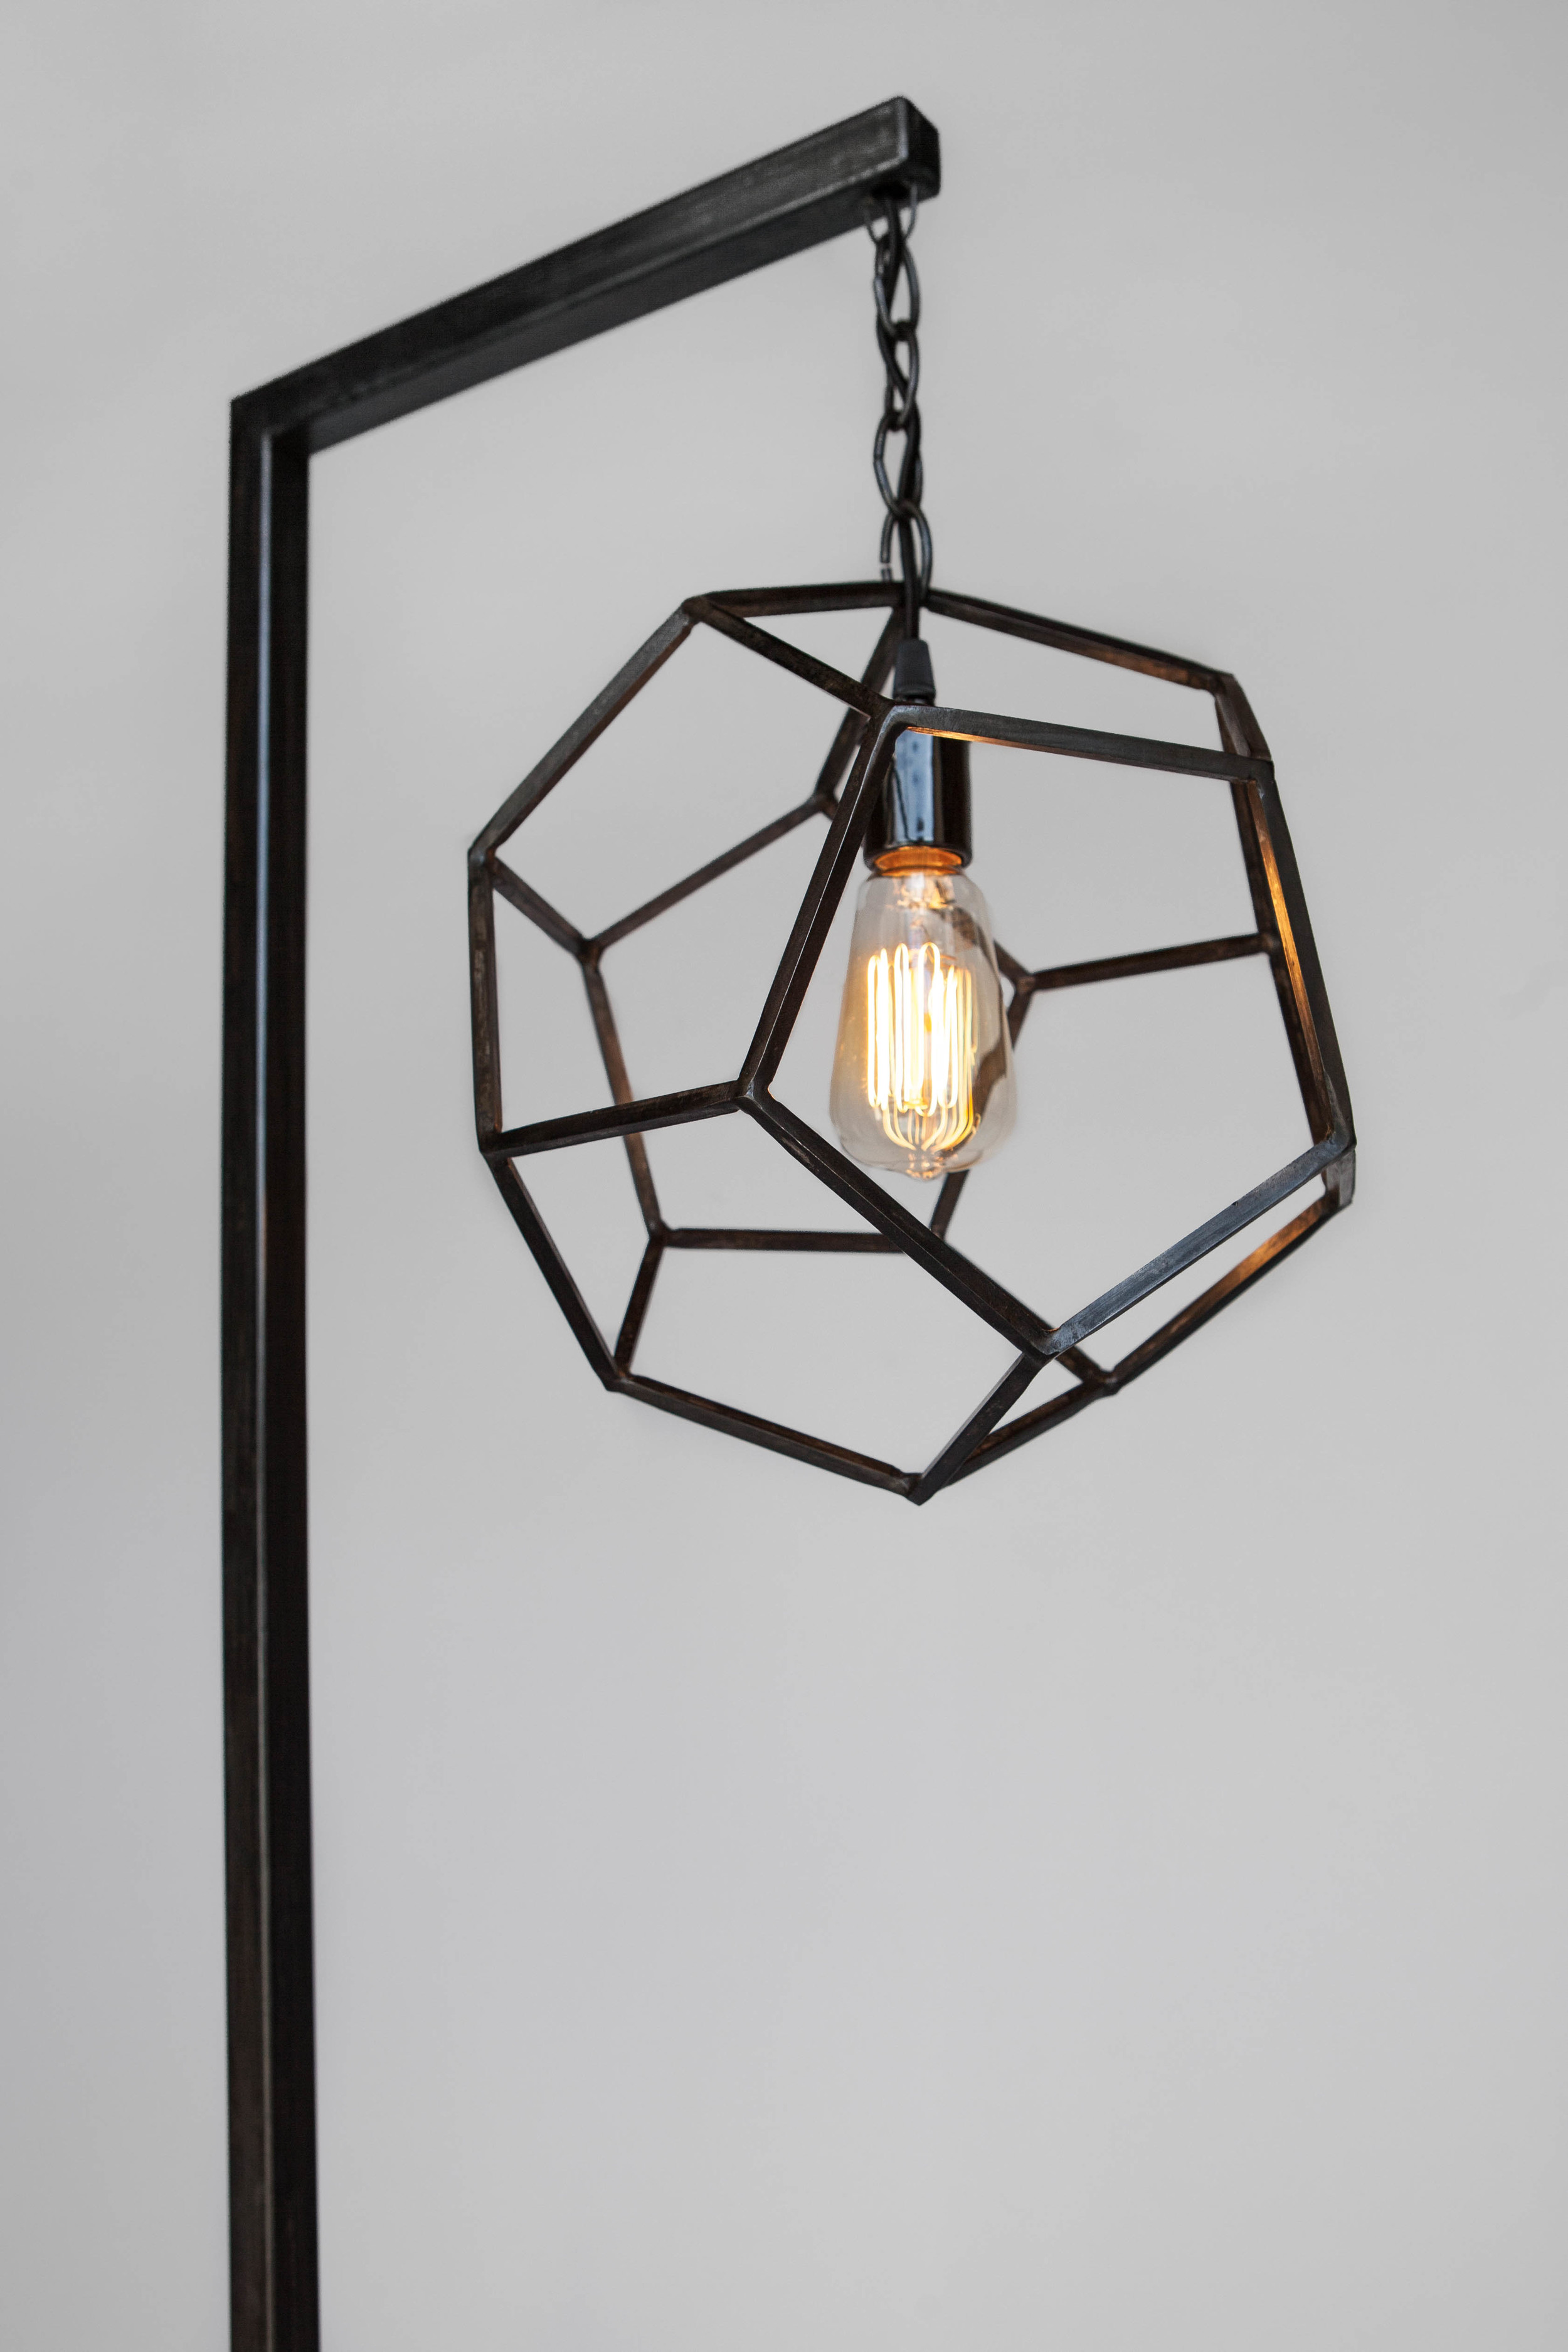
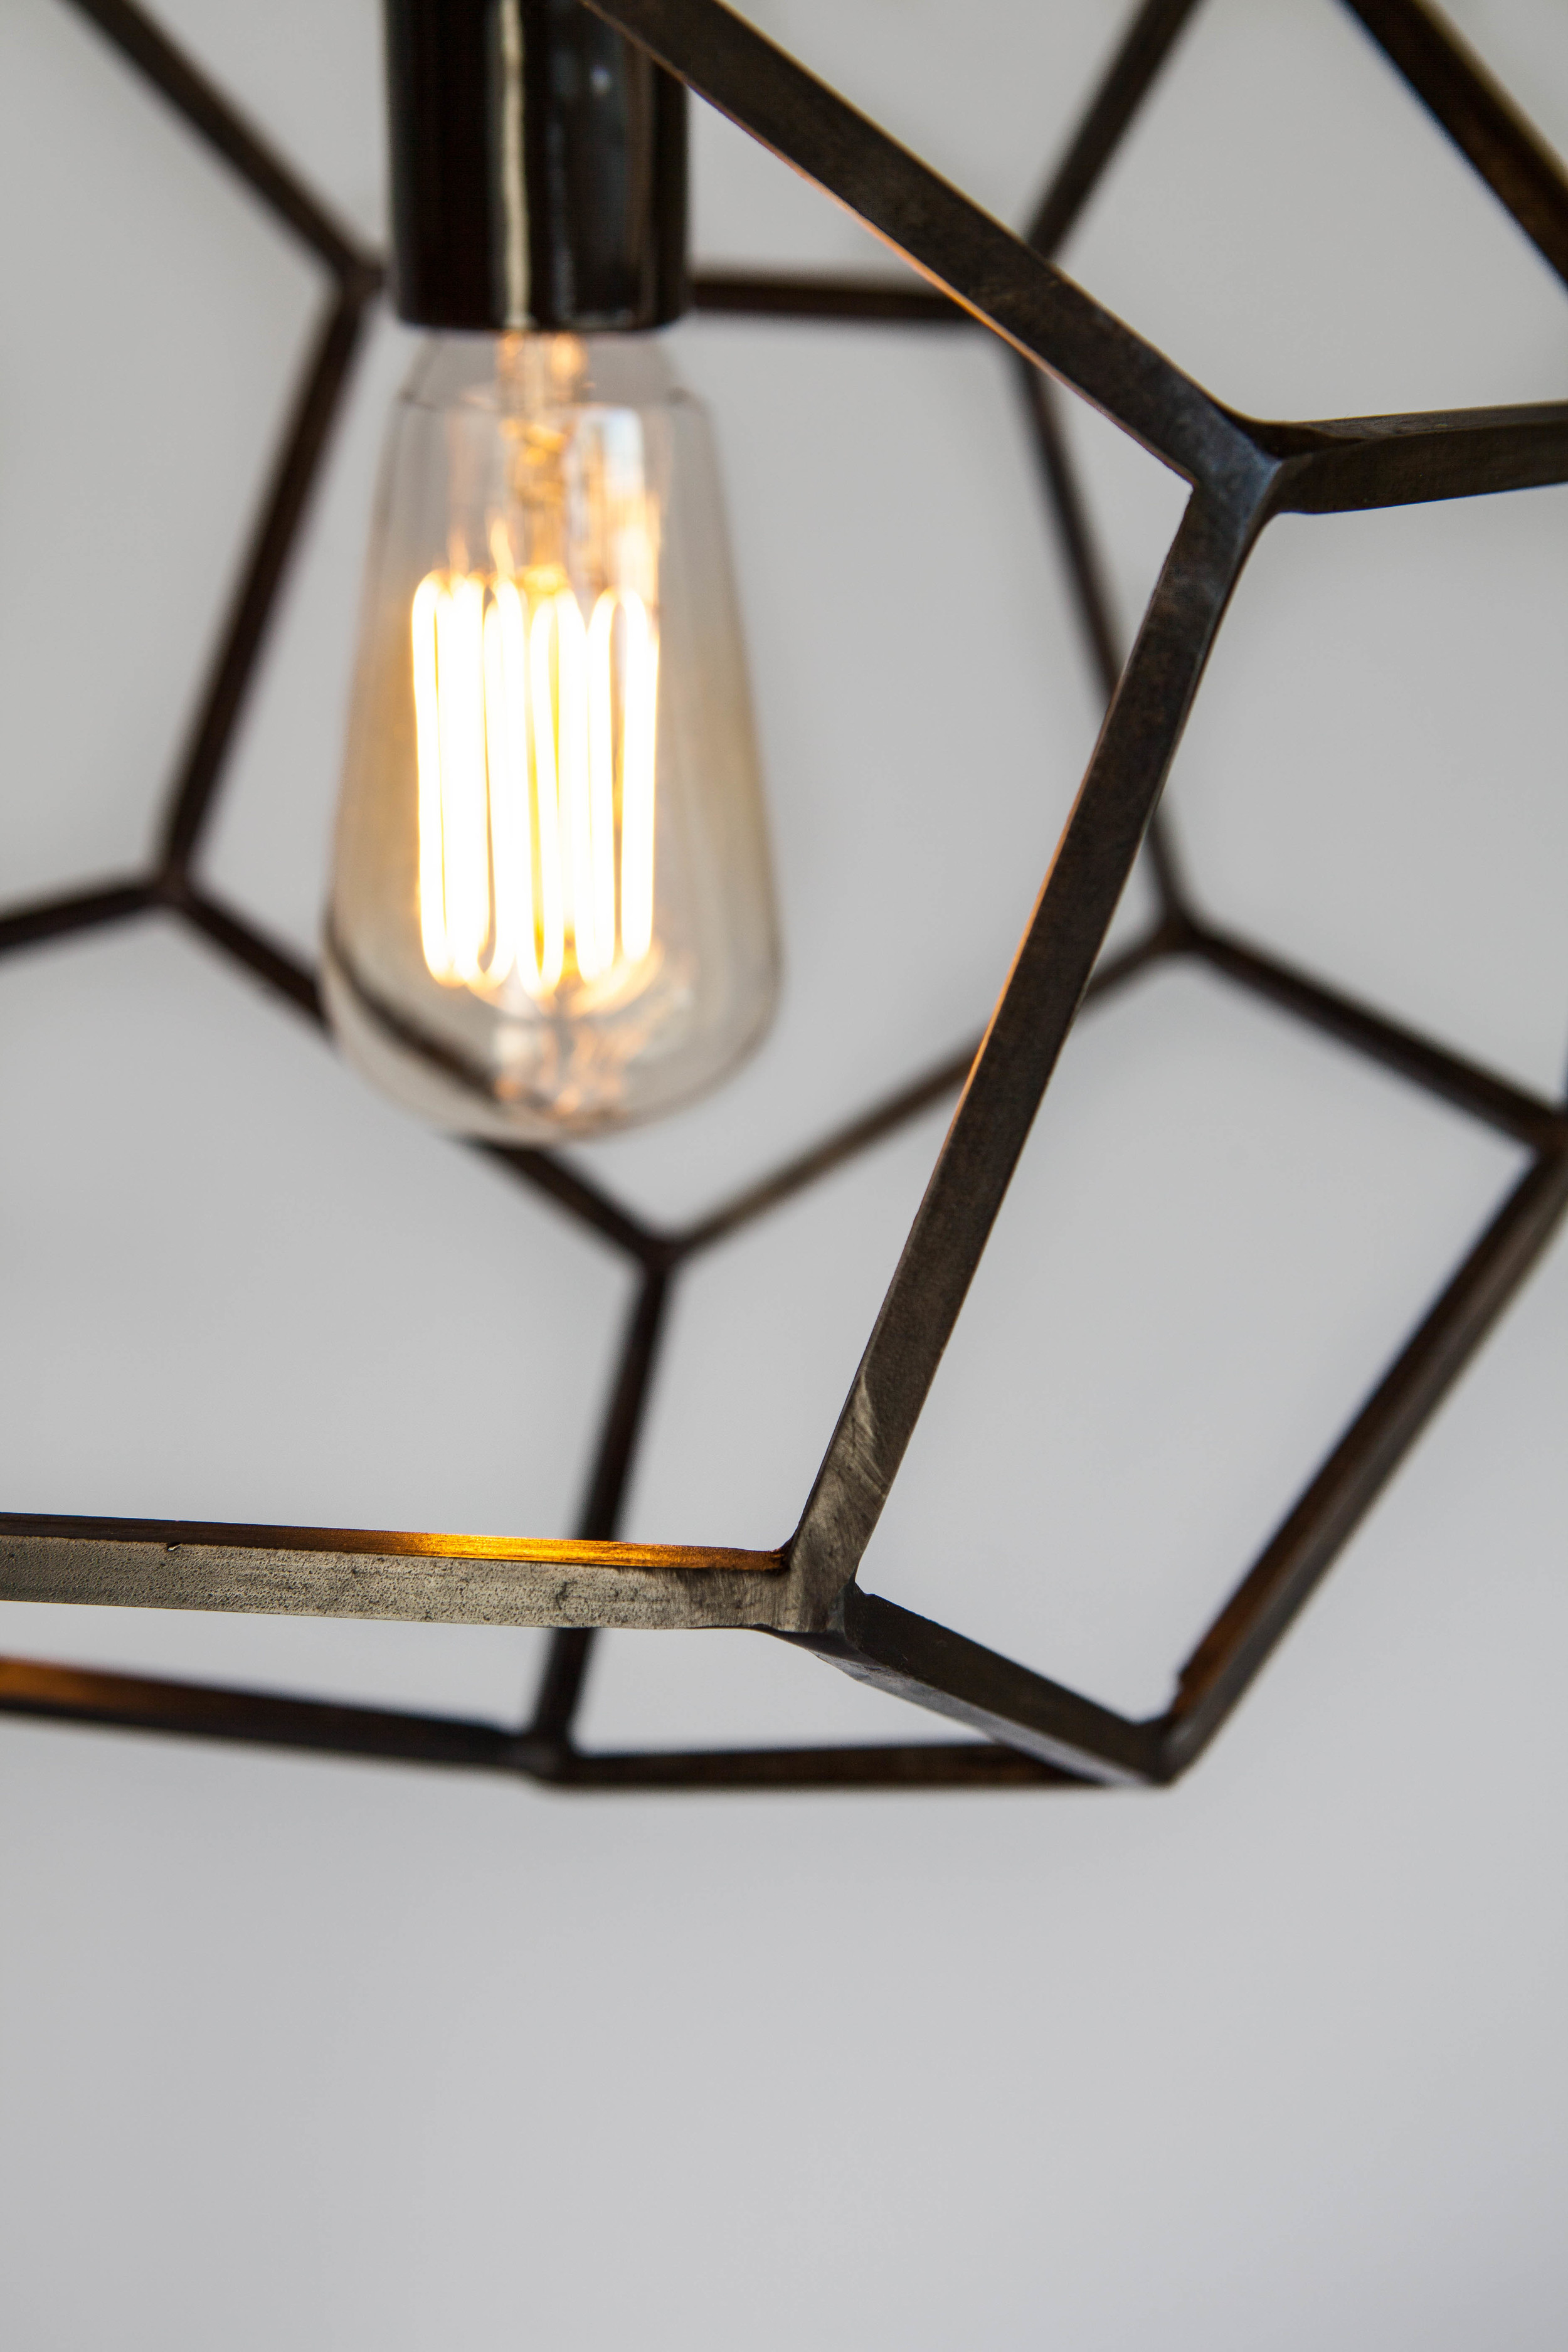
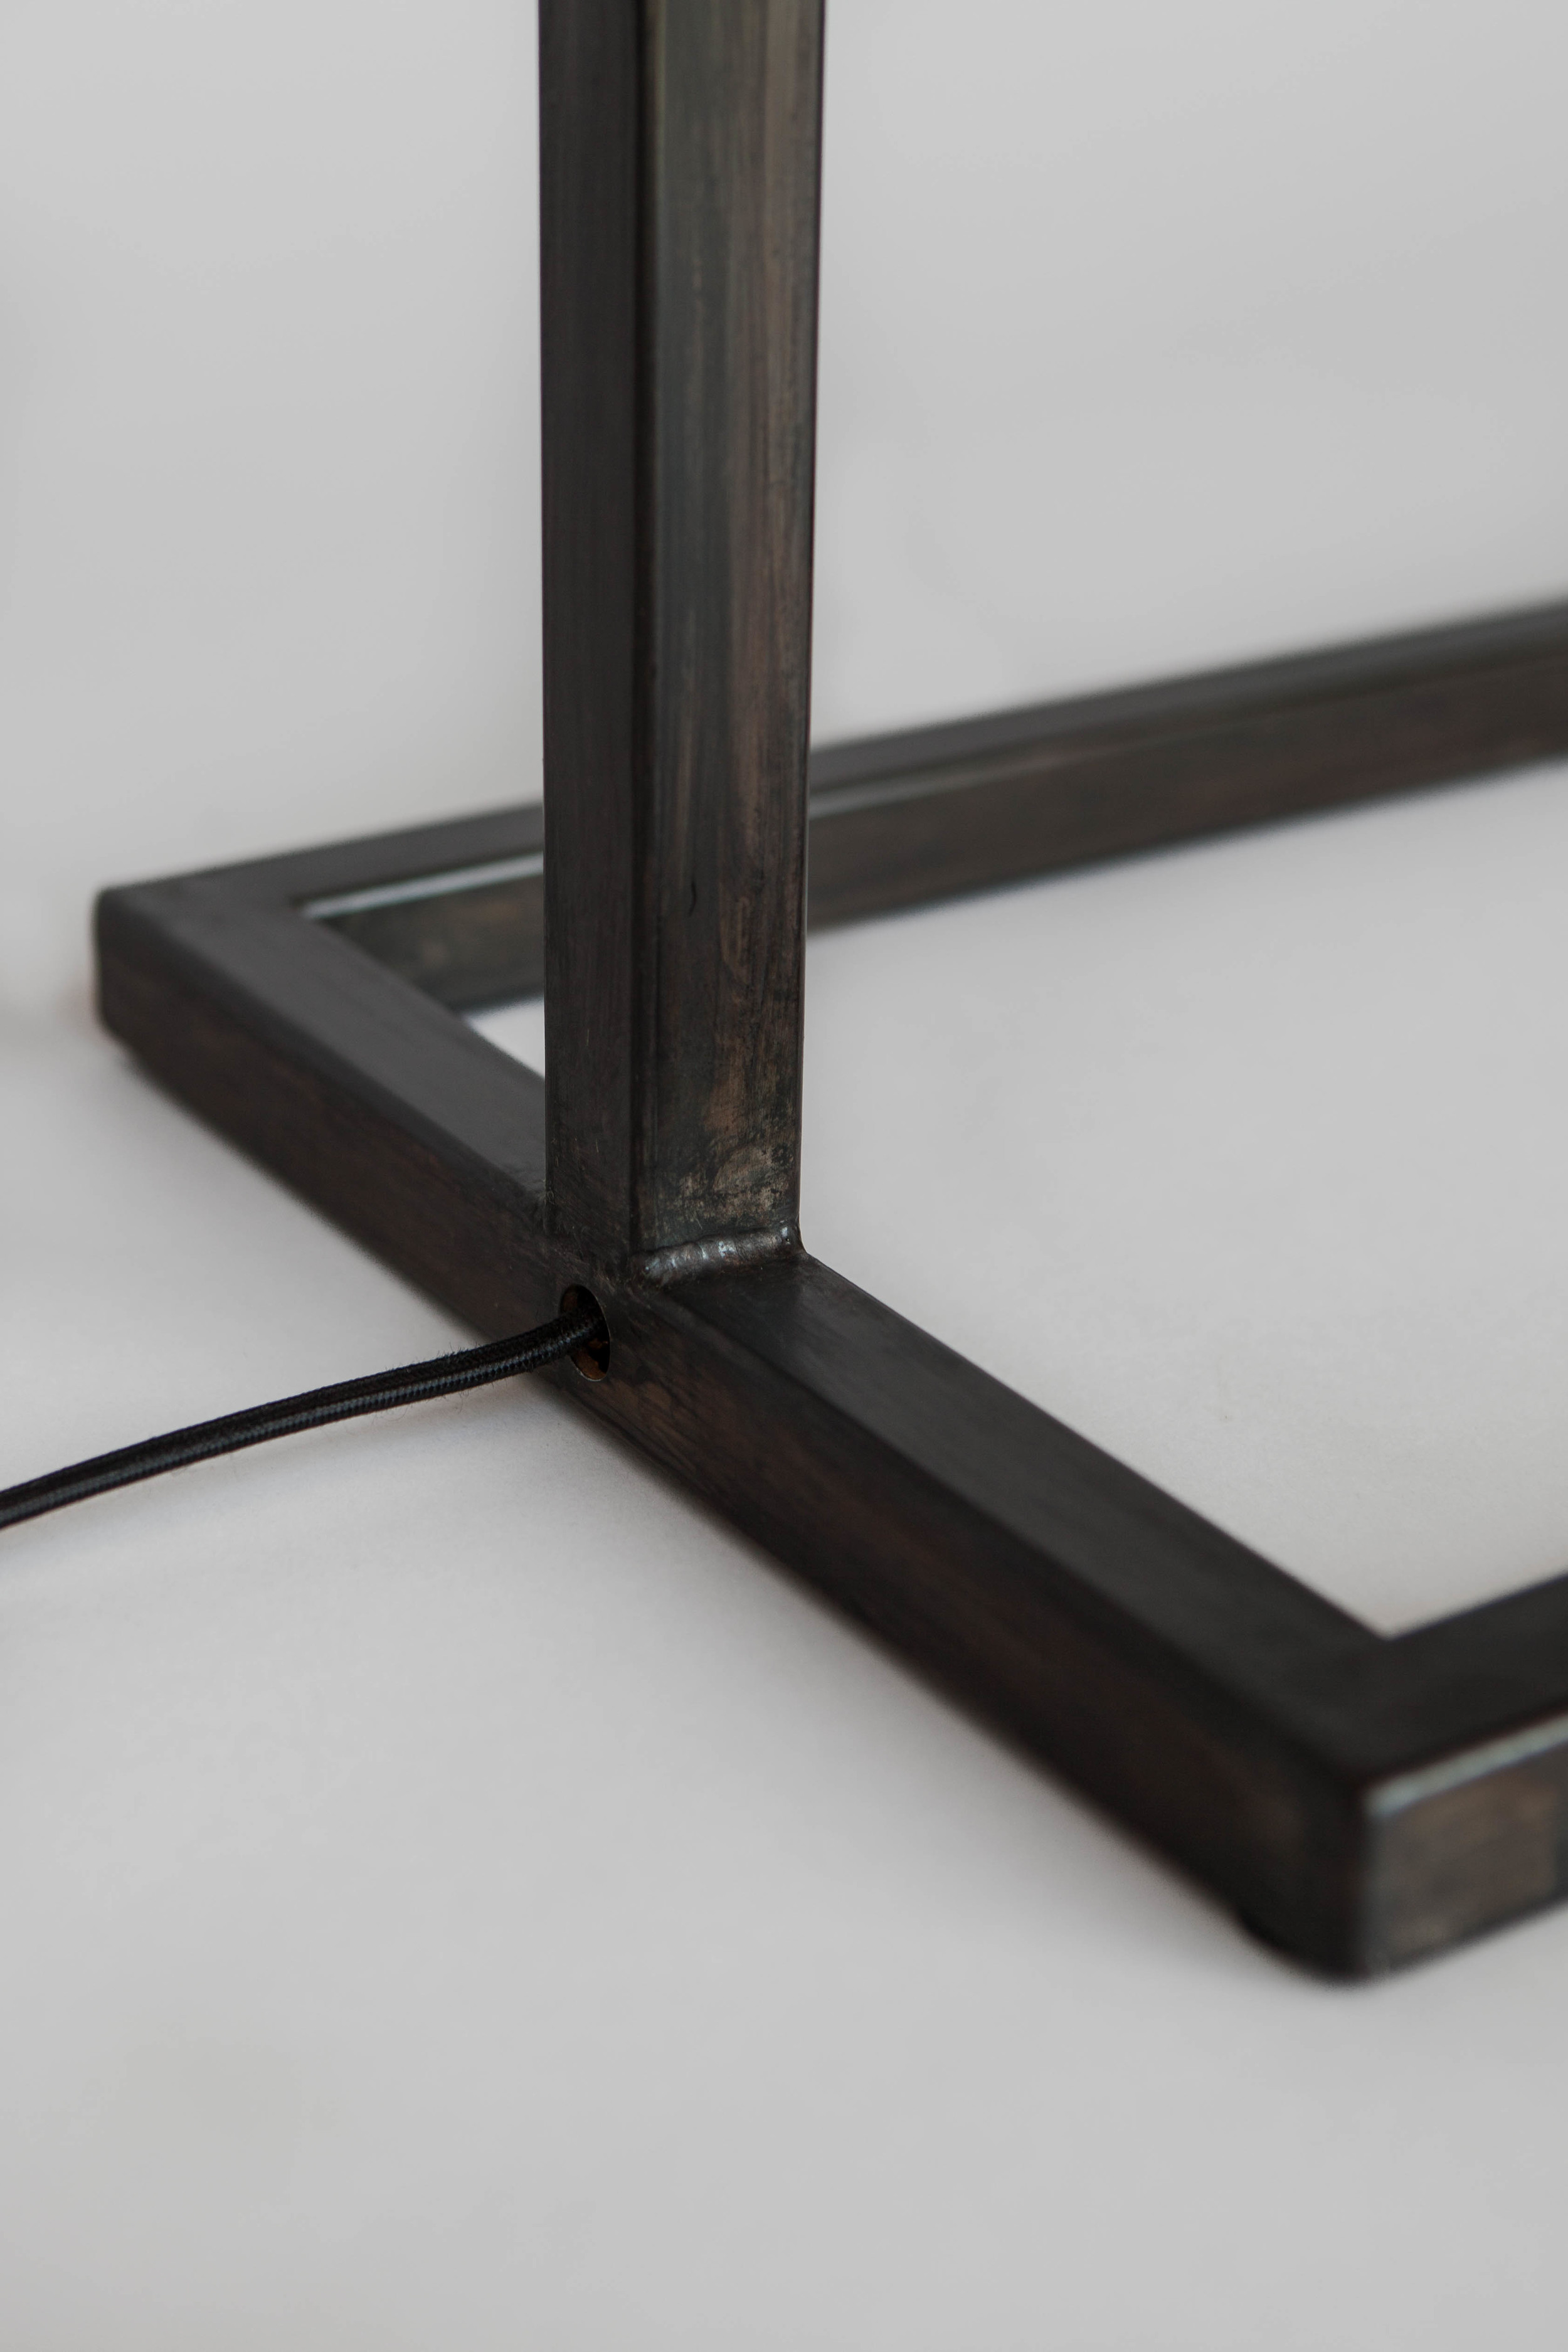
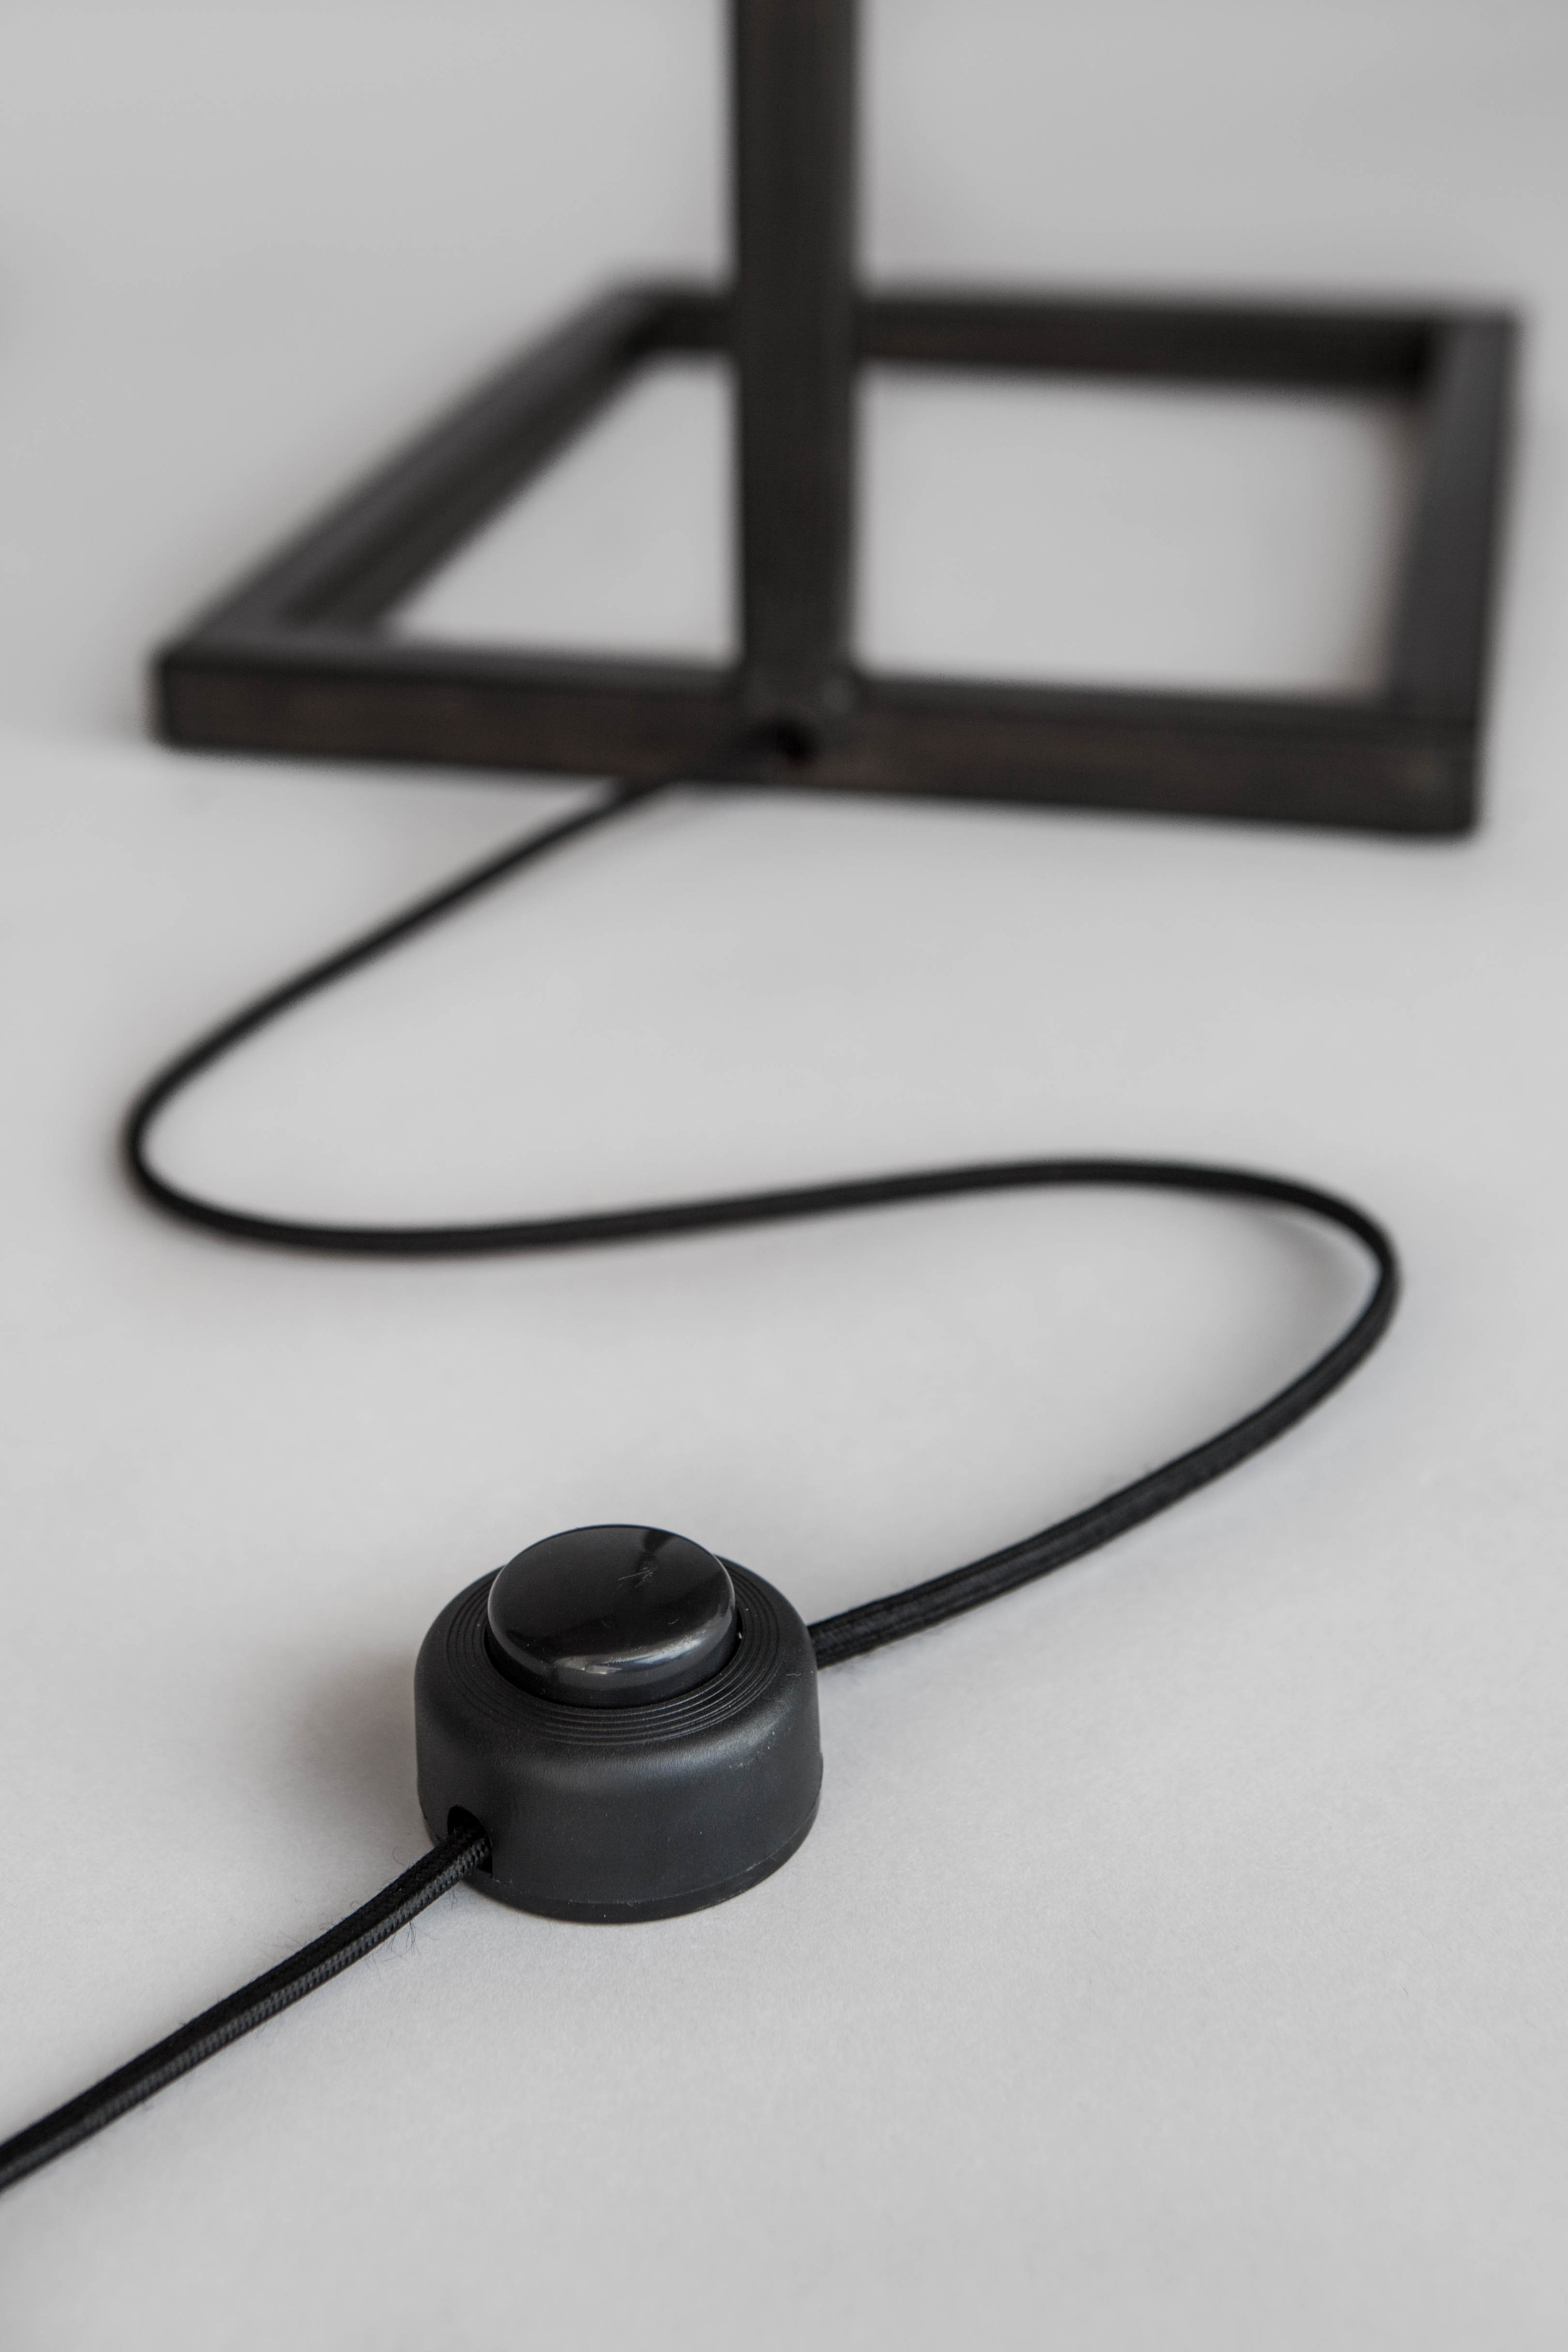
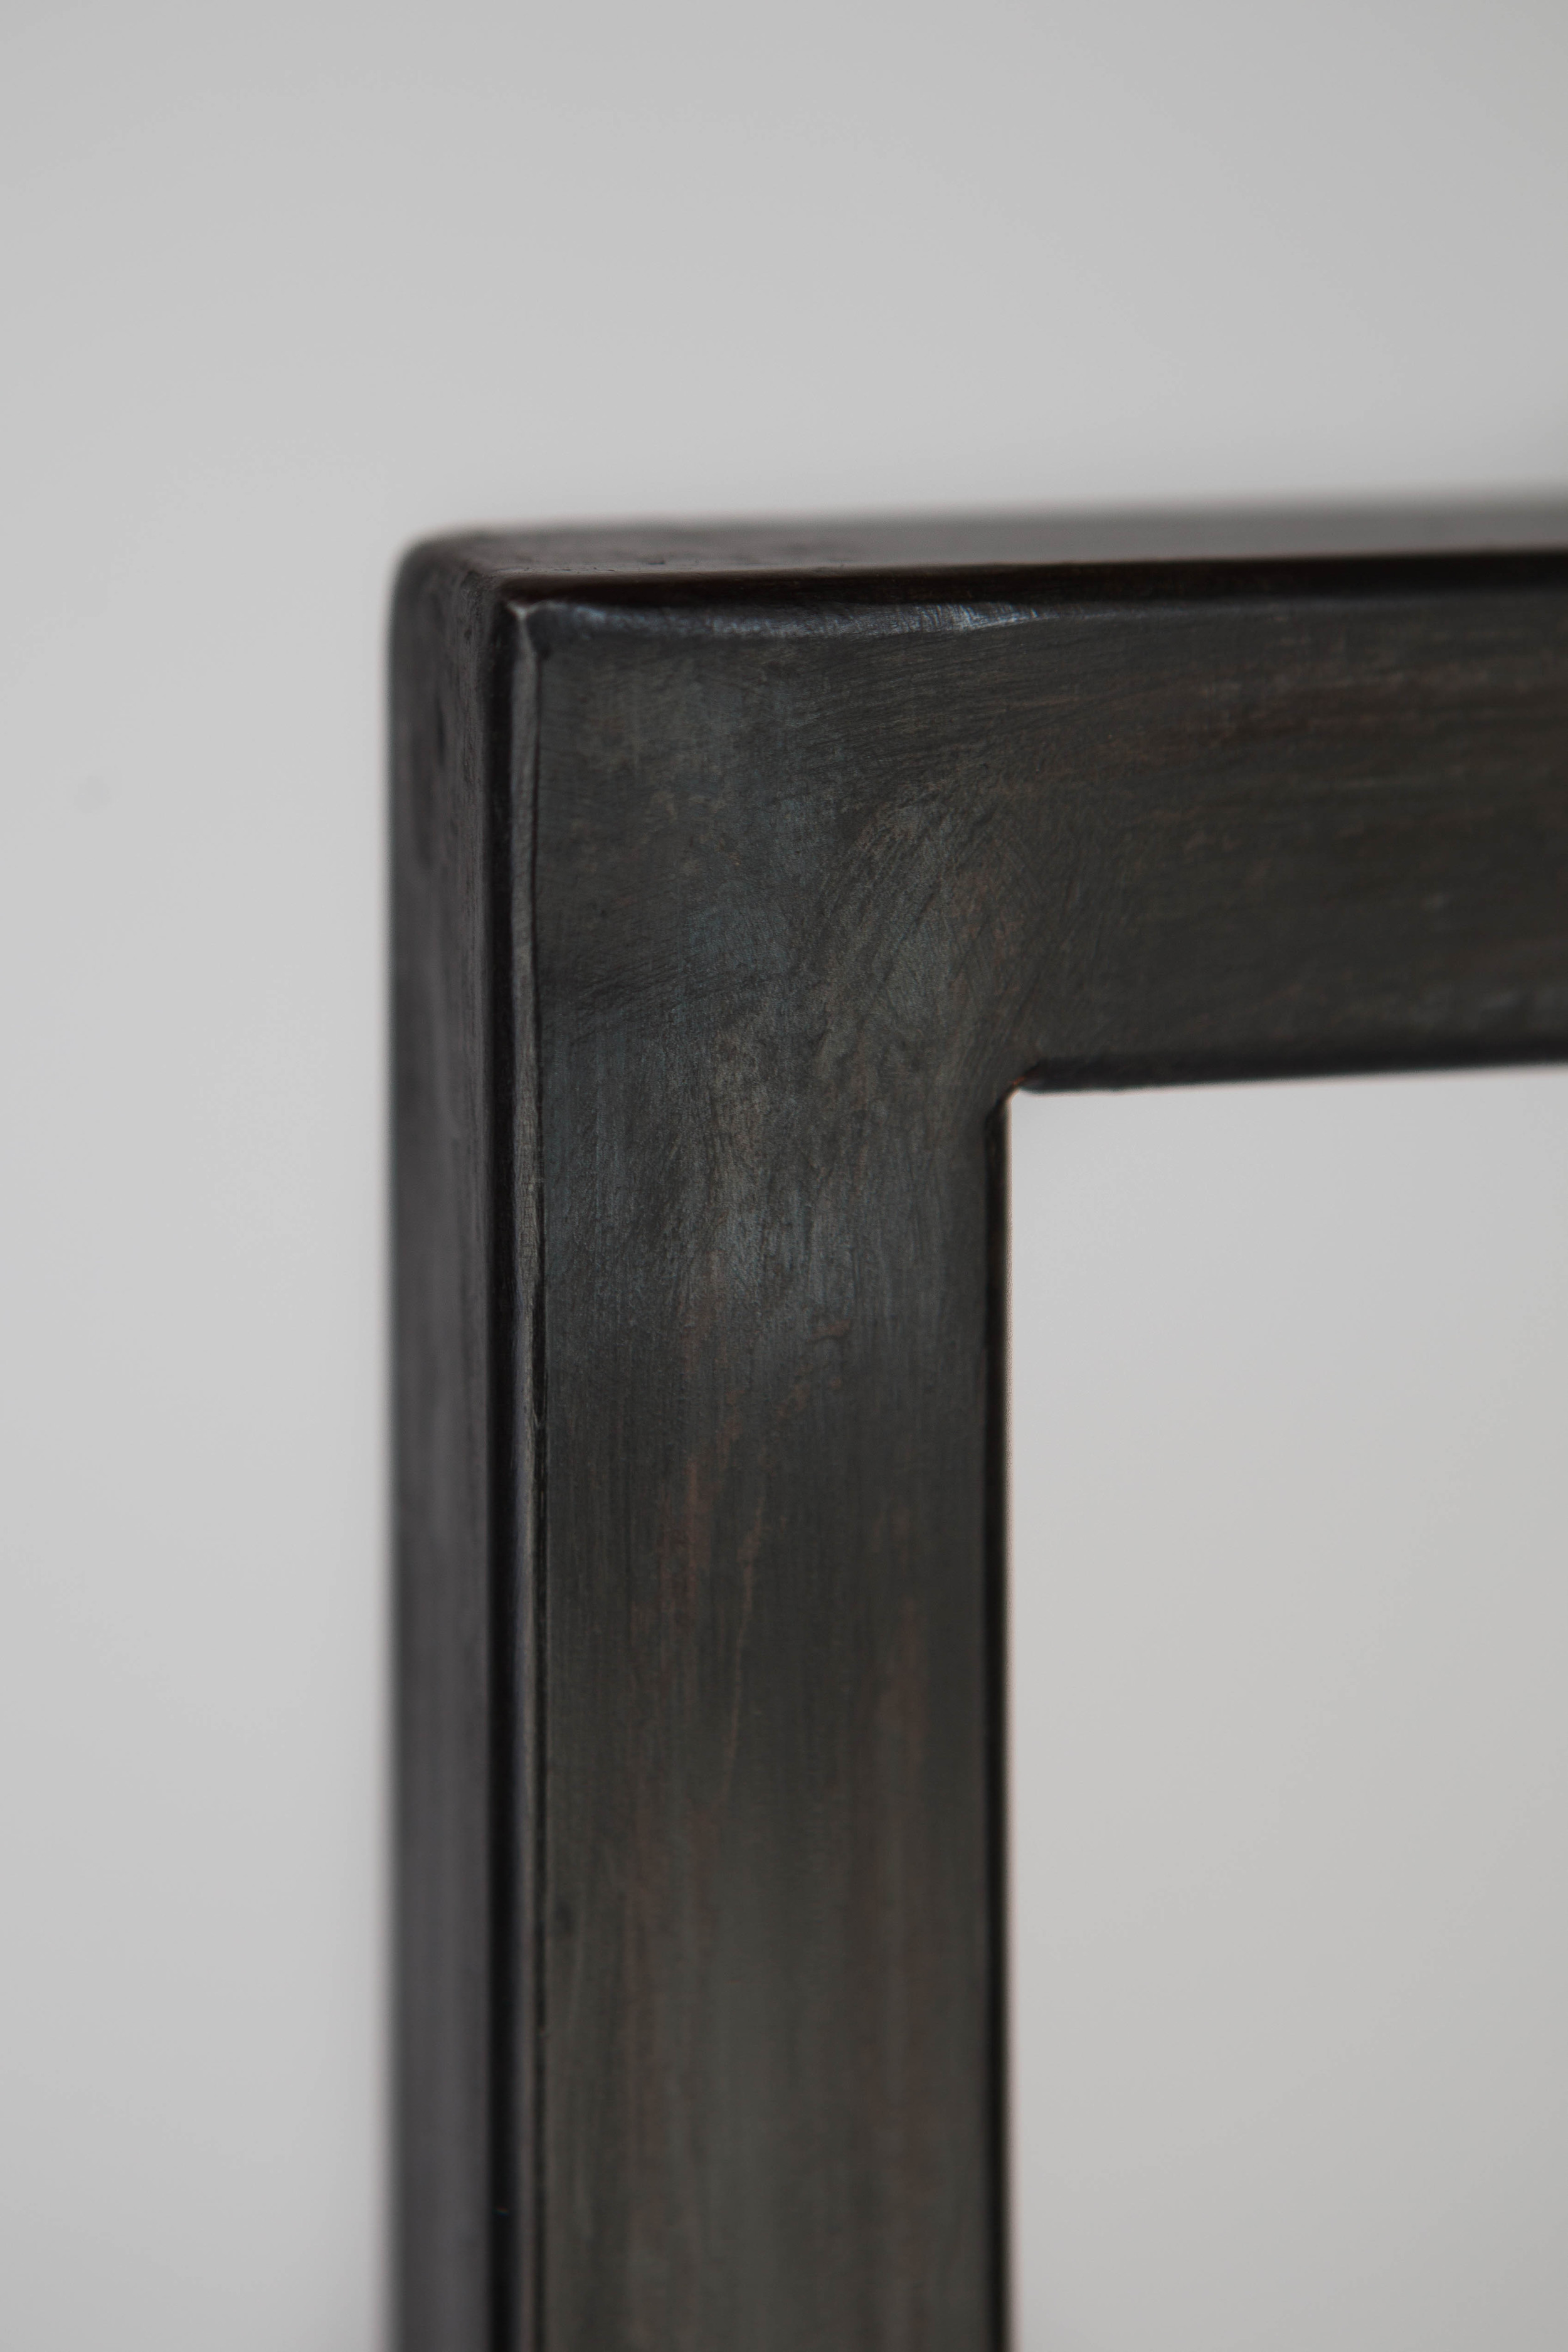
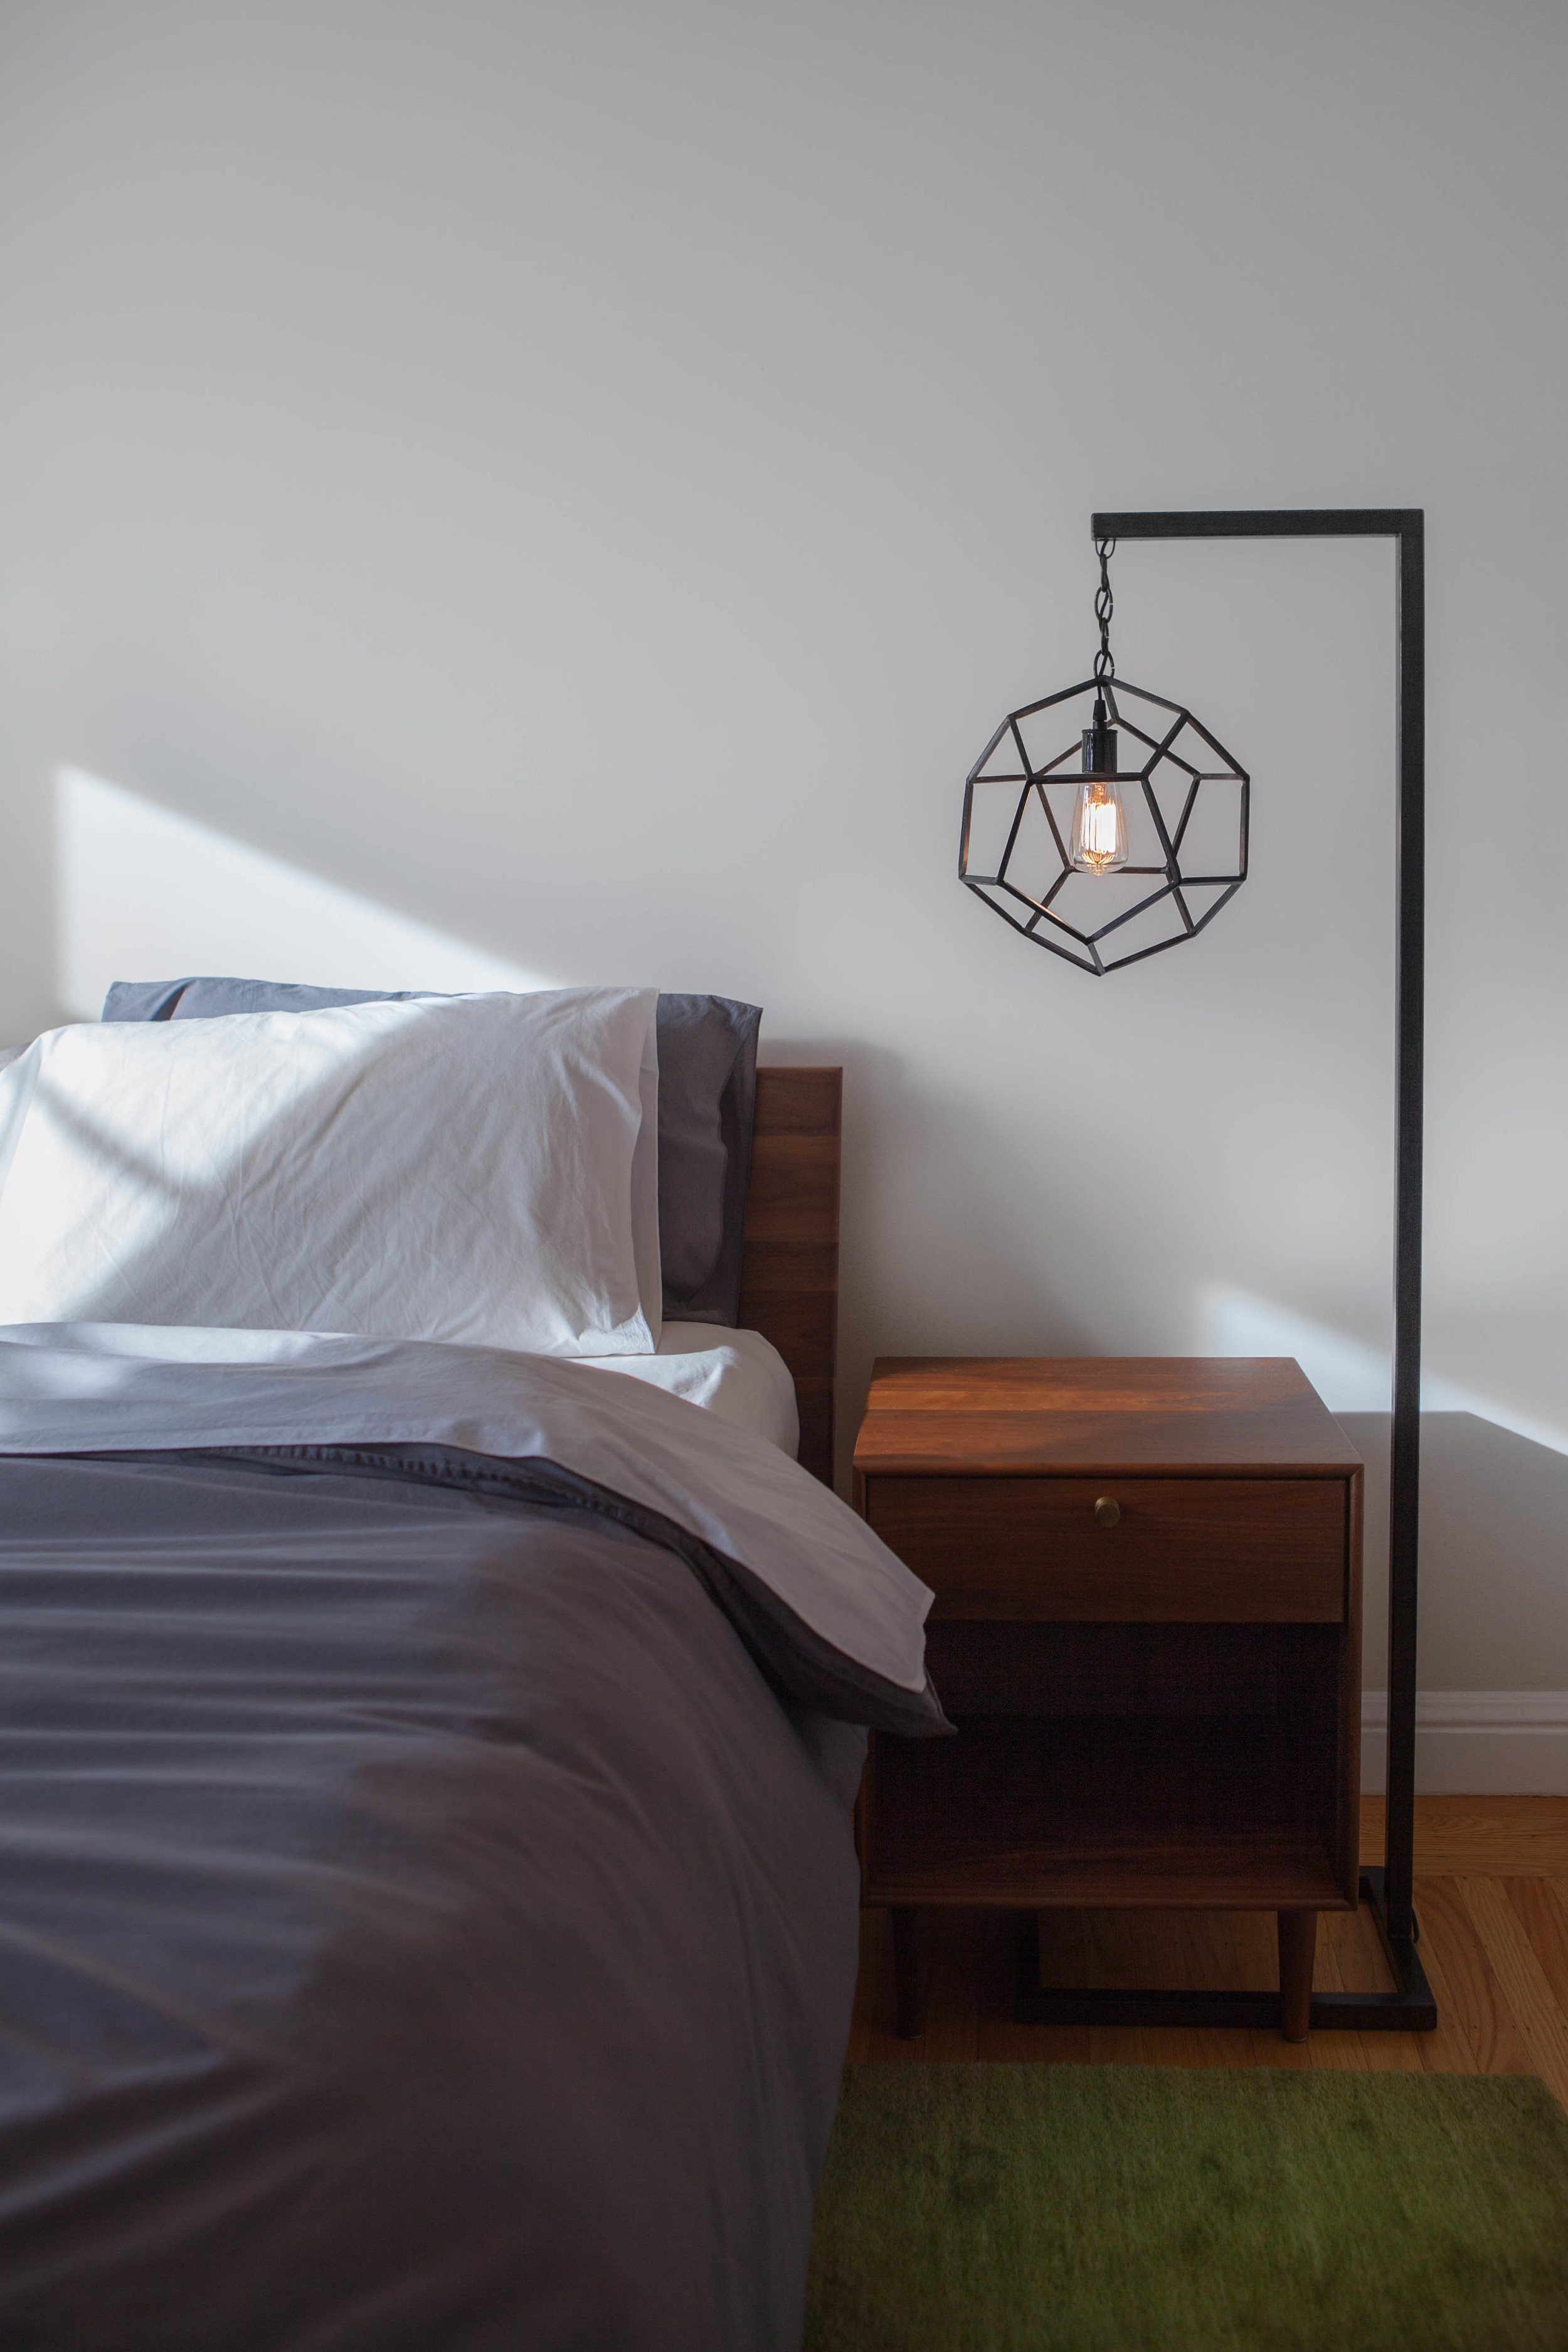
The past week has been a crash course in product photography. I decided to fast-track this skill development because I have a retailer who may be interested in the dodecahedron floor lamp. If all goes well, I'll never see it again -- which means I need to properly document it before it finds its permanent home!
I started by watching some tutorials from the Etsy Seller Handbook. Then I made brunch for a photographer friend in exchange for a photography 101 class, in which I picked his brain about light, aperture, speed, ISO, depth of field, and workflow (see his terrific handwritten notes here). My partner Phil borrowed a fancy DSLR camera and lens from his work, and I invested in some gear (9'-wide paper backdrop, tripod, and the stand thingies to hold up the backdrop). I turned our garage into a photo studio, gave the lamp one last coat of black metal wax (love that stuff; so slick), and got started. Our dog Simi kept me company, snoozing in the sun and occasionally barking at passers-by (rude!).
I turned our garage into a photo studio.
I spent two full days shooting the lamp. Turns out product photography is hard! Some examples of my frustrations:
- Why are all my photos blurry?
- Our garage floor isn't level!
- How can I tell if something is truly in focus?
- My left eye hurts from squinting.
- How did that crease get in the paper backdrop?
- How do you turn on autofocus?
- Why isn't autofocus working?
- Why won't the shutter click all the way down? (True story.)
- My back hurts from standing in weird, contorted positions.
- Shit, low battery. Where can I find a replacement battery?
- Simi, stop barking at the neighbors!
I'm lucky to have some great help, though: Both Phil and our roommate Bradley (a.k.a. GMUNK) answered a million questions for me throughout the last couple days, and Phil even drove home in the middle of the day to drop off a replacement battery and fix some camera settings. I took about 1,000 photos over the two days, and by photo number 800 or so, I think I actually started to get the hang of it.
Simi kept watch while I took photos. She hunted mice in the garage (ew) and barked at a few people innocently walking their dogs (oops).
I took a cursory look at the pics last night, and some of them look pretty good! I'm about to go watch a tutorial on how to use Lightroom to sort and edit my photos. So, hopefully I'll have sexy new lamp photos to post on my website shortly!
My main take-aways from this learning experience:
- The auto setting on a $1200 DSLR works pretty damn well, if you ask me.
- I'm excited to be adding photography and photo editing to my skill set. I imagine (hope!) that future shoots will be considerably more efficient and less painful than this one.
- Learning new skills is totally exhausting. I can't wait to get back to doing things that I'm actually already good at (like welding). :)
The view from the sidewalk. Don't miss Simi's goofy grin.